

mike.the.monk
-
Posts
13 -
Joined
-
Last visited
Content Type
Profiles
News
Forums
Blogs
Gallery
Events
Everything posted by mike.the.monk
-
The irony is I'm not going to use any of these combos, they don't sound fun for the character I want to play as. Even though I like DPS as my play style, even though an Investigator/Skybreaker could deal 8d* damage per turn (half of it as AoE and half as un-deflect-able spirit damage to one character) plus striking with a Shardblade and grazing other enemies, doing so didn't sound like fun for me and so I'm not doing it. I guess I just like finding combos.
-
@Trusk'our Good catch on Applied Medicine vs Emotional Intelligence - I've fixed it in the post. On whether you can use Regrowth 5 times in a round, I had to look up whether using a basic Surge has an actions-per-round limit on it. It does. Page 303: "each named action can only be used once per turn unless stated otherwise. The same applies to actions from talents or other effects... (such as the Breathe Stormlight action available to Radiants)." So, that means you can only use Regrowth once per turn, regardless of Fast Talker's bonus actions.
-
Talents with the most combo potential: Risky Behavior (combos with anything where you can spend an Opportunity), Gather Evidence (combos with anything that has a focus cost). I soon realized that Gather Evidence works amazingly well with talents that have a focus cost of 1. For example, a Focused diplomat can use Steadfast Challenge immediately followed by pacifying that enemy, all for a focus cost of 0. And, since those talents use Discipline, which is a cognitive skill, it will re-trigger Gather Evidence, maintaining your Focused state. The main downside is you'd need to take 4 levels of Investigator. This got me thinking about other cool combos, and then the completionist in me decided to look at lots of cool combos. Some of them are much more powerful than others, and some of them are not very feasible to get (3 or 4 paths). Triggering Gather Evidence The most common way to trigger Gather Evidence is Gain Advantage with a Cognitive skill (which itself can improve with Practical Demonstration or Strategize) or with Get 'Em Talking. Attacking with a Disruptor fabrial can also do it, as can Unleash Lightning (stormform). Where things get interesting and combo-worthy are the Cognitive Surges, but in order to trigger Gather Evidence, you have to succeed on a Cognitive test against a target. Here are the ones that can do it. Division: basic Division attack, Gout of Flame Cohesion: Stone Spear, Sinkhole Transformation: Living Soulcasting, Flamecasting, Soulcast Defense/Parry Transportation: Cognitive Vision, Realmic Evasion Risky Behavior combos As noted with the various combos for Risky Behavior, because Opportunist is a prerequisite, you will get two chances to roll an Opportunity. As noted in the section for Enlightened Truthwatcher, you can add Glimpse the Future to those combos to get a third chance. The coolest custom fabrial combo = unlimited Stormlight Early on, I figured out that the main advantage of the combo painrial (amplifying+numbing) over the basic painrials is it regains charges when absorbing damage for you. You can use those charges in other fabrials or as a Radiant (but you have to drain the painrial with a basic drainer, from which a Radiant can breathe Stormlight or a non-Radiant can use a tuning fork to put the charges into another fabrial). If you combine all that with a low-Strength ally hitting you with an unarmed strike, your fabrial will regain many charges and you won't take any damage. Perfect for Shadesmar, the Weeping, or any scenario where Stormlight is scarce. Also perfect for making your GM hate you. But note that this fabrial requires a tier 2 gem, a reward equivalent to a Shardblade, which is a steep price to pay. Heroic-only combos If one heroic path is clearly the primary and you are taking a short dip into another path, I will classify the combo under the primary path, and will follow this convention for combos involving a custom fabrial, though most of them ended up under Scholar. If a talent can come from multiple paths (e.g. Mighty), I won't classify the combo under any of the paths. Gather Evidence + Swift Strikes or offhand weapon When Focused, you won't have to spend a focus to strike a second time with your main weapon or strike with your offhand weapon. Mighty + 2-action attacks (Wit's End, Meteoric Leap, Devastating Blow, Fatal Thrust, Subtle Takedown) or 3-action attacks (Tagging Shot) Mighty deals more damage the more actions you used for your attack, and each of those other talents use multiple actions. Baleful + Keen Insight Force a target to resist your influence after you Gain Advantage, depleting their focus. Risky Behavior + a Deadly weapon (Shardblade, greatsword, crossbow) The former gives you an easy way to raise the stakes (with two chances to get an Opportunity), inflicting an injury with your weapon. relayform + Cumbersome weapon or armor Relayform ignores Slowed, which is one of the two penalties for Cumbersome. This is better for Cumbersome armor instead of weapons because Cumbersome weapons have disadvantage. Primarily Agent Quick Analysis + Get 'Em Talking or Close the Case These are the Cognitive Agent talents you can use with the former talent. Subtle Takedown + Risky Behavior Get an easy way to raise the stakes, which makes it easier to get an Opportunity (you get two chances) and thus grapple your opponent for free. Subtle Takedown + Ironstance Your stance grants advantage on Insight, which helps Subtle Takedown succeed. Cheap Shot + Anatomical Insight Do normal Cheap Shot and make the target Exhausted. Fast Talker + Subtle Takedown This is the only Spiritual Agent talent you can use with the former talent. Trickster's Hand + Cheap Shot or Shadow Step These are the Physical Agent talents you can use with the former talent. Gather Evidence + Quick Analysis or Fast Talker or Trickster's Hand or Sure Outcome or Plausible Excuse or High Society Contacts or Underworld Contacts or Close the Case Once you are Focused, any of the talents now have a focus cost of 1 instead of 2 (or for Close the Case, a cost of 2 instead of 3). envoyform + Get 'Em Talking Gain advantage on your cognitive test to determine motive. Primarily Envoy Withering Retort + Foresight Use Withering Retort twice per turn. Gather Evidence + Withering Retort + Foresight Use Withering Retort twice per turn and now it costs 0 focus. And, since Discipline is a cognitive skill, Steadfast Challenge itself re-triggers Gather Evidence. Withering Retort or Steadfast Challenge + Imposing Posture If your foe does not resist your Challenge, they become Disoriented. Now, if they do resist it, they also become Disoriented. Gather Evidence + Steadfast Challenge + Calm Appeal Once Focused, you can challenge and pacify an enemy for 0 focus or do it as a reaction. And, since Discipline is a cognitive skill, Steadfast Challenge itself re-triggers Gather Evidence. Gather Evidence + Steadfast Challenge + Calm Appeal + Practiced Oratory As above but you'll still have to spend focus to affect additional targets with Steadfast Challenge, though no additional focus to pacify them. Gather Evidence + Devoted Presence + Stalwart Presence Once Focused, you can use the latter two talents to boost Rousing Presence for no focus cost. Gather Evidence + Devoted Presence + Stalwart Presence + Sage Counsel As above but you can trigger it by using the Aid reaction. Gather Evidence + Devoted Presence + Stalwart Presence + Sage Counsel + Foresight As above but you can do it twice per turn. Applied Motivation + Lessons in Patience Using Rousing Presence causes them to regain 1 focus plus bonus focus (half your ranks in Lore). Applied Motivation + Lessons in Patience + Practical Demonstration Gaining Advantage or hitting with an attack can now trigger the above, for no additional actions. Strategize + Practical Demonstration Gain Advantage, grant that advantage to an ally, and then use Rousing Presence, all for only one action. Strategize + Practical Demonstration + Guiding Oration As above but an ally within 10ft gains advantage, so either the same ally now has two advantages or two different allies have one advantage. Practical Demonstration + Unrelenting Salvo or Swift Strikes or offhand weapon The latter talents each let you strike multiple times, and on each hit, the former talent lets you use Rousing Presence for free. Practical Demonstration + Lessons in Patience + Unrelenting Salvo or Swift Strikes or offhand weapon As above but your ally also regains 1 focus. Combo painrial with its upgrade + Foresight Absorb damage from two attacks per round and regain two charges in your painrial. Combo painrial with its upgrade + Foresight + Swift Strikes As above but now you can Strike twice with your weapon, using both charges you regained. Primarily Hunter Gather Evidence + Backstep Use a Cognitive test to gain advantage on your attack, then you only need to spend 1 focus for Backstep after. Gather Evidence + Backstep + Shadow Step As above but for 1 more focus and no additional actions, you also hide from your foes. Steady Aim + Emotional Intelligence Put one of your Erudition points into Perception, boosting how much bonus damage you deal. Unrelenting Salvo + Mind and Body Put an Erudition point into Light/Heavy weapons so that each of your attacks deals an extra damage. Unrelenting Salvo + a grandbow + grandbow expertise Get up to three attacks and it ignores deflect. Unrelenting Salvo + Projectile weapon fabrial Get up to three attacks and it it's the highest-damage of all ranged weapons. Unrelenting Salvo + Projectile weapon fabrial + Greater Damage upgrade As above but now for even higher damage. Demonstrative Command + Startling Blow Use the former to boost the relevant skill for the latter. Startling Blow + Anatomical Insight Do normal Startling Blow and make the target Exhausted in addition to Surprised. Unleash Lightning (stormform) + Fatal Thrust Make the target Disoriented until the end of the enemy's next turn if you hit with Unleash Lightning, which means senses are obscured, thus fulfilling the prerequisite for the extra damage from Fatal Thrust. lightrial + Fatal Thrust Make the target Disoriented if they run out of focus, which means senses are obscured, thus fulfilling the prerequisite for the extra damage from Fatal Thrust. Startling Blow + Fatal Thrust Make the target Surprised, which is a prerequisite for the extra damage from Fatal Thrust. Startling Blow + Fatal Thrust + Anatomical Insight Do normal Startling Blow and make the target Exhausted in addition to Surprised, then they take extra damage from Fatal Thrust. Mercurial Facade + Fatal Thrust The first person to see through your disguise is Surprised, which is a prerequisite for the extra damage from Fatal Thrust. Shadow Step + Fatal Thrust If you successfully hide from your target, you'll get the extra damage from Fatal Thrust. Startling Blow + Fatal Thrust + Killing Edge As above but your knives are Deadly. Killing Edge + Risky Behavior Now that slings and knives have the Deadly trait, you want an easy way to roll an Opportunity, and Risky Behavior gives you two chances to do so. Fatal Thrust + Risky Behavior Get a 2/3 chance of rolling an Opportunity, which allows you a critical hit, which maximizes damage, which adds a penalty to the injury roll because of Fatal Thrust. Killing Edge + Shadowing Stay hidden from your quarry but you still get to attack with a Deadly weapon (likely sling). Killing Edge + Shadowing + Risky Behavior Stay hidden from your quarry, attack with a Deadly weapon (likely sling), get two chances to roll an Opportunity. Warhammer + Deadly Traps Make an impaling trap and use the warhammer to push an opponent into it. Pack Hunting + Gather Evidence + Emotional Intelligence Once you're Focused from Gather Evidence, you don't need to spend any focus to grant an ally bonus damage from Pack Hunting, and if you put one of your Erudition points into Survival, it deals one more bonus damage. Feral Connection + Emotional Intelligence Put one of your Erudition points into Survival, and now your animal companion's tests get an additional bonus of +1. Primarily Leader Authority + Decisive Command You still only spend 1 focus but now can affect 2 allies. Gather Evidence + Decisive Command Once you're Focused, Decisive Command costs 0 focus. Gather Evidence + Decisive Command + Authority Once you're Focused, Decisive Command costs 0 focus and can affect 2 allies. Gather Evidence + Decisive Command + Authority + Combat Coordination Once you're Focused and you Strike, Decisive Command costs 0 focus and no actions and can affect 2 allies. Imposing Posture + Baleful Resisting your influence depletes your adversary quickly. Valiant Intervention + Demonstrative Command Make it much more likely you'll succeed on your Athletics test for Valiant Intervention, but note the high focus cost (2). Valiant Intervention + Demonstrative Command + Gather Evidence Once Focused, the cost for the above is now 0. Valiant Intervention + Imposing Posture In addition to the usual effects of Valiant Intervention, if they resist your influence, they are also Disoriented. Synchronized Assault + Confident Command or Decisive Command or Shrewd Command Boost the relevant skill for Synchronized Assault. Synchronized Assault + Authority On a failure for Synchronized Assault, 2 allies still get one additional Strike. Synchronized Assault + Gather Evidence When Focused, Synchronized Assault only costs 1 focus. Synchronized Assault + Authority + Gather Evidence When Focused, Synchronized Assault only costs 1 focus, and on failure, 2 allies still get one additional Strike. Cutthroat Tactics + Watchful Eye If your ally chooses to raise the stakes instead of using your command die, they get one chance to reroll it as well. Set At Odds + Gather Evidence The former talent can have a high focus cost, especially if you want to affect many targets. The latter talent makes it cost 1 less focus. Shrewd Command + Tactical Ploy or Set At Odds or Grand Deception Boost the relevant skill for any of the latter 3 talents. Well Dressed + Tactical Ploy or Set At Odds or Grand Deception Assuming it's your first such test of the scene, gain advantage on the relevant skill for any of the latter 3 talents. Primarily Scholar Overcharge + Opportunist Get two chances instead of one to get an Opportunity for an extra fabrial attack. Mind and Body + amplifying painrial Put an Erudition point into Light Weapons so that your painrial gets another bonus damage. amplifying painrial + nimbleform or relayform Forms that boost Speed help with painrial damage. amplifying painrial + nimbleform or relayform + Mind and Body Combines the above two. Swift Strikes + a fabrial weapon Do a second attack with your high-damage fabrial weapon. Swift Healer + Applied Medicine Heal extra based on your ranks in Medicine and Lore. Even better if you put Erudition points into both those skills. Liferial more efficiently heals injuries than Wound Regeneration talent (1 charge vs 2 Investiture), and you don't need to take 3 talents from your Spren Bond talent tree a movement fabrial + Faster upgrade Get 50% extra movement when moving using the accelerator, ascender, or bindrial (self). certain fabrials + Wide Area upgrade Get your fabrial effect to hit every enemy within 5 ft of your target (or heal all allies within 5 ft of you for the Liferial). Works for all the weapon fabrials, Liferial, Lightrial, Bindrial (self) when binding one opponent (if you have that upgrade), Compressor, and custom Drainer (not the basic Drainer). You'll burn through your focus fast, though. If your have the Drainer upgrade where it drains two charges from each target, you'll likely max out your Drainer in one use. certain fabrials + Wide Area upgrade + Fine-Tuned upgrade + Risky Behavior As above but pay 1 more focus (total 3) for a 2/3 chance to regain 1d4 focus (expected value 2.5), decreasing the total focus cost. (to apply one advanced upgrade and one regular upgrade, you'll need Fine Handiwork (one advanced upgrade costs 1 upgrade instead of 2 upgrades) and likely need advantage on your crafting roll, such as from having Navani as a patron or having your ashspren assist you on the Crafting test or being a singer in artform) certain fabrials + Wide Area upgrade + Fine-Tuned upgrade + Risky Behavior + Gather Evidence As above but once you're Focused, now Wide Area only costs 1 focus and Risky Behavior costs 0. You'll at least break even on focus, if not regain some. If your fabrial is the Disruptor, it'll re-trigger Gather Evidence but the other fabrials won't. certain fabrials + Wide Area upgrade + Gather Evidence An alternative to the above. Each use of Wide Area only costs 1 focus when Focused. You'll still have to re-trigger Gather Evidence, most of these fabrials don't involve Cognitive tests (Disruptor is the only one that does). Lightrial + Risky Behavior Gives you a 2/3 chance of dealing vital damage to the target. a fabrial + Fine-Tuned upgrade + Risky Behavior Gives you a 2/3 chance of regaining 1d4 focus. You'll at least break even on the focus cost of Risky Behavior and might regain more. a fabrial + Efficient upgrade + Risky Behavior Gives you a 2/3 chance of regaining 1 charge on your fabrial. Combo painrial with its upgrade + basic Drainer + a tuning fork The main benefit of the amplifying+numbing (combo) painrial over the separate basic painrials is it regains charges when absorbing damage for you. You can use those charges in other fabrials or as a Radiant. Note that within the rules, you can't directly drain charges from most fabrials (including the painrial) with a tuning fork or as a Radiant breathing Stormlight, you can only do it from a drainer. So, drain your painrial with a drainer, then use a tuning fork to move the charges to another fabrial or breathe Stormlight from the drainer. But note that this fabrial requires a tier 2 gem, a reward equivalent to a Shardblade, which is a steep price to pay. Combo painrial with its upgrade + basic Drainer + a tuning fork + a low-Strength ally hitting you with an unarmed attack As above but unlimited Stormlight! Great for Shadesmar or during the Weeping when Stormlight is scarce. But note that this fabrial requires a tier 2 gem, a reward equivalent to a Shardblade, which is a steep price to pay. Amplified + Greater Damage + Wide Area is a killer combo for a weapon fabrial but to apply three upgrades, you'll need Fine Handiwork (one advanced upgrade costs 1 upgrade instead of 2 upgrades) AND need advantage on your crafting roll, such as from having Navani as a patron or having your ashspren assist you on the Crafting test or being a singer in artform AND need to max Intellect, Crafting, and put one Erudition point into Crafting. Advantage makes your median roll a 15 and maxing Intellect/Crafting+Erudition is a +11 on Crafting. Accelerator fabrial + Bindrial (area) Get a free move, then bind enemies to the ground. Note that combining fabrials is more for non-Radiant characters because each requires a custom gem, so that'll be your reward instead of anything else (including Ideals). Accelerator fabrial + Bindrial (area) + Ascender fabrial As above but fly away. Your enemies will still get a Reactive Strike against you unless you Disengage. Note that combining fabrials is more for non-Radiant characters because each requires a custom gem, so that'll be your reward instead of anything else (including Ideals). Accelerator fabrial + Liferial Get a free move, then heal someone. If you take a slow turn, you can also Disengage (if there are enemies within striking distance) and move away. Note that combining fabrials is more for non-Radiant characters because each requires a custom gem, so that'll be your reward instead of anything else (including Ideals). Accelerator fabrial + weapon fabrial Get a free move, then attack with your high-damage weapon fabrial. Note that combining fabrials is more for non-Radiant characters because each requires a custom gem, so that'll be your reward instead of anything else (including Ideals). Primarily Warrior Meteoric Leap + Windstance The former lets you get into good position with multiple enemies in range, letting you take full advantage of your stance. Wit's End + Flamestance The former lets you get into good position with one enemy in range, letting you take full advantage of your stance. Cautious Advance + Flamestance or Windstance The former lets you get into good position to best take advantage of your stance and you get two free actions to Brace and Gain Advantage (in addition to the free action from your stance). Cautious Advance + Stonestance The former lets you get into good position to protect more allies with your stance, and you get two free actions to Brace and Gain Advantage. Brace means that even though enemies will prioritize you instead of your allies, they are less likely to hit you. Cautious Advance + Stonestance + Defensive Position As above but Brace protects you even more and allies within 10ft can brace behind your shield. Cautious Advance + Stonestance + Defensive Position + Formation Drills As above but Brace protects allies even more. Valiant Intervention + Flamestance or Windstance If moving 10ft puts you in a better position to take advantage of your stance, the former talent lets you do it. Valiant Intervention + Stonestance Both talents cause enemies to prioritize you instead of your allies, protecting them. Valiant Intervention + Stonestance + a weapon with longer reach (longspear or poleaxe) As above but Stonestance protects more allies since your melee weapon range is larger. Demonstrative Command + Vinestance Use the former to boost the relevant skill for the latter. Demonstrative Command + Precise Parry Use the former to boost the relevant skill for the latter. Valiant Intervention + Stonestance Get into slightly better position to protect your allies with Stonestance, and Valiant Intervention further protects them from one enemy. Customary Garb + Bloodstance The former mostly counteracts the lowered defenses from the latter, but only when in Presentable armor, not Shardplate. Feinting Strike + Risky Behavior + Gather Evidence The latter two talents reduce the total focus cost to 1 (it ordinarily would be 3) and allow for two chances to get an Opportunity, which grants free actions to strike or change stances. Feinting Strike + Risky Behavior + Gather Evidence + an offhand weapon As above but if you have a second weapon with the offhand characteristic, you can use both of your free actions to strike (one with each weapon) without having to spend focus because you are already Focused. Wit's End + Feinting Strike or Vinestance or lightrial or [Keen Insight + Baleful] Each of the options for the latter drains focus from the opponent, allowing for extra damage from Wit's End. Precise Parry + Risky Behavior Whether you're unarmed or wielding a weapon, Risky Behavior gives you two chances to get an Opportunity, either disarming your opponent or destroying their weapon. Demonstrative Command + Meteoric Leap Use the former to boost the relevant skill for the latter. Meteoric Leap + Anatomical Insight Do normal Meteoric Leap and make the target Exhausted. Armor augmenter fabrial + Stonestance +3 deflect. Now a breastplate has equal deflect value to Shardplate base deflect value (but without the option of +10 deflect per charge). Armor augmenter fabrial + Stonestance + full plate with Adorned upgrade As above but if you craft your own full plate, you can make it Presentable (with the Adorned upgrade) and thus wear it even in situations where military gear is frowned upon. Now your deflect value is 7. Agent/Scholar Gather Evidence + Strategize Gain Advantage with a cognitive Erudition skill, causing you to become Focused, and then you can use the "no reactions" effect of Strategize for only 1 focus. Gather Evidence + Contingency or Turning Point Make the latter two talents only cost 1 focus (once Focused). Envoy/Hunter Fatal Thrust + Steadfast Challenge Make the target Disoriented, which means senses are obscured, thus fulfilling the prerequisite for the extra damage from Fatal Thrust. And revel in the irony that you made a diplomat/assassin. Fatal Thrust + Withering Retort As above but you can trigger Steadfast Challenge as a reaction when an enemy attacks you. Envoy/Leader Practical Demonstration + Combat Coordination Hitting with a Strike allows you to use both Decisive Command and Rousing Presence for no actions required (though you still have to spend 1 focus). Envoy/Scholar Rallying Shout + Swift Healer + Applied Medicine Put Erudition points into Medicine and Lore and Leadership, so now Rallying Shout revives an unconscious ally and restores health equal to their recovery die + your combined ranks in Leadership, Medicine, and Lore. Hunter/Warrior Fatal Thrust + Devastating Blow Deal massive damage with a melee weapon. Fatal Thrust + Devastating Blow + Mighty Deal even more massive damage with a melee weapon. Fatal Thrust + Devastating Blow + Mighty + Risky Behavior As above but get a 2/3 chance for critical hit, maximizing damage dice. Combos involving Radiant talents Surge combos not specific to a Radiant Order (e.g. the combo is specific to Gravitation, so both Windrunners or Skybreakers can do it) Adhesion Surge (Windrunner, Bondsmith squire) Fast Talker + basic Adhesion Surge use Fast Talker gives you two actions to use for a Spiritual skill, and Adhesion is a Spiritual skill. Note that this doesn't work for Adhesion talents, just the basic use of Adhesion (i.e. sticking objects together) or any of its always-on upgrades (such as Living Adhesion). Fast Talker + basic Adhesion Surge use + Gather Evidence As above but use a Cognitive skill (e.g. Gain Advantage from Deduction) to reduce the focus cost of Fast Talker. Warhammer + Adhesive Trap + Distant Surgebinding Make an adhesive trap, then use your warhammer to push them into it. Vinestance + Adhesive Trap + Distant Surgebinding Make an adhesive trap, then use Vinestance to push them into it. Deadly Trap (and it's better with its upgrade talents) + Adhesive Trap Impaling trap deals ongoing damage and Adhesion ensures they can't move, and thus you basically combine both versions of Deadly Trap into one. Living Adhesion + a Shardblade With one opponent stuck in place, they are easier to hit. Gravitation Surge (Windrunner, Skybreaker) Fast Talker + basic Gravitation Surge use Fast Talker gives you two actions to use for a Spiritual skill, and Gravitation is a Spiritual skill. Note that this doesn't work for Gravitation talents, just the basic use of Gravitation (i.e. a Basic Lashing) or any of its always-on upgrades (such as Gravitational Slam). Fast Talker + basic Gravitation Surge use + Gather Evidence As above but use a Cognitive skill (e.g. Gain Advantage from Lore) to reduce the focus cost of Fast Talker. Momentum weapon + Flying Ace For 1 focus, fly and make a melee weapon attack, and as long as you moved 10 ft before attacking, your attack gains advantage. Stable Flight + Unrelenting Salvo Position yourself high above the action, then you can let loose two or three ranged attacks per turn. Stable Flight + Unrelenting Salvo + Master of the Skies As above but you don't have to keep spending Investiture per turn to stay aloft. Gravitational Slam + Unrelenting Salvo If an enemy gets into melee range but you want to hit them with an arrow, use Gravitation to push them away, then hit them from a distance. Deadly Trap (and it's better with its upgrade talents) + Gravitational Slam Create an impaling trap and use Gravitational Slam to launch your foe upward diagonally (your GM might require you to roll a Gravitation test to pull this off) so they fall into your trap, taking trap damage in addition to falling damage. Flying Ace + Flamestance or Windstance If your flight path puts you next to the required number of foes (according to your stance), not only do you get a weapon attack for 1 focus, you get your stance bonus action too. Gravitational Slam + Flamestance Your stance gets better if you're only fighting one enemy, but what if two are in range? Launch one into the air, then get your free action from your stance. Shard Training + Flying Ace Instead of just one Strike with your Shardblade as part of your move, you can graze additional targets (up to your ranks in the skill used), and if any of those targets take damage, they suffer a spiritual injury. Shard Training + Flying Ace + Mind and Body As above but your max number of additional targets is 6 instead of 5. Shard Training + Flying Ace + Mind and Body + a weapon with longer reach As above but with longer reach, you have more potential targets to graze. Any of the above three combos + Swift Strikes Now you can make a second Strike with the same weapon, grazing many additional targets. Division Surge (Skybreaker, Dustbringer) Quick Analysis + basic Division Surge use Quick Analysis gives you two actions to use for a Cognitive skill, and Division is a Cognitive skill. Note that this doesn't work for Division talents, just the basic use of Division (i.e. a Division attack against one enemy) or any of its always-on upgrades (such as Spark Sending). Quick Analysis + basic Division Surge use + Gather Evidence + a Division attack (basic or Gout of Flame) As above but you can reduce the focus cost of Quick Analysis by using a basic Division attack or Gout of Flame to trigger Gather Evidence. Note you can't use the bonus actions from Quick Analysis to use Gout of Flame. Bodily Decay + Risky Behavior You get an easy way to raise the stakes, allowing you to get an Opportunity and thus inflict an injury. And, since Opportunist is a prerequisite, you can reroll the plot die once. Sleuth's Instincts + any Division attack If you know your target's motivation, you have advantage on cognitive skill tests (which include Surge attacks). Abrasion Surge (Dustbringer, Edgedancer) Trickster's Hand + basic Abrasion Surge use Trickster's Hand gives you two actions to use for a Physical skill, and Abrasion is a Physical skill. Note that this doesn't work for Abrasion talents, just the basic use of Abrasion (e.g. slicking yourself or skating) or any of its always-on upgrades (such as Smooth Operator). Trickster's Hand + basic Abrasion Surge use + Gather Evidence As above but use a Cognitive skill (e.g. Gain Advantage from Crafting) to reduce the focus cost of Trickster's Hand. Momentum weapon + Slick Combatant For 2 focus (or only 1 if you have Smooth Operator) you can move as a free action, make a melee weapon attack with bonus damage, and as long as you moved 10 ft before attacking, your attack gains advantage. Smooth Operator + Unrelenting Salvo You get a free move to be in perfect position to let loose two or three ranged attacks. Slick Combatant + Combat Coordination You get a free move (no actions required), use one action to make a Strike, and then get to use Decisive Command for no additional actions. If your attack hits, it deals extra damage, and if it misses, you don't have to spend focus for Decisive Command. Slick Combatant + Combat Coordination + Gather Evidence As above but total cost is 0 focus once you're Focused. Smooth Operator + Stonestance You get a free move to be right where you want to protect the maximum number of allies. Smooth Operator + Windstance or Flamestance Those two stances require a certain number of enemies within reach, and the former talent allows an easy way to do that for only 1 focus. Smooth Operator + Slick Combatant + Windstance or Flamestance As above but with an attack along the way with bonus damage (especially great if you can get the right number of enemies within range (for your stance) along the way). Shard Training + Slick Combatant Instead of just one Strike with your Shardblade as part of your move, you can graze additional targets (up to your ranks in the skill used), and if any of those targets take damage, they suffer a spiritual injury. Shard Training + Slick Combatant + Mind and Body As above but your max number of additional targets is 6 instead of 5. Shard Training + Slick Combatant + Mind and Body + a weapon with longer reach As above but with longer reach, you have more potential targets to graze. Any of the above three combos + Swift Strikes Now you can make a second Strike with the same weapon, grazing many additional targets. Progression Surge (Edgedancer, Truthwatcher) Fast Talker + basic Progression Surge use Fast Talker gives you two actions to use for a Spiritual skill, and Progression is a Spiritual skill. Note that this doesn't work for Progression talents, just the basic use of Progression (e.g. regrowth). Fast Talker + basic Progression Surge use + Gather Evidence As above but use a Cognitive skill (e.g. Gain Advantage from Medicine) to reduce the focus cost of Fast Talker. Explosive Growth + Risky Behavior You get an easy way to raise the stakes, allowing you to get an Opportunity and thus entangle some targets. And, since Opportunist is a prerequisite, you can reroll the plot die once. basic regrowth + Swift Healer + Applied Medicine Heal extra based on your ranks in Medicine and Lore. Even better if you put Erudition points into both those skills. Illumination Surge (Truthwatcher, Lightweaver) Fast Talker + basic Illumination Surge use Fast Talker gives you two actions to use for a Spiritual skill, and Illumination is a Spiritual skill. Note that this doesn't work for Illumination talents, just the basic use of Illumination (e.g. making an illusion) or any of its always-on upgrades (such as Multiplicative Lightweaving). Fast Talker + basic Illumination Surge use + Gather Evidence As above but use a Cognitive skill (e.g. Gain Advantage from Intimidation) to reduce the focus cost of Fast Talker. Distracting Illusion + Multiplicative Lightweaving For no additional actions or Investiture, you can create distracting illusions for allies (# up to your ranks in Illumination), which last until an attack misses you/them. basic Illumination + Shadow Step Create your own obscured area with Illumination, then step into it with Shadow Step. basic Illumination + Backstep Create your own obscured area with Illumination, then step into it with Backstep. basic Illumination self-disguise + Fatal Thrust If that target doesn't see you as a threat due to a disguise, you can the bonus damage from Fatal Thrust. Disorienting Flash + Fatal Thrust Make the target Disoriented, which means senses are obscured, thus fulfilling a prerequisite for the extra damage from Fatal Thrust. Ironstance + Distracting Illusion The latter makes it more likely your opponent misses, allowing you to make a reactive strike right away. Transformation Surge (Lightweaver, Elsecaller) Quick Analysis + basic Transformation Surge use Quick Analysis gives you two actions to use for a Cognitive skill, and Transformation is a Cognitive skill. Note that this doesn't work for Transformation talents, just the basic use of Transformation (i.e. transforming a non-living substance) or any of its always-on upgrades (such as Flamecasting or Persistent Transmuter). Quick Analysis + basic Transformation Surge use + Gather Evidence + Transformation vs. another character As above but any Transformation vs another character (i.e. Soulcast Defense/Parry, Living Soulcasting, Flamecasting) triggers Gather Evidence, reducing the focus cost of Quick Analysis. Quick Analysis + basic Transformation Surge use + Gather Evidence + Transformation vs. another character + Flamecasting As above but Flamecasting can be the recipient of the bonus actions from Quick Analysis. Flamecasting + Expansive Transmuter + Distant Surgebinding Turn the floor into fire, attacking all enemies above it and they fall into a pit as well, and since you're not 5ft away, you don't get hit by this. Sleuth's Instincts + any Transformation attack/reaction If you know your target's motivation, you have advantage on cognitive skill tests (which include Surge attacks/reactions). Transportation Surge (Elsecaller, Willshaper) Quick Analysis + basic Transportation Surge use Quick Analysis gives you two actions to use for a Cognitive skill, and Transportation is a Cognitive skill. Note that this doesn't work for Transportation talents, just the basic use of Transportation (i.e. peering into the Cognitive Realm) or any of its always-on upgrades (such as Cognitive Vision). Quick Analysis + basic Transportation Surge use + Gather Evidence + Transportation vs. another character As above but any Transportation vs another character (i.e. Realmic Evasion, basic peering between realms, Cognitive Vision) triggers Gather Evidence, reducing the focus cost of Quick Analysis. Quick Analysis + basic Transportation Surge use + Gather Evidence + Transportation vs. another character + Realmwalker As above but guarantee you'll succeed on the Transportation test vs another character to trigger Gather Evidence. basic Transportation test to determine motive + Get 'Em Talking Spend 1 Investiture instead of 1 focus and test Transportation instead of Deduction. It doesn't matter how you learned your target's motivation, you can raise the stakes on any test to leverage it. basic Transportation test to determine motive + envoyform Gain advantage on the Transportation test, provided it's about discovering the target's intent. basic Transportation test to determine motive + Get 'Em Talking + envoyform Spend 1 Investiture instead of 1 focus and test Transportation instead of Deduction, and you have advantage on it. It doesn't matter how you learned your target's motivation, you can raise the stakes on any test to leverage it. Sleuth's Instincts + any Transportation attack/reaction If you know your target's motivation, you have advantage on cognitive skill tests (which include Surge attacks/reactions). Realmic Step + Unrelenting Salvo If enemies are too close for your now, teleport away and then fire a few shots. Realmic Step + Depended Bond + Unrelenting Salvo As above but teleport far enough so enemies can't close the distance. Realmic Step + Fatal Thrust If your enemy doesn't see you (for example, you're looking through a crack in the door), teleport right next to them, and since they're unsuspecting, you get bonus damage from Fatal Thrust. Realmic Step + Windstance or Flamestance Those two stances require a certain number of enemies within reach, and the former talent allows you to teleport to that location. Realmic Step + Stonestance You get a free move to be right where you want to protect the maximum number of allies, and the former talent allows you to teleport to that location. Any Realmic Step combo + Realmwalker Guarantees you succeed on your Transportation test to teleport. Cognitive Vision + Ironstance The former allows you to figure out enemy intent and thus they have disadvantage on their next test against you, which then means the latter is likely to trigger, giving you a reactive strike. Cohesion Surge (Willshaper, Stoneward) Quick Analysis + basic Cohesion Surge use Quick Analysis gives you two actions to use for a Cognitive skill, and Cohesion is a Cognitive skill. Note that this doesn't work for Cohesion talents, just the basic use of Cohesion to shape stone or any of its always-on upgrades (such as Unbound Cohesion). Quick Analysis + basic Cohesion Surge use + Gather Evidence + Cohesion vs. another character As above but any Cohesion test vs another character (i.e. Stone Spear, Sinkhole) triggers Gather Evidence, reducing the focus cost of Quick Analysis. Note that you can't use either of those talents with the bonus actions from Gather Evidence. Sleuth's Instincts + any Cohesion attack If you know your target's motivation, you have advantage on cognitive skill tests (which include Surge attacks). Stone Spear + Risky Behavior You get an easy way to raise the stakes, allowing you to get an Opportunity and thus knock your target prone. And, since Opportunist is a prerequisite, you can reroll the plot die once. Stone Spear + Risky Behavior + Gather Evidence As above but there's no focus cost to Risky Behavior once Focused. And, since Cohesion is a Cognitive skill, successfully hitting with it triggers Gather Evidence, keeping you Focused for another round. Momentum weapon + Flowing Earth Requires you to use Cohesion, then you get a free move (no focus or action cost) and then have to make a Strike action after, which you have advantage on. Flowing Earth + Windstance or Flamestance Those two stances require a certain number of enemies within reach, and the former talent allows an easier way to do that as long as you use Cohesion. Flowing Earth + Stonestance You get a free move to be right where you want to protect the maximum number of allies, assuming you use a Cohesion attack. Tension Surge (Stoneward, Bondsmith squire) Trickster's Hand + basic Tension Surge use Trickster's Hand gives you two actions to use for a Physical skill, and Tension is a Physical skill. Note that this doesn't work for Tension talents, just the basic use of Tension (e.g. Hardened Defense or slowing down an enemy) or any of its always-on upgrades (such as Clothsmith). Trickster's Hand + basic Tension Surge use + Gather Evidence As above but use a Cognitive skill (e.g. Gain Advantage from Discipline) to reduce the focus cost of Trickster's Hand. Rigged Weaponry + Risky Behavior You get an easy way to raise the stakes, allowing you to get an Opportunity and thus use Tension without having to pay focus. And, since Opportunist is a prerequisite, you can reroll the plot die once. Stonestance + Rigged Weaponry Increase your weapon's reach by +10ft, which means even more allies are protected by Stonestance. Rigged Weaponry + Windstance Increase your weapon's reach by +10ft, which means it's very likely you can reach multiple enemies and thus Windstance kicks in. Surge combos specific to a Radiant Order Windrunner Gravitational Slam + Adhesive Trap + Distant Surgebinding Fling an enemy to the wall or ceiling, where they stay Restrained. Lashing Shot + Binding Shot Fling a boulder (or any projectile) with Gravitation and infuse the enemy with Adhesion. Lashing Shot + Binding Shot + Risky Behavior As above but you get an easy way to raise the stakes, allowing you to get an Opportunity and thus use Binding Shot without having to pay focus. And, since Opportunist is a prerequisite, you can reroll the plot die once, giving you two chances for an Opportunity. Flying Ace + Binding Strike Get a melee attack while flying and then stick your enemy to the ground, but it's a very high focus cost (3). Flying Ace + Binding Strike + Gather Evidence Once you're Focused from Gather Evidence, your melee attack from Flying Ace costs 0 focus and Binding Strike costs 1, reducing the total focus cost from 3 down to 1. Nice. Distant Surgebinding + Gravitation (particularly Gravitational Slam or Lashing Shot) Skybreaker Flying Ace + Soaring Destruction Get a melee attack while flying and then get an action to use Division, but it's a high focus cost (2). Flying Ace + Soaring Destruction + Gather Evidence Once you're Focused from Gather Evidence, both your melee attack from Flying Ace and Soaring Destruction costs 0 focus. Very nice. And, since Division is a Cognitive skill, successfully hitting with it triggers Gather Evidence, keeping you Focused for another round. Add Unleashed Entropy to either of the above and now you get to do Division with no action cost. Dustbringer Gather Evidence + Division attack + Trickster's Hand + basic Abrasion Surge use Hit on a Division attack (basic Division use or Gout of Flame) to trigger Gather Evidence, reducing the focus cost of Trickster's Hand to give you two actions to use for a Physical skill, and Abrasion is a Physical skill. Note that this doesn't work for Abrasion talents, just the basic use of Abrasion (e.g. slicking yourself or skating) or any of its always-on upgrades (such as Smooth Operator). Since you're Focused now, skating costs 1 less focus also. Gather Evidence + Division attack + Trickster's Hand + basic Abrasion Surge use + Smooth Operator As above but skating now has a cost of 0 focus when Focused. Searing Dust Storm + Warhammer The main problem with Searing Dust Storm is that enemies must enter the affected spaces, but with warhammer, you can push them into it. Searing Dust Storm + Vinestance As above but use Vinestance to push them. Distant Surgebinding + Division You won't get as much range as the upgrades to Spark Sending, but you don't need a solid surface between you and your target if you do it this way. Smooth Operator + any Division attack + Gather Evidence Division is a Cognitive skill, successfully hitting with it triggers Gather Evidence, keeping you Focused for another round, which means skating doesn't cost any focus. Edgedancer Distant Surgebinding + Progression Healing at a distance or area attack at a distance. Nice. Edgedancer's Grace + Ironstance With your extra reaction, you can dodge without spending focus, making the attack likely to miss, which then allows you to make a reactive strike from your stance. Edgedancer's Grace + numbing painrial Get one reaction to Dodge/Avoid Danger and one to absorb damage from a different attack. Edgedancer's Grace + Withering Retort Get one reaction to Dodge/Avoid Danger and one to use Steadfast Challenge against a different enemy as they attack you. Edgedancer's Grace + Withering Retort + Foresight Get three reactions - one to Dodge/Avoid Danger, two to use Steadfast Challenge against different enemies as they attack you. Edgedancer's Grace + Withering Retort + Foresight + Peaceful Solution Get three reactions - one to Dodge/Avoid Danger, two to use Steadfast Challenge against different enemies as they attack you and pacify them, ending combat if all enemies are pacified. Edgedancer's Grace + Withering Retort + Foresight + Peaceful Solution + Gather Evidence As above but it doesn't cost any focus to pacify enemies or use Withering Retort Edgedancer's Grace + Withering Retort + Foresight + numbing painrial Get three reactions - one to Dodge/Avoid Danger, one to use Steadfast Challenge against a different enemy as they attack you, and one to absorb damage from a different attack. Enlightened Truthwatcher [Any combo with Risky Behavior] + Glimpse the Future Instead of getting two chances to roll an Opportunity, you can get three. Glimpse the Future + either Explosive Growth, Disorienting Flash, or Painful Truth If you roll badly, reroll. Glimpse the Future + expensive Heroic talents (Close the Case, Synchronized Assault, Grand Deception, Turning Point, Meteoric Leap, Precise Parry) Get one chance to reroll, ensuring you don't waste the actions and/or focus. Lightweaver Gather Evidence + Transformation vs. another character + Fast Talker + basic Illumination Surge use any Transformation vs another character (i.e. Soulcast Defense/Parry, Living Soulcasting, Flamecasting) triggers Gather Evidence, reducing the focus cost of Fast Talker, which gives you two actions to use for a Spiritual skill, and Illumination is a Spiritual skill. Note that this doesn't work for Illumination talents, just the basic use of Illumination (e.g. making an illusion) or any of its always-on upgrades (such as Multiplicative Lightweaving). Physical Illusion + Multiplicative Lightweavings Create multiple physical illusions at the same time for no additional Investiture. Physical Illusion + Endless Illusions Your physical illusion lasts until it run out of health, not due to running out of infused Investiture. Elsecaller Elsecaller's Perspicacity + either Soulcast Parry or Realmic Evasion Advantage on reactions nearly guarantees these attacks will miss. Elsecaller's Perspicacity + Ironstance Advantage on reactions includes Reactive Strikes from Ironstance. Elsecaller's Perspicacity + Cognitive Vision Nearly guarantees your target will have disadvantage on their next test against you. Willshaper Cognitive Vision + Sinkhole Use the former to identify the intent of one target, granting them disadvantage on their next roll, then use Sinkhole to immobilize them and possibly other targets (who don't have disadvantage). Stoneward Gather Evidence + Cohesion vs. another character + Trickster's Hand + basic Tension Surge use any Cohesion vs another character (i.e. Stone Spear, Sinkhole) triggers Gather Evidence, reducing the focus cost of Trickster's Hand, gives you two actions to use for a Physical skill, and Tension is a Physical skill. Note that this doesn't work for Tension talents, just the basic use of Tension (e.g. Hardened Defense or slowing down an enemy) or any of its always-on upgrades (such as Clothsmith). Strategize + Practical Demonstration + Cohesive Teamwork Gain Advantage, grant that advantage to an ally, and the next player to make a test against the enemy also gains an advantage, and then use Rousing Presence, all for only one action. Strategize + Practical Demonstration + Guiding Oration + Cohesive Teamwork As above but an additional ally within 10ft gains advantage. Stonestance + Rigged Weaponry + Flowing Earth Assuming you use a Cohesion attack, you get a free move to be right where you want to protect the maximum number of allies (more than normal due to your extra +10ft weapon range). a Soulcaster + either True Stoneshaping or Cloth Mastery Make stone or cloth into an intricate shape, then turn it into whatever material you want with the Soulcaster. Through the Stone + Tension Parry or basic Hardened Defense Defend an ally within 20ft. Through the Stone + Fine Control Get 20ft range from the former and another 25ft for the latter, so now you can melee attacks from 45ft away. Bondsmith squire Lashing Strike + either Fine Control (25ft range) or Rigged Weaponry (+10ft range beyond your normal melee weapon range) Strike at longer range and then stick your target to the ground. Distant Surgebinding + Tension (particularly the basic Tension Surge to slow an enemy or to grant Hardened Defense to an ally, or Tension Parry to do it at a reaction) Atypical Surge combos (requires a Surge fabrial) Slick Combatant + Adhesion Slide around as a free move and stick people in place along the way. Slick Combatant + Living Soulcasting Slide around as a free move and get a powerful Transformation attack along the way. Smooth Operator + Flowing Earth Get a huge amount of movement for no extra actions (just 1 focus and a use of Cohesion). Regrowth + basic Tension Hardened Defense Heal your ally and then bolster their physical defenses. Realmic Step + any area attack (Division, Progression, Transformation) Get into perfect position without triggering reactive strikes, then blast them with an area attack. Any area attack + Living Adhesion or Adhesive Trap With opponents stuck in place, they are easier to hit, so blast them with an area attack. Any area attack + Sinkhole Similar to the above but with Immobilized instead of Restrained. Living Adhesion + Living Soulcasting or basic Division attack With one opponent stuck in place, they are easier to hit, so blast them with a powerful amount of spirit damage.
-
I made these tables for myself to understand similarities and differences and figured I'd share. For example, now that I can see all three Surge area attacks side-by-side (bottom table), I like Progression the best because it has the cheapest Investiture cost and you can choose which characters in the area to affect rather than having to attack everyone in the area like Division does. Spren test assistance (all of them can assist with Lore tests on topics they are familiar with) Radiant Order Skills they can assist with (granting advantage) Other things they can assist with Windrunner Leadership tests Keeping track of time, predicting highstorms, pushing objects weighing no more than 0.1 pounds (at Third Ideal, no more than 1 pound) Skybreaker Intimidation tests Investigating crimes, determining guilt or innocence Dustbringer Crafting tests Setting traps, dismantling objects Edgedancer Insight tests Finding common ground, understanding someone you don’t share a culture with Truthwatcher Persuasion tests Approaching and engaging in new experiences, understanding others’ perspectives Lightweaver Deduction tests, tests to determine if someone is lying (Third Ideal) Language deciphering, figuring out patterns (including ciphers and codes), picking locks Elsecaller Deduction tests, Discipline tests, Stealth tests Willshaper Survival tests Travel and fair trade, pushing objects weighing no more than 0.1 pounds, silent communication no more than 25 words long Stoneward Athletics test Supporting or coordinating individuals (especially unruly ones) Which heroic paths fit with which Radiant Orders? (The handbook lists this info in reverse, where each Radiant Order has a list of which heroic paths fit with it) Heroic paths Radiant orders that are a good fit Agent Investigator Skybreaker, Dustbringer, Truthwatcher, Lightweaver, Elsecaller Spy Windrunner, Skybreaker, Lightweaver Thief Dustbringer, Edgedancer, Truthwatcher, Lightweaver Envoy Diplomat Skybreaker, Edgedancer, Truthwatcher, Lightweaver Faithful Edgedancer, Truthwatcher, Elsecaller Mentor Windrunner, Edgedancer, Elsecaller, Willshaper, Stoneward Hunter Archer Windrunner, Skybreaker, Dustbringer Assassin Skybreaker, Dustbringer, Lightweaver Tracker Dustbringer, Edgedancer, Stoneward Leader Champion Windrunner, Edgedancer, Willshaper, Stoneward Officer Windrunner, Elsecaller, Willshaper, Stoneward Politico Lightweaver, Willshaper Scholar Artifabrian Dustbringer, Willshaper, Truthwatcher Strategist Skybreaker, Dustbringer, Truthwatcher, Lightweaver, Elsecaller Surgeon Edgedancer, Truthwatcher, Elsecaller, Willshaper Warrior Duelist Windrunner, Skybreaker, Stoneward Shardbearer Stoneward Soldier Windrunner, Elsecaller, Willshaper, Stoneward All Surge attacks (anything that directly deals damage) vs. a single character Cohesion: Stone Spear Division Gravitation: Gravitational Slam Gravitation: Lashing Shot Tension: Fine Control Transformation: Living Soulcasting Attack roll vs. Defense Cohesion vs. Physical Division vs. Spiritual Gravitation vs. Physical Gravitation vs. Physical Tension vs. Physical Transformation vs. Spiritual # of levels of [Surge] needed to access this talent 1 0 1 2 4 1 Damage dice (# of) and type 2d* impact 3d* spirit Upgrade to 4d* spirit (+4 levels) 1d* impact per 10ft moved Upgrade to 4d* for 40ft moved (+1 level). Upgrade to greater distance/rounds (+1 level). 2d* impact 2d* impact 3d* spirit Range 60ft Melee Upgrade to 20ft (+1 level). Upgrade to 30ft (+2 levels total). Upgrade to 100ft (+3 levels total). Melee Windrunner only: Upgrade to 20ft (+2 levels Adhesion) Melee for object propelled, and as far as you want for attack distance. Windrunner only: Upgrade to 20ft for object propelled (+2 levels Adhesion) 25ft Melee Upgrade to 20ft (+3 levels). Investiture cost 1 1 1 1 per attack distance divided by Gravitation rate. 1 per round Upgrade to 1 total (+2 levels). 1 # of actions 2 2 Upgrade to 1 (+4 levels) 1 2 2 to initiate, 1 per attack 2 Area attacks (all of these are vs. Physical) Division Transformation Progression # of levels of [Surge] needed to access this talent 3 3 1 Damage dice (# of) and type 3d* energy Upgrade to 4d* energy (+1 level required) 2d* energy 2d* impact or keen Range Melee Upgrade to 20ft (+1 level). Upgrade to 30ft (+2 levels total). Upgrade to 100ft (+3 levels total). Melee Upgrade to 20ft (+1 level). Melee Edgedancer only: Upgrade to 20ft (+2 levels Abrasion) Max size 25 ft 20 ft 20 ft Investiture cost 3 for any size area 1-5 depending on size. Upgrade to 1 Investiture for Large and 3 for Gargantuan (+1 level). 1 for any size area # of actions 2 Upgrade to 1 (+1 level) 2 2 Upgrade to 1 (+3 levels) Skill test required? Yes. DC 0 for clean air, DC 5 for vapor, DC 10 for liquids. Upgrade for -5 to DCs (+1 level) Yes, DC 10 for clean air, DC 15 for vapors, DC 20 for liquids. No Choose targets? No, must affect everyone in area Yes, can choose what area to affect and thus what characters to affect. Yes
-
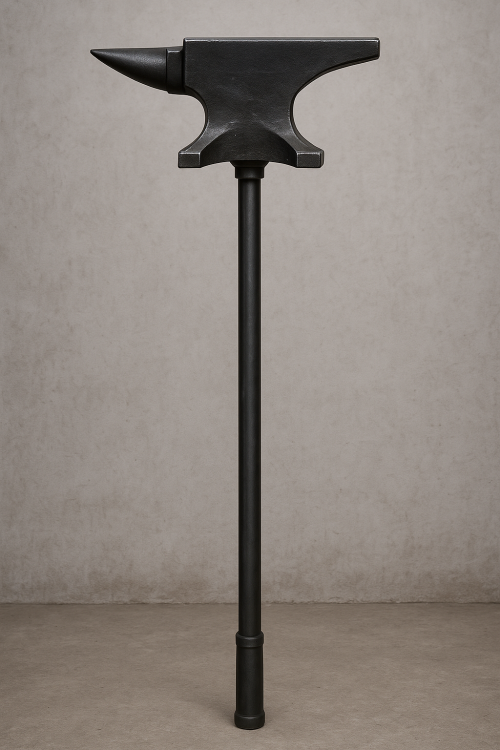
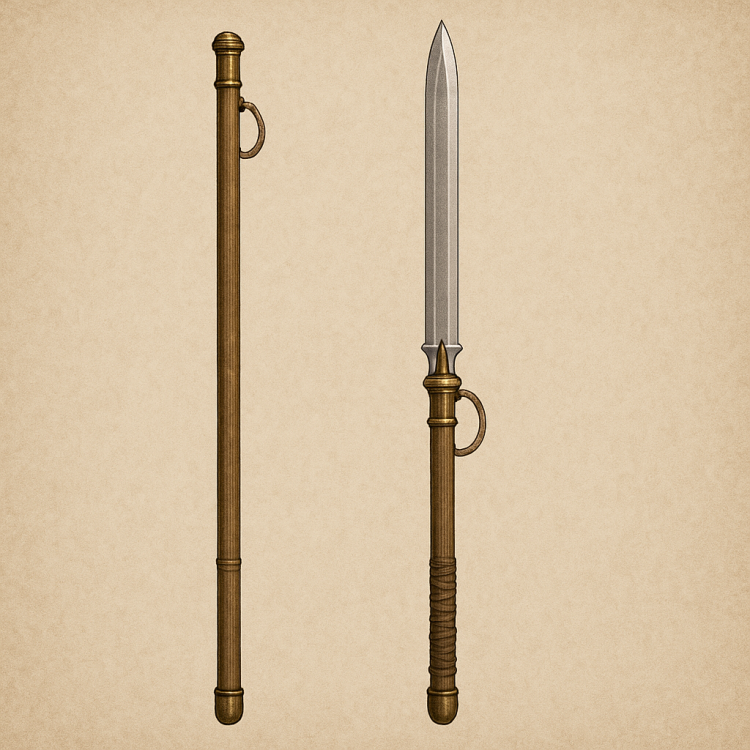
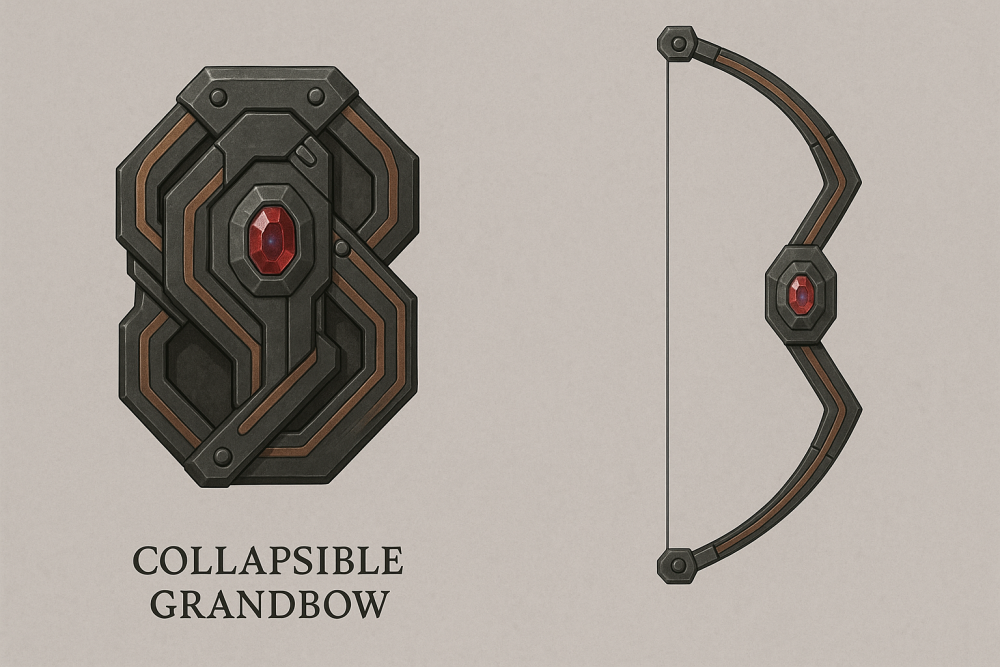
I was intrigued by the idea of crafting weapons with the upgrade that makes them Discreet - especially large weapons that can't exactly be concealed, so you'd have to disguise them at another item. Here's my images (AI generated) of a Shardhammer with a detachable handle (i.e. disassembles into a metal pole and a fully-functional anvil), a greatsword concealed in a walking stick, a collapsible grandbow, and an aluminum work table that folds up into a shield. The images didn't always turn out the best, sometimes the collapsed version doesn't look enough the the un-collapsed version, but still was fun. Warhammer disguised as anvil Greatsword concealed in walking stick Shield that unfolds into a table Collapsible grandbow

-
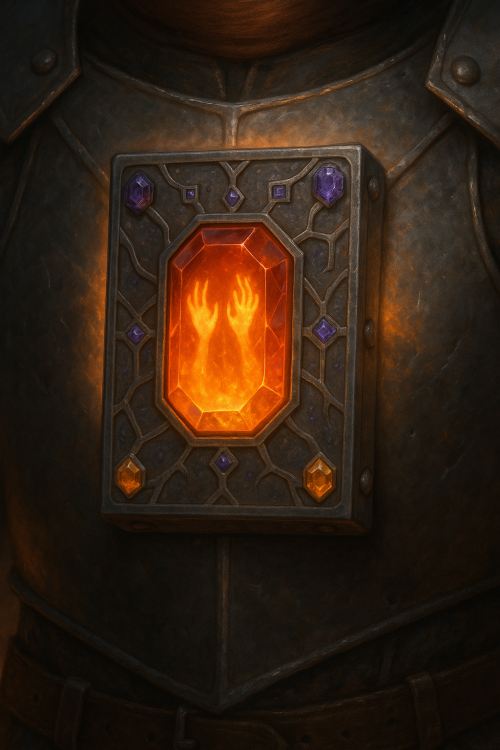
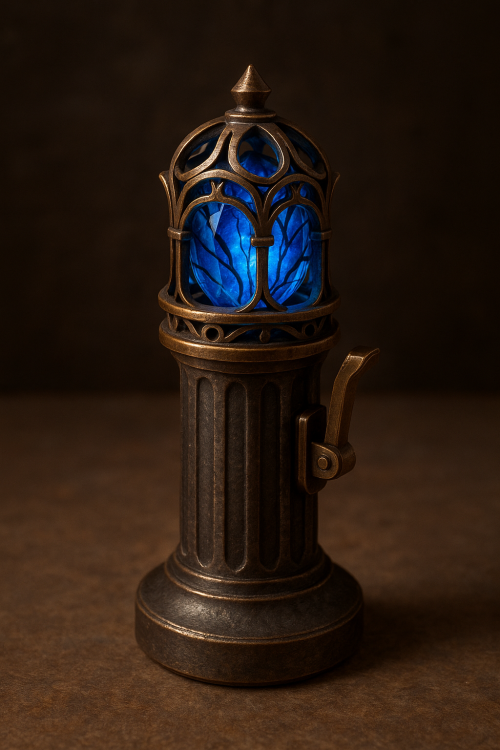
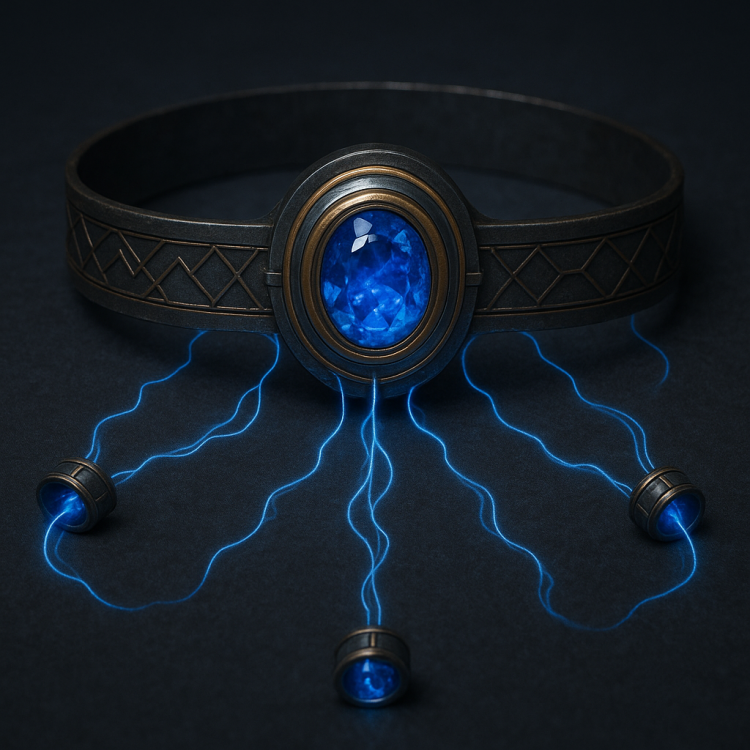
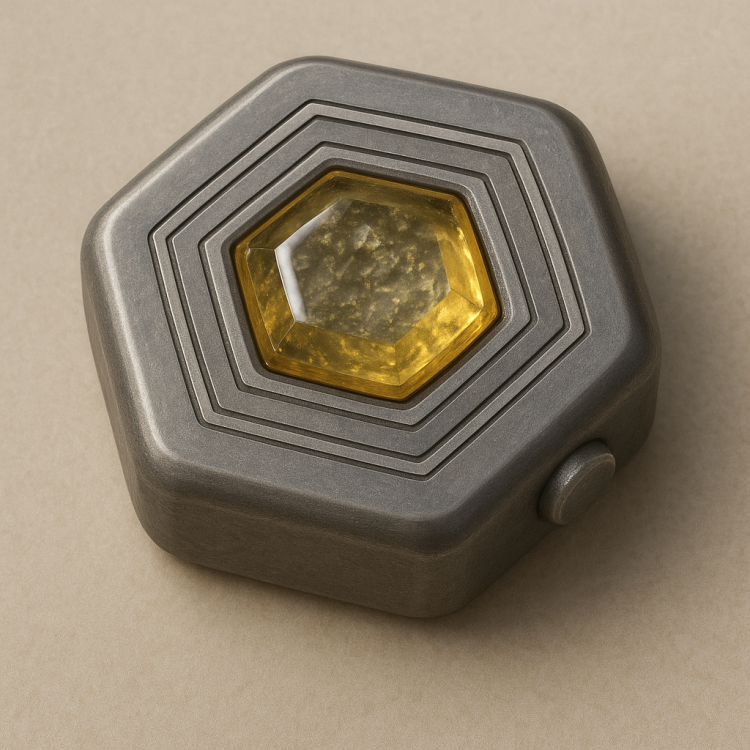
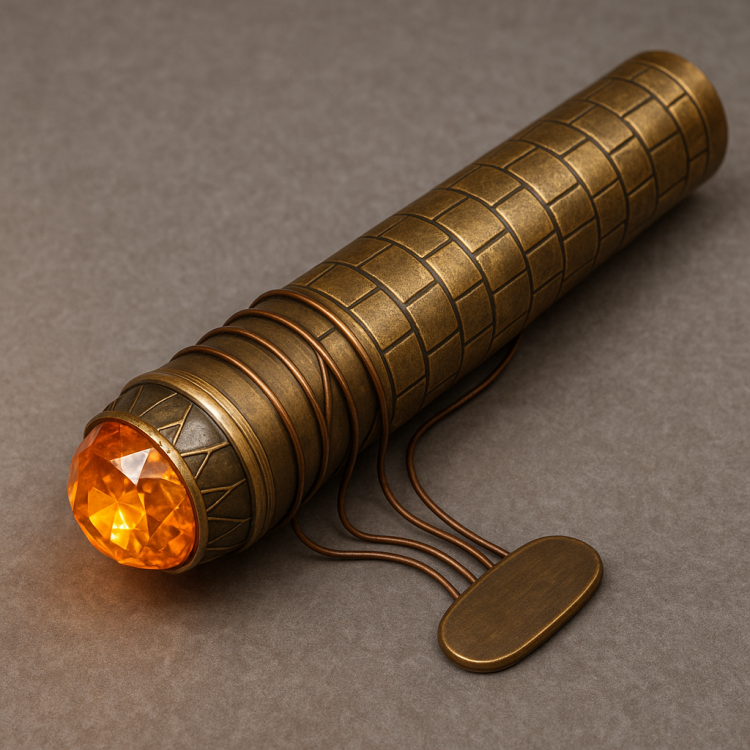
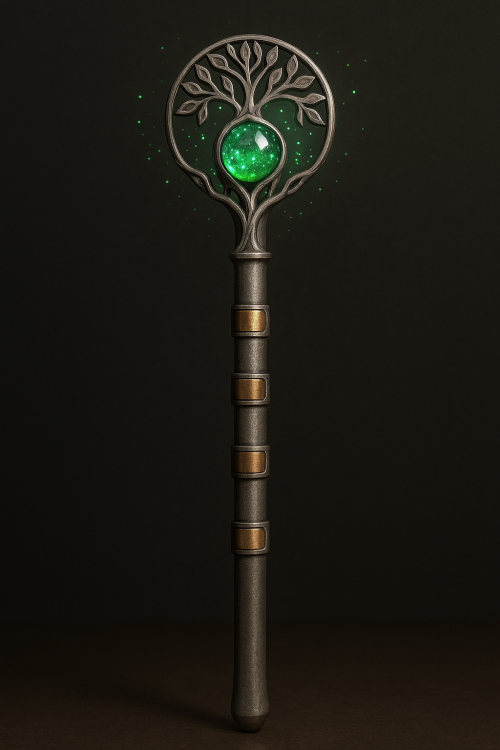
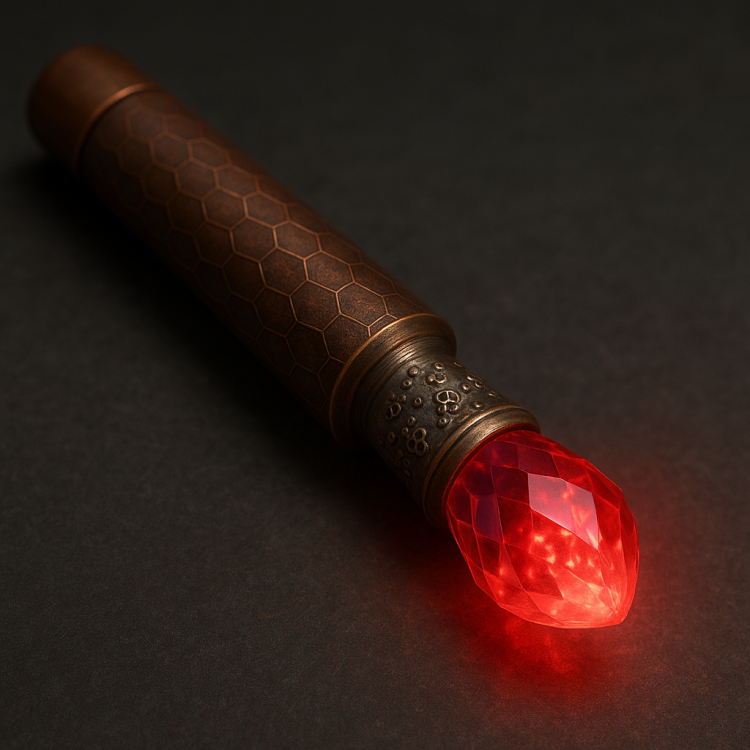
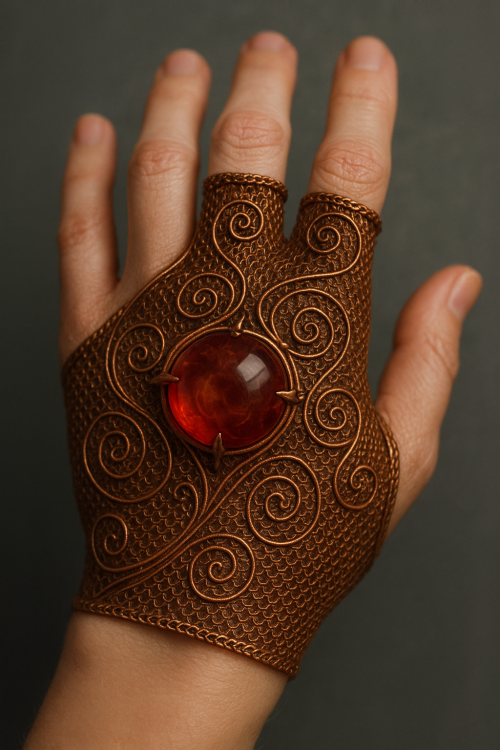
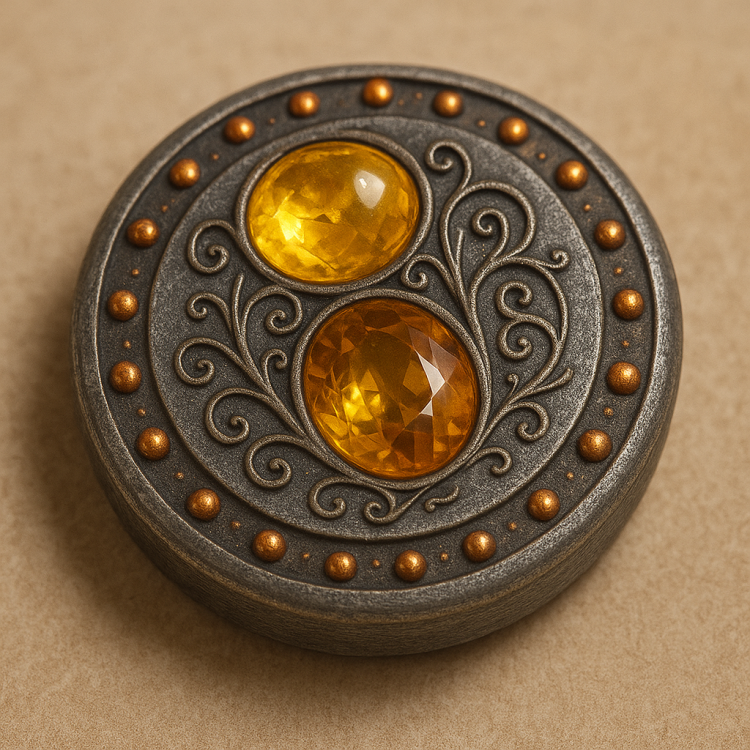
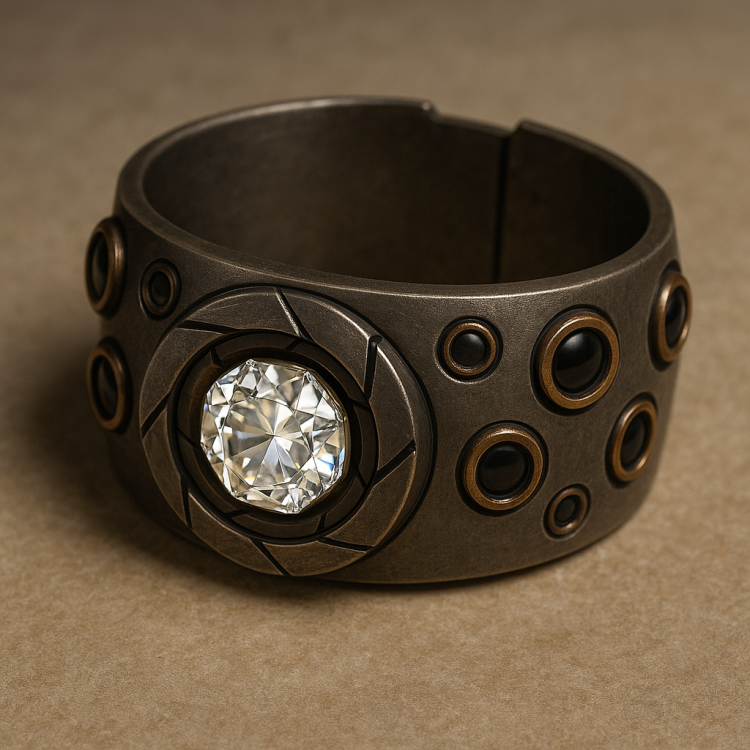
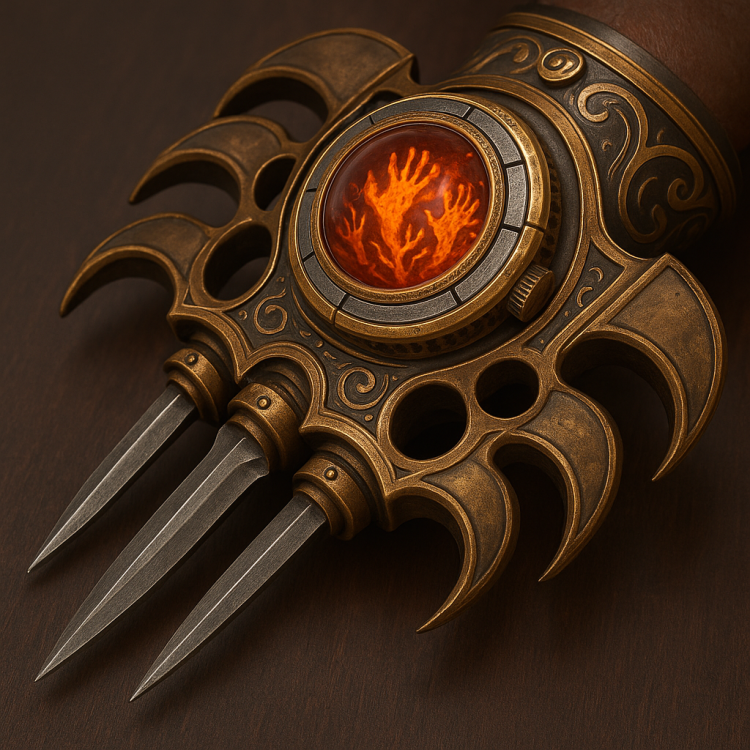
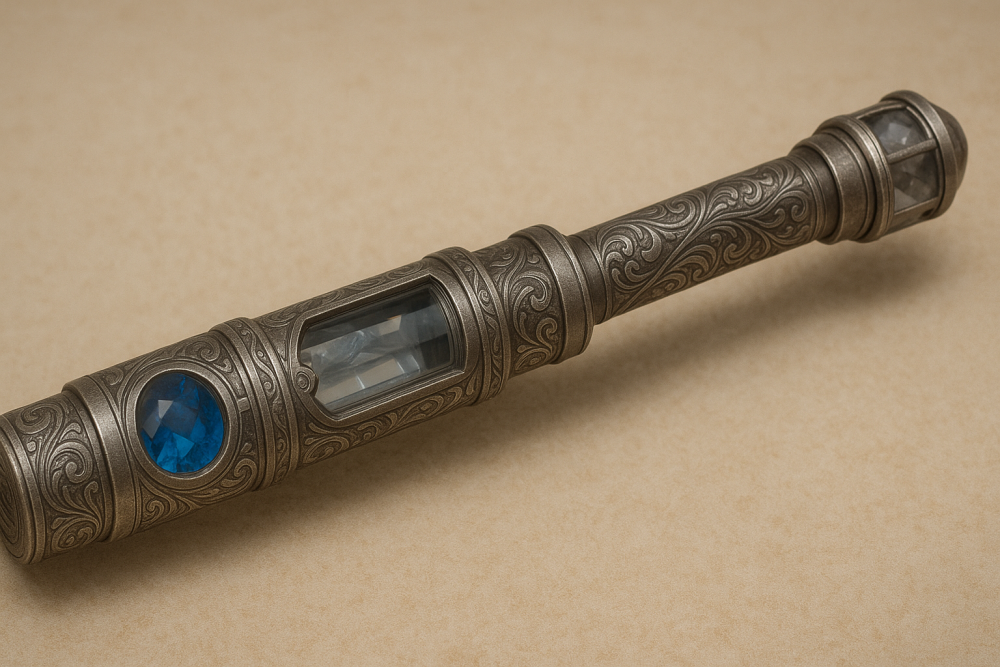
Custom fabrial designs with visual descriptions
mike.the.monk replied to mike.the.monk's topic in Brandon Games
I used AI to make images for some of these designs. Accelerator Armor augmenter Bindrial (area) Bindrial (self) Compressor Cremrial Cultivator Disruptor Drainer Liferial Lightrial Painrial Projectile
-
I'm going to play as an artifabrian and was intrigued by one paragraph from the Handbook: "When crafting fabrials, you don’t need to worry about the details of which metals you use and how you craft them. However, you might like to enhance the stories you tell about your fabrials and how they function (or malfunction). If so, it’s good to know that each metal has a different effect on spren and fabrial functionality". It got me thinking about how each fabrial might look. So, I made a Claude Project to help me brainstorm. I loaded it with a description of each polestone (from the wiki), what each metal does in a fabrial (from the Handbook), and description of every known spren (from the wiki). Then, its instructions are that I describe the fabrial's effect and the AI gives me at least 5 spren that might be able to cause the effect, 5 polestones that could trap the spren to cause the effect, and which metals might be associated with it. From there, I choose which spren, gemstone(s), and metals I think that the best, and had the AI generates 10 possible designs for the fabrial. Vote on your favorites! And, feel free to use any of these designs. Accelerator Fabrial Designs I chose windspren since it's associated with movement (including when someone is using the Surge of Abrasion), zircon since it is associated with the essence of oil, pewter around the gemstone to enhance movement, and the main body of the fabrial is tin (reducing friction) and steel (repelling the ground). Sleek wrist gauntlet made of polished steel bands interwoven with tin filigree. A pale teal zircon sits prominently on the back of the hand, held by delicate pewter claws that spiral around the gem like frozen wind currents. The windspren inside creates tiny swirling patterns of light when activated. Twin ankle cuffs crafted from brushed tin with steel reinforcement rings. Each bears a clear zircon gemstone set in an ornate pewter mounting that resembles stylized gusts of wind. Thin steel cables connect the cuffs, and the trapped windspren cause faint ribbons of light to dance between them. Compact belt buckle featuring a steel frame with tin inlay work depicting flowing air currents. The central zircon is a brilliant teal stone surrounded by pewter shaped like miniature vortexes. When pressed, the windspren creates visible air distortions around the wearer's feet. Medallion pendant with a steel outer ring and tin inner disc etched with wind patterns. The zircon centerpiece is held by pewter tendrils that seem to move in an unfelt breeze. The windspren appears as shifting prismatic colors within the stone when the device is active. Fingerless gloves made of flexible tin mesh reinforced with steel joints at the knuckles. Each palm contains a zircon set in pewter mountings shaped like small whirlwinds. The windspren create glowing trails that follow hand movements during activation. Shin guard plates constructed from curved steel with tin detailing along the edges. The zircons are mounted in pewter settings that resemble wind-carved stone formations. The trapped windspren make the gems pulse with soft light that ripples down toward the feet. Compact handheld device resembling a steel compass with tin construction. The zircon sits where the needle would be, surrounded by pewter filigree that spirals outward like wind currents on a weather map. The windspren creates a gentle humming when the stone is pressed. Ornate chest brooch featuring interlocking steel and tin plates arranged like stylized feathers. The central zircon is cradled in pewter shaped like a miniature storm cloud, with the windspren creating occasional flashes of movement within the stone. Sleek armband made of braided steel and tin wires that spiral around the arm. Multiple small zircons are set in pewter at intervals along the band, creating a cascade effect when activated. Boot-mounted device with steel heel plates and tin side panels etched with aerodynamic patterns. Twin zircons sit in pewter housings shaped like wind scoops on each boot's outer edge. The windspren cause faint air currents to visibly swirl around the soles when active. Armor Augmenter Fabrial Designs I chose painspren due to its association with warform, trapped in a ruby surrounded by pewter since that is already associated with augmenter fabrials (which is the kind of fabrial a grandbow has), in a steel box (already associated with half shard and grandbow), with amethyst and topaz as secondary gems due to their association with Soulcasting metal and stone, which I took to mean enhancing durability. Chest-Mounted Reinforcement Plate - A rectangular steel housing the size of a large book, permanently riveted to the center of a breastplate. The central ruby glows with trapped painspren like flickering orange hands pressed against the gem's facets. Smaller amethyst and topaz gems are set into pewter channels that spider-web across the steel surface. When activated, the entire device pulses with a warm, protective light. Shoulder Pauldron Integration - Built directly into the pauldron's curved surface, this fabrial appears as a smooth steel dome with the ruby positioned at its apex like a crown jewel. Intricate pewter filigree spirals down from the central gem, incorporating the amethyst and topaz into the decorative pattern. The whole assembly follows the pauldron's contours so naturally it appears to have been forged as one piece. Gauntlet Knuckle Guard - A compact steel knuckle guard that replaces or covers existing hand protection. The ruby sits prominently on the back of the hand, surrounded by four smaller gems - two amethyst, two topaz - arranged in a cross pattern. Pewter wire connects all gems in a delicate lattice that doesn't impede finger movement. The steel housing is contoured and articulated to move with the hand. Belt-Mounted Control Unit - A steel box the size of a large belt pouch, designed to hang from a warrior's belt or weapon harness. The ruby sits in a crystal window on the front face for easy activation, while the secondary gems are arranged in pewter settings around the box's edges. Thin pewter cables extend from the unit to attachment points on the armor, creating a network that channels the enhancement throughout the wearer's protection. Helm Crown Assembly - Integrated into a helmet's crown, this fabrial forms a regal crest of steel and pewter. The ruby is the centerpiece, flanked by the amethyst and topaz gems in a symmetrical arrangement. The pewter framework follows the helmet's ridges and contours, making the enhancement appear as natural ornamentation. When active, the gems cast a warm glow that frames the wearer's face. Modular Armor Disc - A circular steel disc approximately six inches across, designed with universal mounting brackets that can attach to any flat armor surface. The ruby occupies the center, while the amethyst and topaz are positioned at cardinal points around the rim. Pewter tracery connects all elements in an elegant mandala pattern. Integrated Chainmail Enhancement - Woven directly into a section of chainmail, this fabrial uses pewter links to replace iron ones in a specific pattern. The ruby is held in a small steel setting that appears to float within the mail, while the secondary gems are distributed throughout the pewter network at regular intervals. The enhancement spreads through the mail's structure, making the entire section glow faintly when activated. Vambrace Communication Array - Built into a forearm guard, this fabrial extends along the vambrace's length like a technological bracer. The steel housing is sleek and angular, with the ruby positioned at the wrist for easy thumb activation. The amethyst and topaz gems are arranged in a line along the forearm, connected by pewter conduits that pulse with energy when the device is active. Small pewter tendrils extend to connect with other armor pieces. Gorget Collar System - Incorporated into a neck guard, this fabrial wraps around the throat like protective jewelry. The steel base follows the gorget's curve, with the ruby positioned at the front where it's easily accessible. The secondary gems are embedded at regular intervals around the collar, connected by ornate pewter work that resembles decorative scrollwork. The design balances protection with an almost ceremonial appearance. Modular Attachment Node - A cube-shaped steel housing small enough to fit in one's palm, designed with universal mounting points that can attach to armor via straps, magnets, or mechanical clasps. The ruby dominates one face of the cube, while each adjacent face contains either an amethyst or topaz. Pewter channels run along the cube's edges, and retractable pewter filaments can extend to touch and enhance nearby armor sections. This design prioritizes versatility and portability over integration. Bindrial (Self) Fabrial Designs Bindspren was the obvious choice because of its association with the Surge of Adhesion, and same with sapphire because of its association with the Windrunners. The gemstone is in a casing of zinc and brass to allow for control of intensity. The body is iron (attracts substances) with some bronze so that the fabrial can detect the user's thoughts, which is especially important since the user is not Slowed when climbing (unless you have the drawback that does cause you to be Slowed). Gauntlet Style - A sleek iron gauntlet that covers the back of the hand and extends halfway up the forearm. The brilliant blue sapphire sits in a brass-and-zinc medallion at the center of the palm, surrounded by intricate bronze filigree that pulses with faint light when detecting thoughts. Thin brass channels run along the fingers like veins, allowing precise control over which parts of the hand adhere to surfaces. Belt Harness Design - An iron belt adorned with a large, glowing sapphire centerpiece encased in alternating rings of zinc and brass. Bronze wire threading creates geometric patterns across the belt's surface. When activated, tendrils of dark blue light (like the bindspren themselves) flow from the central gem down thin iron channels to smaller sapphire nodes positioned at the wrists and ankles, allowing full-body adhesion. Bracer Pair - Matching iron bracers worn on both forearms, each featuring a sapphire set in an intricate brass-and-zinc housing that resembles a clockwork mechanism. Bronze contact points press against the user's skin, reading their intentions. The gems pulse with deeper blue light when climbing, and small iron studs along the inner surface glow when adhesion is active. Climbing Gloves - Form-fitting iron mesh gloves with reinforced palms containing small sapphires in brass-and-zinc settings. Bronze threading runs through the fabric like circuitry, allowing the fabrial to sense which fingers need adhesion. The knuckles feature decorative brass plates that glow when the device is active, and the entire glove shimmers with a faint blue aura during use. Harness Vest - A lightweight iron chest piece resembling climbing gear, with a large sapphire housed in an ornate brass-and-zinc chamber over the heart. Bronze wires spread across the vest like a nervous system, connecting to smaller iron contact points at the shoulders, elbows, knees, and feet. The central gem pulses in rhythm with the user's heartbeat, responding to their climbing intentions. Boot Integration - Sturdy iron-soled boots with sapphires embedded in brass-and-zinc housings at the arch of each foot. Bronze sensors line the inner sole, reading the user's balance and intentions. When active, blue light traces along iron channels that run up the boot's sides, and the soles emit a soft sapphire glow that leaves brief, glowing footprints on surfaces. Pendant Style - An elegant iron pendant hanging from a chain, featuring a large sapphire surrounded by concentric rings of brass and zinc in an intricate mandala pattern. Bronze touches at the back rest against the user's chest to read their thoughts. When activated, the pendant projects thin streams of blue light that flow down the user's arms and legs, enabling adhesion wherever needed. Wrist Cuffs - Heavy iron cuffs worn on both wrists, each containing a sapphire set in a brass-and-zinc mechanism with visible gears and springs. Bronze contact strips on the inside monitor muscle tension and intent. The cuffs can extend thin iron cables tipped with smaller sapphires, allowing the user to adhere ropes or tools to their body while climbing. Climbing Ring - A thick iron ring worn on the dominant hand, featuring a prominent sapphire held in place by brass-and-zinc claws that can rotate and adjust the gem's position. Bronze inlay spirals around the ring's band, creating a continuous connection with the user's skin. When active, the ring projects a field of blue energy that extends several inches from the hand, allowing adhesion through thin gloves or fabric. Ceremonial Circlet - An iron circlet worn around the forehead, with a central sapphire housed in an elaborate brass-and-zinc sunburst design. Bronze temples pieces rest against the user's head to read their climbing intentions. This mental-control model allows for the most precise adhesion, creating blue glowing patterns that flow from the circlet down the user's entire body, adhering whatever body parts they focus on to any surface. Bindrial (Area) Fabrial Designs Almost identical to the above except no bronze for thought detection, and I wanted it to be able to be placed on the ground. Grounding Disc - A flat, circular iron disc about the size of a dinner plate, with intricate geometric etchings radiating outward from the center. A brilliant sapphire sits in a raised brass and zinc housing at the center, glowing with soft blue light. Dark blue wisps seem to swirl within the gem like trapped ink clouds. The disc has three small iron legs that fold out to keep it stable when placed on uneven ground. A brass button sits flush with the edge of the disc. Anchor Stone - A hexagonal iron weight roughly the size of a large book, designed to sit firmly on any surface. The sapphire is mounted in an ornate brass and zinc cage that rises from the top like a miniature lighthouse. When active, dark blue patterns that look like spilled ink pulse through the translucent gem. Brass control rings around the cage can be rotated to adjust intensity. The entire device has a sturdy handle on one side for easy transport. Binding Plate - A rectangular iron platform with rounded corners, about the size of a shield when laid flat. The central sapphire is surrounded by concentric rings of alternating brass and zinc, creating a target-like pattern. When activated by pressing the gem itself, dark blue bindspren can be seen swirling inside like a tiny storm. Small iron spikes extend from the bottom to grip the ground, and brass corner caps protect the edges. Tether Hub - A cylindrical iron device that stands upright like a small pillar when deployed. The sapphire sits protected within a brass and zinc crown at the top, its blue glow casting intricate shadows through the metalwork. The bindspren appear as dark blue streaks that seem to reach toward the edges of the gem as if trying to escape. A brass activation lever on the side can be pressed to engage the effect, and the iron base is weighted to prevent tipping. Ground Clasp - Shaped like an oversized iron medallion, this fabrial is designed to lay flat against any surface. The sapphire is set within a brass and zinc bezel that can be twisted to control the binding intensity. Dark blue bindspren spiral within the gem like liquid shadows. Four small iron claws extend from the bottom to anchor it in place, while a raised brass activation button sits prominently on one edge. Adhesion Engine - A compact iron box with brass corner reinforcements and a zinc-lined sapphire housing on top. The gem sits within a rotating brass gimbal system that allows for precise control of the binding field. Inside the crystal-clear sapphire, bindspren create mesmerizing patterns like dark blue ink dropped in water. The device has retractable iron stabilizer legs and a large brass button on the front face for activation. Immobilizer Pad - A low, wide iron platform with a slight concave depression in the center where the sapphire rests. The gem is surrounded by alternating brass and zinc bands that create interference patterns when the light hits them. The trapped bindspren appear as constantly shifting dark blue blotches within the sapphire. Small brass dials around the perimeter allow for fine-tuning. Binding Beacon - A conical iron device that tapers to a point, designed to be pushed into soft ground or placed on hard surfaces via a flat base. The sapphire crowns the top, held within an intricate brass and zinc framework that resembles a geometric flower. The bindspren create dark blue veins throughout the gem that pulse in rhythm with its glow. A brass pressure plate at the base activates the device when stepped on or pressed. Tethering Orb - A spherical iron cage containing the sapphire at its center, with the gem suspended in a brass and zinc gimbal system. The bindspren appear as dark blue threads connecting different facets of the crystal, creating an internal web effect. When placed on the ground, three iron legs automatically extend to stabilize it. A brass key-like protrusion must be turned to activate the binding field. Anchor Rune - A flat iron triangle with mystical engravings along each edge, designed to lay flush with the ground. The sapphire sits at the center in a raised brass and zinc setting that resembles a compass rose. Dark blue bindspren swirl in the gem like a miniature whirlpool, and their movement intensifies when the device is active. Brass studs at each corner can be pressed simultaneously to activate the immobilization field, while zinc inlays help channel and control the effect. Compressor Fabrial Designs I had a hard time coming up with a spren for this one, but settled on rockspren. Topaz was the obvious choice for gemstone (Stonewardens), set in zinc to increase the intensity of the spren. The body of the fabrial is pewter to enhance the rigidity effect. Stone-Heart Compressor - A palm-sized oval device with a smooth pewter body that feels surprisingly dense. The central topaz gleams like captured sunlight, held in an intricate zinc setting that resembles interlocking mountain peaks. When inactive, the topaz appears clear, but when charged with Stormlight, tiny motes of grey stone seem to swirl within like a miniature rockslide. The fabrial is activated by pressing the topaz directly, which causes the zinc setting to grow warm and the pewter body to emit a subtle metallic hum. Stonemason's Vice - Shaped like a flattened cylinder, this fabrial's pewter body is etched with geometric patterns reminiscent of stonework masonry. The topaz sits proudly at the center, cut in an octagonal shape and surrounded by a zinc bezel carved to look like tiny stone blocks. When the trapped rockspren is active, faint cracks of light appear to run through the topaz like veins in marble. A small zinc button on the side activates the device, causing the entire fabrial to briefly flash with golden light. Rigid Compass - This circular fabrial resembles an oversized pocket watch made of polished pewter with subtle hammer-marks across its surface. The topaz is mounted off-center, surrounded by a zinc ring inscribed with tiny runic patterns that seem to shift like settling stones when viewed closely. The rockspren within appears as dark specks that slowly orbit within the gem. Activation requires pressing both the topaz and a small pewter lever simultaneously. Stonewarden's Clasp - A rectangular device designed to be worn as a large brooch or belt ornament, with a pewter frame that's both functional and decorative. The topaz is cut in a perfect square and set in a zinc mounting that resembles a miniature archway or bridge. When Stormlight flows through it, the rockspren manifests as tiny crystalline formations that grow and dissolve within the gem. The entire topaz acts as the activation surface, requiring firm pressure to engage. Petrifier's Tool - This fabrial takes the form of a thick pewter rod, comfortable to grip, with the topaz embedded at one end like the head of a ceremonial mace. The zinc setting extends outward in spoke-like projections, giving the appearance of a starburst around the gem. The rockspren appears as shadows that dance and consolidate within the topaz when active. A thumb-operated zinc trigger near the grip activates the device. Anchor Stone - A hexagonal pewter case with rounded edges, designed to fit comfortably in one hand. The topaz is mounted flush with the surface, surrounded by a zinc inlay that forms concentric hexagons echoing the fabrial's shape. When charged, the rockspren creates patterns within the topaz that look like sedimentary layers in stone. The entire top surface serves as the activation pad, lighting up with golden radiance when pressed. Rigidity Engine - A complex-looking device with a pewter body featuring multiple small chambers and viewing windows. The primary topaz sits beneath a zinc dome that can be rotated to adjust the fabrial's intensity. Secondary tiny gems are visible through the windows, and the trapped rockspren appears to flow between them like liquid stone when active. A zinc slide-switch on the side controls activation, with multiple settings for different levels of rigidity. Mountaineer's Friend - Designed like a mountaineering tool, this fabrial has an elongated pewter body with a textured grip and the topaz set into what appears to be a miniature pickaxe head made of zinc. The rockspren manifests as sharp, angular shadows that shift like falling scree within the gem. A pressure-sensitive zinc plate on the handle serves as the activation mechanism, requiring a firm squeeze to engage. Geomancer's Seal - A flat, disc-shaped device with intricate pewter engravings covering its surface, depicting various types of stone and rock formations. The topaz is set dead center, held by a zinc setting that resembles a compass rose. When active, the rockspren appears as a slowly rotating mandala of tiny stone particles within the gem. The fabrial is activated by pressing the topaz while simultaneously rotating the outer pewter ring. Bedrock Projector - This fabrial resembles a small pewter lantern or cage, with the topaz suspended in the center by delicate zinc wires. The pewter framework is perforated with small holes that allow light to shine through in patterns when activated. The rockspren is clearly visible as a slowly pulsing core of grey matter within the topaz, like the heart of a mountain. Activation requires grasping the entire device and applying pressure to two zinc contact points on opposite sides. Cremrial Fabrial Designs Obviously rockspren since it softens rock, and obviously topaz (Stonewards). The gemstone is set in tin since it diminishes attributes (reduces stone's hardness). Main body is brass to diminish the manifestation of the rockspren, with some bronze to allow the user's thoughts to channel the effect to the correct area. Stonemason's Rod - A brass cylinder the length of a forearm, etched with geometric patterns resembling stone blocks. A brilliant orange topaz sits at one end, surrounded by a delicate tin setting that forms radiating lines like cracks in stone. Thin bronze wires spiral down the brass shaft, ending in a small bronze grip plate where the user places their palm. Geologist's Compass - Shaped like an oversized brass compass, with the orange topaz replacing the traditional needle. The tin setting allows the gem to rotate freely within the brass housing. Bronze tracery forms a web across the brass face, converging at a central bronze button that activates the device. Mason's Mallet - A ceremonial hammer design with a brass head containing the topaz in an ornate tin crown. The handle is wrapped in thin bronze wire that channels the user's intent. When activated, the orange gem pulses with trapped rockspren energy. Architect's Lens - A brass magnifying glass frame holding the topaz like a lens, set in an intricate tin bezel. Bronze filigree decorates the brass handle, with a thumb-activated bronze switch. The device focuses the user's will through the gemstone to the target stone. Quarry Master's Gauntlet - A brass bracer worn on the forearm, with the topaz prominently displayed in a tin socket at the wrist. Bronze channels run along the brass like veins, ending in small bronze contacts that touch the wearer's skin for mental connection. Stone-Singer's Wand - An elegant brass wand with the topaz set in its bulbous tip, surrounded by a tin collar that resembles layered sediment. Delicate bronze inlays form musical staff lines along the brass shaft, symbolizing the harmony between user and stone. Excavator's Orb - A brass sphere that opens like a flower, revealing the topaz nestled in tin petals at its center. Bronze mesh forms a protective cage around the gem, with small bronze nodes that warm to the user's touch when channeling intent. Builder's Signet - Designed like an oversized brass signet ring meant to be held rather than worn. The topaz sits in a tin bezel shaped like a foundation stone, with bronze channels forming geometric patterns that guide the user's mental focus to the target area. Sculptor's Stylus - A brass pen-like device with the topaz set in its tip within an adjustable tin collar. Bronze wire winds around the brass barrel in a double helix pattern, ending in a bronze activation band the user grips with their fingers. Foundation-Breaker - A brass pyramid with the topaz embedded in its peak, held by a tin setting shaped like interlocking stones. Bronze plates form the base, designed to rest in the user's palm while their fingers trace bronze-inlaid channels that focus their intent through the device. Cultivator Fabrial Designs This one was easy: lifespren since they can be used along with Stormlight and music to make plants grow faster, and emerald since it's associated with the Essence of Pulp and used to Soulcast plant material. The gemstone is set in zinc to enhance the spren's effect, pewter as the main body to enhance growth, with some bronze to allow the user's thoughts to channel the effect to the correct area. Gardener's Rod - A sleek pewter rod about the length of a forearm, topped with a brilliant emerald the size of a large marble set in an intricate zinc crown. Delicate bronze filigree spirals down the pewter shaft like climbing vines, terminating in a comfortable grip wrapped in leather. When activated, the emerald pulses with soft green light, and tiny motes of light—the trapped lifespren—can be seen dancing within the gem like fireflies. Growth Gauntlet - A fingerless pewter glove that covers the back of the hand and forearm, with an oval emerald mounted prominently on the back of the hand within a zinc bezel. Bronze threading runs along the fingers and palm in patterns resembling leaf veins, allowing precise directional control. The wearer simply touches a plant and presses the emerald with their other hand to activate it. The bronze lines glow faintly when in use, showing the path of the user's intent. Botanist's Orb - A sphere roughly the size of a large apple, crafted from polished pewter with bronze inlay work depicting intertwining branches and leaves. The emerald sits at the "north pole" of the sphere, surrounded by a zinc collar engraved with tiny symbols. The entire device can be held in one hand and pressed against soil or plant matter. When active, the bronze inlays pulse with verdant light, and the emerald blazes like a tiny green sun. Cultivator's Staff - A walking staff-sized fabrial with a pewter core and bronze bands every few inches for grip and control. The top features a stylized tree design in pewter, with the emerald nestled in zinc "roots" that spread across the staff's head. The user can plant the staff in the ground or touch it to vegetation. Bronze touch-plates along the shaft allow for precise mental direction of the growth effect. Sprouter's Disc - A flat, circular device the size of a dinner plate, made primarily of pewter with concentric bronze rings etched into its surface. The emerald sits at the center, held in a zinc mounting that resembles a blooming flower. The disc can be placed on the ground to affect a wider area or held against individual plants. Activation comes from pressing bronze studs around the rim while focusing on the central emerald. Nature's Wand - An elegant wand-like device, tapering from a comfortable pewter grip to a delicate point. The emerald is set near the tip in a zinc cage that looks like unfurling fern fronds. Bronze wire is woven through the pewter body in a double helix pattern, ending in bronze contact points on the grip. The user points the wand at the desired area and squeezes the bronze contacts to channel their intent through the lifespren. Verdant Bracer - A wide bracelet of pewter that wraps around the forearm, with the emerald prominently displayed on the top surface in an elaborate zinc setting shaped like a sunburst. Bronze tracery covers the bracer in patterns of spreading roots and branches. The wearer places their palm on the target area and presses the emerald with their opposite hand, using the bronze patterns to mentally guide where growth should occur. Grove Keeper's Lens - A hand-held magnifying glass with a pewter frame and handle, but instead of regular glass, it features the emerald as its lens, held in a zinc mounting. Bronze etching around the rim helps focus the user's intentions. When looked through and activated, the emerald-lens glows softly, and whatever plant matter is viewed through it begins to grow rapidly. The bronze frame grows warm to the touch during use. Harvest Master's Cube - A cube roughly four inches on each side, crafted from pewter with bronze corner reinforcements and edge details. Each face has different bronze patterns—leaves, flowers, branches, roots, bark, and fruit. The emerald sits proudly on the top face, surrounded by a zinc frame shaped like a crown of thorns. The user selects which face to place down based on what type of growth they want to encourage, then presses the emerald to activate. Sylvan Pendant - A large pendant worn on a pewter chain, featuring an teardrop-shaped emerald set in flowing zinc that resembles liquid metal frozen mid-pour. The pewter backing is worked into the shape of overlapping leaves, while bronze inlay creates delicate vein patterns throughout. The wearer grasps the pendant and holds it against the target plant while concentrating on their desired outcome. The entire piece grows warm and the emerald's glow can be seen even through clothing. Disruptor Fabrial Designs Decayspren fit the best, as did ruby (Dustbringers, Essence of Spark). The gemstone is set in zinc and the main body is copper to conduct energy, channeling the destructive force to the target. Decay Gauntlet - A fitted copper glove that covers the back of the hand and fingers, with intricate etchings that resemble spreading cracks. The central ruby, no larger than a thumbnail, sits embedded in a zinc disc on the back of the hand. When active, tiny barnacle-like shadows seem to crawl across the gem's surface. The fingertips are capped with small copper points for precise targeting. Activated by pressing the ruby with the opposite hand. Erosion Rod - A copper baton about the length of a forearm, hollow and lightweight, with a textured grip wrapped in leather. The ruby is mounted at one end, surrounded by a zinc collar that can be twisted to adjust intensity. Barnacle-like patterns are etched into the copper surface, and when activated, a faint reddish glow emanates from hairline cracks that run along the rod's length. Press the ruby against the target to activate. Decay Orb - A sphere of polished copper that fits comfortably in one hand, covered in raised barnacle-shaped bumps. The ruby sits at the "north pole" of the orb, held in a zinc setting that resembles a crown of tiny spikes. When not in use, it looks almost decorative, but activation causes the barnacle patterns to seem to shift and writhe. Activated by squeezing the orb while touching the target. Corrosion Disc - A flat, circular copper device about the size of a dinner plate but thin enough to carry like a shield. The ruby is centrally mounted in an intricate zinc framework that spreads outward like a spider web. The disc's edge is lined with small copper teeth. When active, the web-like zinc tracery glows faintly, and the trapped decayspren causes tiny barnacle shadows to dance across the surface. Press the ruby while making contact with the target. Entropy Bracer - A copper armband that wraps around the forearm, designed to look like overlapping barnacle shells. The ruby is set into the largest "shell" in a zinc bezel that's shaped like a miniature coral formation. Copper wires run beneath the surface, visible through small gaps between the shells. The bracer feels slightly warm when worn. Activated by pressing the ruby while the bracer touches the target. Dissolution Stylus - An elegant copper pen-like device, about as thick as a thumb and twice as long. The ruby sits at the tip, held by a zinc ferrule decorated with tiny barnacle engravings. The copper body has a subtle hexagonal pattern etched into it, and the opposite end features a copper cap. When activated, the ruby pulses with inner fire, and microscopic barnacle-like shadows seem to scurry within the gem. Simply touch the ruby tip to the target and press gently. Decay Medallion - A copper pendant on a sturdy chain, shaped like an abstract barnacle cluster. The central ruby is the largest element, set in a zinc mounting that resembles overlapping shells. Smaller copper "barnacles" surround it, each etched with fine detail. The back is smooth copper with activation instructions engraved in flowing script. Worn around the neck, activated by grasping the medallion and pressing it against the target. Ruin Knuckles - A set of four copper rings, each designed to fit over the knuckles of one hand. Three rings feature small copper spikes shaped like barnacles, while the fourth (on the index finger) holds the ruby in a prominent zinc setting. The rings are connected by thin copper chains that run along the back of the hand. When all rings are worn, they form a unified weapon. Activated by making a fist and striking the target, with the ruby ring making contact first. Entropy Wand - A copper rod with an ornate handle, about the length of a conductor's baton. The business end splits into three prongs, with the ruby set in zinc at the center point. The handle is wrapped with copper wire and features barnacle-like protrusions for better grip. Along the shaft, hairline seams in the copper glow faintly when the device is active. Point the prongs at the target and press a small copper stud on the handle to activate. Corrosion Gauntlet - A partial copper glove covering just the palm and fingertips, with an open back for easy wearing. The ruby is set into the palm's center in a zinc socket surrounded by radiating copper channels that look like spreading cracks. Small copper studs resembling barnacles dot the fingertips. The device feels deceptively light despite its metal construction. Activated by making contact with the target and pressing the thumb against the ruby in the palm. Drainer Fabrial Designs Spren was hard to pick but I settled on exhaustionspren. Garnet is already used in suppression fabrials that can suppress Investiture, so I stayed with it. I picked tin (diminishes attributes or energy sources (ideal for draining effects)) and copper (conducts energy, could channel drained Investiture into the fabrial's storage)). Siphon Gauntlet - A fingerless glove of burnished copper mesh with thin tin wiring woven throughout in spiral patterns. A blood-red garnet the size of a large marble sits prominently on the palm, held in place by delicate copper claws. When charged, brown wisps seem to swirl within the garnet like trapped dust storms. The wearer activates it by pressing the garnet against their target. Vampiric Rod - A slender baton about the length of a forearm, crafted from alternating bands of polished tin and copper that spiral around each other. The handle ends in an ornate copper grip, while a faceted garnet crowns the opposite end, glowing with an inner crimson light. Hairline tin filaments connect the garnet to the metal bands. Activated by gripping the handle and touching the garnet end to the target. Essence Chalice - A small, elegant goblet made of tin with copper inlay work depicting swirling wind patterns. The stem houses a deep red garnet that pulses with trapped exhaustionspren when charged. The cup itself can be pressed against spheres or touched to creatures. When not in use, it appears to be an ornate drinking vessel, but the garnet's glow betrays its true nature. Draining Circlet - A thin headband of interwoven copper and tin wires that forms delicate geometric patterns. A teardrop-shaped garnet hangs at the center of the forehead, suspended by fine copper chains. The wearer activates it by pressing their hand to the garnet while touching their target with their other hand. When charged, the garnet seems to contain swirling brown motes like captured exhaustionspren. Leech Medallion - A pocket watch-sized device with a tin case and copper mechanical details. The face features a large central garnet surrounded by smaller copper dials and tin switches. Delicate engravings show flowing lines that seem to draw toward the central stone. A copper chain allows it to be worn around the neck. Activated by opening the case and pressing the garnet against the target. Hunger Lamp - A small lantern-like device with a tin frame and copper wire cage protecting the central garnet "flame." Instead of giving light, it seems to absorb it, with the garnet glowing deeper red as it charges. Copper filigree work around the base forms patterns resembling reaching hands. A small copper button on the handle activates the device when the lamp touches its target. Bloodstone Bracer - A wide cuff bracelet made of hammered tin plates connected by copper hinges. The centerpiece is a large, oval garnet set in a copper bezel that covers most of the back of the hand when worn. Thin copper wires trace elegant patterns across the tin surface, all leading to the central stone. Activated by making a fist to press the garnet forward while touching the target. Sapping Stylus - A writing instrument that doubles as a fabrial, with a body of marbled tin and copper that creates beautiful swirling patterns. The "ink" end houses a small, perfectly spherical garnet that glows with contained exhaustionspren. Copper bands around the grip provide activation pressure points. Used by pressing the garnet tip against the target while squeezing the grip. Vitality Sash - A decorative belt or sash clasp made of interlocking tin and copper pieces that form an abstract geometric design. The centerpiece is a star-cut garnet that seems to contain swirling brown mist. Copper wires form the "rays" of the star pattern, while tin forms the geometric frame. Worn at the waist and activated by grasping the garnet center while the wearer touches their target. Exhaustion Engine - A compact, mechanical-looking device resembling a small clockwork mechanism. Gears and springs of tin and copper are visible through crystal windows, all centered around a large garnet heart. The entire device fits in one hand, with copper finger grips and a tin activation lever. When operating, the gears seem to turn of their own accord, and the garnet pulses with captured brown energy like a mechanical heartbeat. Liferial Fabrial Designs Spren was easy: lifespren. The books already established the gemstones as heliodor and topaz, which I set in zinc to increase spren manifestation (amplifying healing). Pewter is the main body (augments attributes/energy sources (boosts healing power)), with some bronze to detect injuries. Dual-Heart Healer - A palm-sized pewter disc with two gemstone "hearts" at its center - a warm golden heliodor and a honey-colored topaz, both nestled in delicate zinc filigree that spirals outward like tiny vines. Bronze sensors form a ring around the edge, appearing as small raised dots that pulse with a faint warmth when detecting injuries. Activated by pressing both gemstones simultaneously. Physician's Rod - A pewter cylinder about the length of a dagger handle, with the heliodor set prominently at one end and the topaz embedded halfway down the shaft. Bronze wire wraps around the device in a double helix pattern, serving as injury sensors. The zinc settings appear as ornate crowns around each gemstone. A simple bronze button near the topaz activates the device. Life Compass - Shaped like a compass, this pewter device has the heliodor at its center surrounded by zinc tracery resembling a sun. The topaz sits opposite on the rim, set in a zinc crescent moon. Bronze needles radiate from the center like compass points, each one an injury sensor. The entire heliodor setting can be pressed to activate. Healing Gauntlet - A pewter bracer designed to fit over the forearm, with the heliodor prominently displayed on the back of the hand and the topaz positioned at the wrist. Both gems are surrounded by zinc settings shaped like blooming flowers. Bronze veins run throughout the pewter like leaf patterns, serving as the injury detection network. Activated by clenching the fist. Verdant Medallion - A circular pewter pendant with an intricate tree design - the heliodor forms the "sun" above the tree while the topaz represents its roots below. Zinc branches connect the two stones in an elegant pattern. Bronze leaves scattered throughout the design serve as injury sensors, darkening when wounds are detected. The central heliodor acts as the activation button. Twin-Stone Scepter - A short pewter rod with bulbous ends, each containing one of the polestones in elaborate zinc cages that resemble crystalline flowers. Bronze bands wrap around the handle at regular intervals, providing tactile injury feedback through temperature changes. The device is activated by rotating the heliodor end a quarter turn. Healer's Lens - Resembling a jeweler's loupe, this pewter device has a large heliodor as the primary lens and a smaller topaz as a focusing element. Both are held in zinc mounts with delicate gear-work details. Bronze filaments web across the pewter frame like a spider's web, glowing softly when injuries are present. Activated by squeezing the pewter handle. Life-Light Lantern - A miniature pewter lantern with the heliodor and topaz positioned as the "flames" within, surrounded by zinc flame-patterns. Bronze mesh panels on each side of the lantern serve as injury sensors, growing warm near wounds. The entire top of the lantern (encompassing both gems) can be pressed to activate the healing effect. Grove Guardian - Shaped like a stylized tree branch, this curved pewter device has the heliodor nestled where a leaf would grow and the topaz positioned like a piece of fruit. Zinc wire forms delicate leaf patterns around each stone. Bronze bark texture covers the handle, with certain raised sections that tingle when detecting injuries. Activated by stroking the bronze bark in a specific pattern. Twin-Flame Circlet - A simple pewter headband with the two polestones mounted like twin stars - the heliodor on the left temple, topaz on the right. Zinc settings radiate like coronas around each gem. Thin bronze wires follow the curve of the circlet, serving as injury sensors that create a slight humming when wounds are present. Activated by touching both gemstones at once. Lightrial Fabrial Designs Shockspren seemed to fit the best. Diamond was the obvious choice (Essence of Lucentia (Light)) and it's already used in light-producing fabrials. The gemstone is set in zinc to increase spren manifestation. Main body is pewter (augments energy sources) with bronze to control the targeting effect. Shockbaton - A sleek pewter cylinder the size of a dagger hilt, with intricate bronze threading spiraling around its surface like metallic veins. The brilliant diamond sits prominently at one end, held in a zinc crown that resembles crystallized lightning. Thin bronze wires extend from the crown toward a pewter activation stud on the side. Radiance Seal - An ornate pewter disk about the size of a large medallion, with bronze filigree forming concentric targeting circles across its face. The central diamond blazes with inner light, set in a raised zinc bezel shaped like radiating sunburst. The entire device pulses faintly with trapped energy. Stormguard - A pewter gauntlet attachment shaped like an elongated teardrop, designed to rest along the forearm. Bronze conduits run along its length like exposed clockwork, culminating in a zinc-framed diamond that crowns the device. The gemstone can be pressed like a button to activate. Dazzleorb - A compact pewter sphere with bronze geometric etchings covering its surface in maze-like patterns. The diamond floats seemingly within a zinc cage at the sphere's center, visible through carefully placed gaps. The entire device can be squeezed to trigger activation. Conductor's Gleam - An elegant pewter rod resembling a conductor's baton, with bronze wire wrapped in precise coils along its length. The diamond rests at the tip within a zinc housing shaped like a miniature lantern. A bronze trigger mechanism near the handle controls activation. Focusband - A pewter bracer designed to wrap around the wrist, with bronze targeting sensors embedded like small lenses across its surface. The diamond sits in a zinc setting that resembles a camera aperture, able to iris open and closed. The gemstone itself serves as the activation button. Gleaming Eye - A pewter handheld device shaped like a stylized eye, with bronze details forming the "iris" patterns around the central zinc-framed diamond "pupil." The entire eye can be gripped and the diamond pressed to unleash the dazzling effect. Stormheart - A pewter pendant worn on a bronze chain, crafted to look like a miniature storm cloud. The diamond sits within a zinc lightning bolt that pierces through the cloud's center. The pendant grows warm when activated by pressing the gemstone. Precisionbeam - A pewter cylindrical device with bronze focusing rings that can rotate around its circumference for targeting precision. The diamond sits in a zinc mount at the business end, surrounded by small bronze apertures that help direct the light burst. A pewter trigger extends from the main body. Shockbox - A pewter box small enough to fit in a palm, with bronze corner reinforcements and intricate targeting runes etched into its surface. The diamond sits flush with the top face in a zinc bezel, and the entire top plate can be pressed down to activate the device. Painrial (combo of amplifying/numbing) Fabrial Designs A bit easier because the books already gave us a description of the standard amplifying painrial and standard numbing painrial (ruby in brass), though I did deviate from them a bit. I chose painspren, of course, and stuck with ruby. It's set in brass (with tin body) for numbing mode, and set in zinc (with pewter knife blades) for amplification mode. Scorpion's Embrace - A fist-sized device resembling a mechanical scorpion, with six articulated tin legs that curve inward to grip flesh. The central ruby pulses with trapped orange painspren like flickering embers. When in numbing mode, the brass housing around the gem dims its glow to a warm amber, while the tin body feels cool to the touch. A brass switch flips the device into amplification mode, causing the housing to shift to zinc-bright silver as three pewter stingers telescope out from the "tail," each adjustable from needle-prick to dagger-length. Surgeon's Gauntlet - Crafted like an ornate brass knuckleduster that wraps around the forearm with five curved tin claws. The central ruby sits prominently on the knuckles, containing swirling painspren that look like trapped orange hands reaching outward. A rotating bezel around the gem switches between polished brass (numbing) and bright zinc (amplifying). In weapon mode, three pewter blades slide out between the knuckles with satisfying clicks, their lengths controlled by brass dials on the wrist mount. Crimson Lotus - Designed as a blooming mechanical flower with eight petal-like tin appendages that close around a limb like a lotus bud. The ruby core blazes with painspren that writhe like tiny orange sinew. When set to numbing, the brass petals have an aged, tarnished look that seems to absorb light. Switching to zinc mode makes the device gleam like new silver, while three hidden pewter thorns emerge from the stem with adjustable extension controls hidden beneath decorative brass leaves. Brass Scarab - Shaped like an oversized scarab beetle with a domed tin carapace and six jointed legs that lock around limbs with brass clasps. The ruby abdomen glows with restless painspren resembling orange beetles crawling inside the gem. The brass wing-cases can flip open to reveal zinc mechanisms underneath, transforming the peaceful numbing scarab into a weapon. Three pewter mandibles extend from the head section, their length controlled by rotating the brass horn-like protrusion above the ruby. Mourning Star - A spherical tin core surrounded by eight curved brass spikes that bend inward to grip flesh, resembling a medieval morning star. The ruby sits at the apex, flickering with painspren that pulse like a heartbeat of orange light. A brass ring around the gem's setting rotates to switch modes—when turned, zinc elements slide up through grooves in the tin, brightening the device. Three of the spikes are actually retractable pewter blades that can extend up to four different lengths via small brass adjustment wheels. Alchemist's Vice - Built like an elegant brass and tin vise that opens on hinges to clamp around appendages. The ruby pressure point glows with swirling painspren resembling orange liquid mercury. Brass thumbscrews tighten the device in numbing mode, their duller finish seeming to soak up the gem's radiance. Flipping a brass lever transforms key components to zinc, making them gleam while three pewter spikes emerge from the lower jaw, adjustable via delicate gear mechanisms visible through brass fretwork. Spider's Bite - Designed as a mechanical spider with a tin body and eight segmented legs that wrap and lock with brass joints. The ruby thorax pulses with painspren that skitter like orange spiders inside the gem. When numbing, the brass chelicerae (fangs) remain retracted and dull. Activating amplification mode causes zinc components to slide forward, brightening the device as three pewter fangs extend from the head section with four distinct length settings controlled by rotating the brass cephalothorax. Brass Orchid - An artistic piece resembling a corsage or brooch, with flowing tin petals that curve around to embrace flesh. The ruby center burns with graceful painspren that dance like orange flower petals in the wind. The brass stem and setting create a warm, muted glow in numbing mode. A hidden catch releases zinc elements that transform the elegant orchid into something predatory, with three pewter thorns sliding out from the stem like deadly pistils, their extension controlled by pressing sequential brass buds. Clockwork Crab - A mechanical crustacean with a tin shell and six brass pincers that close around limbs with satisfying clicks. The ruby carapace glows with restless painspren that move like trapped orange crabs. Brass gears visible through crystal windows operate the numbing function with methodical precision. A brass key-wind mechanism switches the device to zinc mode, causing previously hidden gears to engage and three pewter claws to emerge from the underside, each adjustable through a system of visible brass clockwork. Physician's Paradox - Resembling a medical instrument crossed with jewelry, featuring a tin base with curved brass arms that embrace like a supportive brace. The central ruby contains painspren that flow like orange blood through crystalline veins. In numbing mode, the brass components have a healing, therapeutic appearance with soft edges. Switching to zinc transforms the device into something surgical and menacing, as three pewter scalpels emerge from hidden sheaths, their cutting lengths precisely adjustable via brass micrometers etched with measurement marks. Projectile Fabrial Designs This one is going to depend on the propulsion mechanism, and I went with air/compressed gas rather than heat, explosion, or magnetic. Thus, I picked sapphire (air) and smokestone (compressed gas), each with a windspren, set in zinc for increasing spren manifestation intensity. Main body is iron for repelling projectiles and pewter for amplifying the launching force. Storm Launcher - A sleek, rifle-like device with a pewter barrel reinforced by iron bands. The sapphire sits prominently in a zinc housing at the rear breach, glowing with soft blue light as windspren ribbon around it. The smokestone is mounted in a secondary zinc chamber along the barrel's underside, its grey translucency swirling with trapped windspren. Delicate pewter filigree connects both gemstones to an iron trigger mechanism. The weapon has an elegant curve like a crescent moon. Twin-Heart Projector - Designed like an oversized crossbow pistol, this fabrial features two prominent gemstone chambers. The sapphire gleams in a zinc-lined socket at the weapon's center, while the smokestone rests in a parallel zinc housing. Both stones pulse in alternating rhythm as their windspren create visible air currents. The iron frame is reinforced with pewter supports that branch like lightning, converging at a trigger formed from polished iron. A pewter sight runs along the top. Gale Cannon - This compact, cannon-like device has a wide iron barrel tapering to a narrow muzzle. The sapphire is set into a rotating zinc chamber at the breach, allowing it to be spun for activation. Below it, the smokestone sits in a stationary zinc mount with pewter cooling fins. Iron bands wrap around the weapon for grip, while pewter inlays channel energy between the gemstones. The trigger is a simple zinc button that activates both stones simultaneously. Zephyr Caster - Resembling an ornate hand-held telescope, this device extends when armed. The sapphire is housed in the main zinc body, visible through crystal windows, while the smokestone sits in an extendable pewter-and-iron chamber. When collapsed, it's pocket-sized; when extended, it forms a proper aiming device. Intricate pewter etchings spiral around the iron barrel, and the activation requires pressing both gemstones in sequence while extended. Dual Storm Rod - A staff-like weapon meant to be held with both hands, about three feet long. The sapphire crowns the tip in a zinc cage surrounded by iron prongs, while the smokestone sits in a zinc chamber at the weapon's balance point. Pewter wire spirals down the iron shaft, connecting both gemstones to a pressure-sensitive pewter grip. When squeezed, both windspren activate simultaneously, launching projectiles from the crown end with tremendous force. Breath Thrower - This weapon resembles a mechanical gauntlet worn on the forearm. The sapphire is set into the zinc backplate, while the smokestone sits in a zinc chamber along the forearm guard. Iron fingers extend forward as the barrel, reinforced with pewter joints. The wielder aims by pointing, and activates by pressing their thumb against the sapphire while making a fist. Pewter tracery along the iron fingers glows when charged. Wind Weaver - Designed like an elegant scepter with a flared, trumpet-like end, this device balances artistry with function. Both gemstones sit side by side in ornate zinc settings at the weapon's midpoint - the sapphire in a star-shaped housing, the smokestone in a cloud-like mount. The iron shaft is wrapped with pewter bands, and the flared end serves as both muzzle and focusing chamber. A delicate trigger mechanism is hidden within the pewter grip wrapping. Pressure Pike - A spear-like weapon with a hollow iron shaft and pewter spearhead that opens to reveal the barrel. The sapphire is mounted in a zinc collar just behind the spearhead, while the smokestone sits in a zinc chamber at the weapon's center of gravity. Pewter supports run the length of the iron shaft, and the weapon can be used as both a melee weapon and ranged projector. Activation requires twisting the zinc collar while pressing the smokestone. Vortex Wand - A compact wand-like device with an iron core wrapped in pewter wire. The sapphire sits at the tip in a zinc crown that can rotate freely, while the smokestone is housed in a zinc chamber that slides along grooves in the handle. The wielder aims by pointing and adjusts power by sliding the smokestone position. Both stones glow brighter as they're moved closer together, and activation requires pressing a hidden pewter stud while the gemstones align. Gust Gauntlets - A pair of matching devices worn as bracers, designed to work together. Each bracer has one gemstone - left arm bears the sapphire in a zinc mount, right arm the smokestone in its own zinc housing. Iron plates protect the forearms while pewter channels connect to finger-mounted triggers. The wielder aims by bringing both arms together and pressing triggers simultaneously, creating a focused projectile launch from the space between their hands where the two windspren effects converge.
-
These are rough ideas at this point, very much a work in progress, and so I would love to get your feedback. My goal is to make it not overpowered. One of my character ideas is a melee crafter who crafts his own weapon and armor, eventually out of aluminum (either from getting an aluminum Soulcaster as a reward, or if my GM thinks that is OP, getting enough aluminum to make my weapon and armor as a reward). What I'm trying to do is not directly covered in the rules, but some adjacent things are covered in the rules: The rules for Stonewalkers adventure includes aluminum manacles, so by comparing normal manacles to aluminum manacles, here are the differences - easier to break (Athletics DC is 5 lower to break them) and they don't take damage from a Shardblade or Surges (spirit damage). Weight is lower also. half-shards and Shardplate have charges and spending a charge increases deflect value by +10 and it applies to all kinds of damage, including spirit and vital. A lucky hit (i.e. an Opportunity) against Shardplate can cause it to lose a charge. Shields, since they are Defensive, can be used for cover with the Brace action provided that they reasonably can provide cover - i.e. a normal shield can't do this against a Shardblade. Same with other Defensive weapons. So here are my thoughts: All aluminum items - how to implement "easier to break" and "lighter" Option 1: crafting an aluminum item automatically ends up with the "half weight" upgrade and the drawback of "The item is delicate. A Complication on any test using the item causes it to break." This upgrade/drawback takes the place of one upgrade/drawback you'd normally get based on how well you rolled on your Crafting test. Option 2: the above upgrade/drawback are in addition to the normal upgrades/drawbacks you'd get based on how well you rolled on your Crafting test. I currently like the second option better. Aluminum armor (basically a weaker version of half-shard) Easier to break and lighter (see above) Can only apply to metal armor. Does not have charges and cannot increase deflect value by +10 by spending a charge. Deflect value can only reduce spirit damage but not vital damage since this armor doesn't fully encase like Plate and it doesn't make sense to me that the armor helps you take less damage from poison. Aluminum shield (or any weapon with the Defensive trait) Easier to break and lighter (see above) Does not have charges and cannot increase deflect value by +10 by spending a charge. So, you might still take damage from a Blade, but less. Since shields are Defensive, you can use the Brace action with the shield as cover against Shardblade since it now reasonably can provide cover against a Blade, unlike a normal shield. Same with other Defensive weapons. Aluminum weapon I'm least sure of how to implement "aluminum weapons can damage Shardplate, but not as well as a Shardblade can, but better than a normal weapon (which requires a lucky hit i.e. an Opportunity)". Easier to break and lighter (see above) Option 1: Having aluminum weapon means I can raise the stakes (ignoring a Complication) when striking someone in Shardplate and if I roll an Opportunity, the Shardplate loses one charge as per the normal rules. Option 2: as above but don't ignore Complications, so your weapon might break. This one makes less sense to me since we don't see it in Adolin's duel with Abidi. Option 3: roll e.g. a d4 or a d6 and on the highest number, treat it as if you rolled an Opportunity and the Shardplate loses one charge as per the normal rules. This allows you to tweak the odds of getting a lucky hit - the normal plot die would give you 1/3 odds, which is too high, Adolin knows it will take 4 hits to the exact same spot to cause Plate to crack. Option 4: don't worry about implementing this at all. I'm currently leaning towards option 3 but don't know which odds to use. Maybe it's based on your heavy/light weapons skill ranks, with d4 being for 5 ranks, d6 for 4 ranks, d8 for 3, d10 for 2, and d12 for 1 rank. As I said, this is very much a work in progress and I'll need to discuss with my GM to make sure it's not too OP. I'd love to get your feedback!
-
Kholinar was not a Dawncity but was built on the site of one. Sesamalex Dar was a Dawncity. Singers only comprised 1/10 of the population of Alethkar. In my mind, that makes the singers the equivalent of lighteyes in occupied Alethkar (though lighteyes might have been a smaller percentage of the population, I don't know for sure).
-
Shardplate is definitely weaker in game than in the books - in WaT, it takes four strikes of an aluminum weapon to the exact same spot of Plate to shatter it, and even more so for a different kind of weapon. But in the game, Plate can only deflect four attacks before it runs out of charges, whether or not it's in the same exact spot. Stonewards also can take more squires than most orders. Most orders have a maximum number of squires equal to their Ideal they've sworn, so 4 at high levels. Stonewards max at their level rather than Ideal. Windrunners have even more, max is twice their level. The stat blocks for Skybreaker enemies has a boost to sifting the guilty from the innocent - they get advantage on Deduction or Insight rolls to determine truth. No such power exists for players. The closest you can get is Sleuth's Instincts from the Investigator path, where if you know a character's motivation, you can tell when they are lying to you.
-
How similar is each Radiant Order? (Based on the quiz)
mike.the.monk replied to mike.the.monk's topic in Stormlight Archive
In this context, "inherently similar" means "would score a high percent as the other order on the quiz", which happens because the two orders have similar answers on many of the questions. For example, a 100% Windrunner would get 70% Skybreaker and 40% Elsecaller. -
A friend of mine took the quiz and got Willshaper and Lightweaver as his top two, but those were my bottom two. It got me wondering whether those two Orders are inherently closer or if they happened to be so. (by the way, the answer is inherently closer) So, in typical Truthwatcher fashion, I made it into a spreadsheet to answer the question - how similar is the ideal Windrunner to the ideal Skybreaker, and so on for the other combinations? (ideal = getting 100% alignment with that Order on the quiz) Results are below, sorted by order. As a follow up, I wanted to know which questions were the biggest distinguishing factors between each pair of Orders. For example, my top two are Truthwatcher and Skybreaker. Skybreaker is the second-most similar to Truthwatcher, and the differences between the two are driven by the following questions: confident vs. needs reassurance, wolf pack vs. lone wolf, leader vs. facilitator, book smart vs. street smart, competitive vs casual. Methodology, for anyone who wants to know exactly what I did. I put in the ideal answer for each Order for each question (e.g. the ideal Windrunner is a 35 out of 100 on heart on sleeve versus poker face, meaning closer to heart on sleeve). for each question, I calculated the distance between the ideal Windrunner vs ideal Skybreaker answers, and same for the other combinations of orders. I squared those distances, just like the quiz does I summed those squared distances. I did NOT adjust the Bondsmith sum by an additional 30% because I was uninterested in doing so. I divided the sum by 120,000 and multiplied by 100, just like the quiz does. smaller numbers mean two Orders are similar. Here are some Orders that tend to cluster together (they are mutually similar): Windrunner / Edgedancer / Bondsmith Windrunner / Skybreaker / Stonewarden Skybreaker / Truthwatcher / Elsecaller Dustbringer / Lightweaver / Willshaper The following Orders are close, starting with the closest: Edgedancer vs. Bondsmith Windrunner vs. Bondsmith Lightweaver vs. Willshaper Windrunner vs. Edgedancer Windrunner vs. Stonewarden Windrunner vs. Skybreaker Skybreaker vs. Stonewarden Dustbringer vs. Willshaper Dustbringer vs. Lightweaver The following Orders are far away, beginning with the furthest away: Dustbringer vs. Truthwatcher Skybreaker vs. Lightweaver Dustbringer vs. Edgedancer Dustbringer vs. Elsecaller Truthwatcher vs. Stonewarden Lightweaver vs. Elsecaller Dustbringer vs. Bondsmith Truthwatcher vs. Lightweaver Skybreaker vs. Dustbringer Windrunner Most similar to Bondsmith, Edgedancer, Stonewarden, Skybreaker Least similar to Dustbringer, Elsecaller, Lightweaver, Truthwatcher Moderately similar: Willshaper Which questions show the most difference between the two Orders? (basically, these questions are what distinguish the two). These start with the largest-difference questions, and the Orders begin with the most similar. Bondsmith - library vs dojo, likes to take things apart vs if it ain't broke don't fix it, creative vs conventional, hotel vs camping, tense vs relaxed, spiritual vs skeptical, down to earth vs head in clouds Edgedancer - down to earth vs head in clouds, hotel vs camping, decisive vs indecisive, creative vs conventional Stonewarden - down to earth vs head in clouds, competitive vs casual, peacemaker vs firebrand, fencing vs boxing, paladin vs rogue, likes change vs likes stability, transparency vs need-to-know Skybreaker - compassionate vs dispassionate, thinks outside the box vs collars inside the lines, letter of the law vs spirit of the law, heart vs head Willshaper - paladin vs rogue, obedient vs rebellious, decisive vs indecisive, guard dog vs alley cat, likes change vs likes stability Truthwatcher - leader vs facilitator, decisive vs indecisive, library vs dojo, book smart vs street smart, confident vs needs reassurance, wolf pack vs lone wolf, heart vs head Lightweaver - decisive vs indecisive, guard dog vs alley cat, tells the truth vs bends the truth, creative vs conventional, paladin vs rogue Elsecaller - wolf pack vs lone wolf, end justifies the means vs honorable actions, paladin vs rogue, library vs dojo, compassionate vs dispassionate, heart on sleeve vs poker face Dustbringer - paladin vs rogue, peacemaker vs firebrand, dependable vs flexible, guard dog vs alley cat, obedient vs rebellious, fencing vs boxing, likes to take things apart vs if it ain't broke don't fix it Skybreaker Most similar to Windrunner, Stonewarden Least similar to Lightweaver, Dustbringer, Willshaper, Edgedancer Moderately similar: Elsecaller, Bondsmith, Truthwatcher Which questions show the most difference between the two Orders? (basically, these questions are what distinguish the two). These start with the largest-difference questions, and the Orders begin with the most similar. Windrunner - compassionate vs dispassionate, thinks outside the box vs collars inside the lines, letter of the law vs spirit of the law, heart vs head Stonewarden - thinks outside the box vs. colors inside the lines, hotel vs. camping, down to earth vs. head in the clouds Elsecaller - wolf pack vs. lone wolf, thinks outside the box vs. colors inside the lines, end justifies the means vs. honorable actions, letter of the law vs. spirit of the law, paladin vs rogue, down to earth vs head in the clouds, likes change vs likes stability Bondsmith - thinks outside the box vs. colors inside the lines, spiritual vs. skeptical, compassionate vs. dispassionate, heart vs. head, letter of the law vs. spirit of the law, likes to take things apart vs. if it ain't broke don't fix it, artistic vs scientific, creative vs conventional, tense vs relaxed Truthwatcher - confident vs. needs reassurance, wolf pack vs. lone wolf, leader vs. facilitator, book smart vs. street smart, competitive vs casual Edgedancer - compassionate vs. dispassionate, heart vs. head, letter of the law vs. spirit of the law, competitive vs. casual, down to earth vs. head in the clouds, spiritual vs skeptical Willshaper - letter of the law vs. spirit of the law, obedient vs. rebellious, thinks outside the box vs. colors inside the lines, paladin vs. rogue Dustbringer - likes to take things apart vs. if it ain't broke don't fix it, paladin vs. rogue, dependable vs. flexible, obedient vs. rebellious, heart vs. head, planner vs. spontaneous Lightweaver - letter of the law vs. spirit of the law, creative vs. conventional, heart vs. head, guard dog vs. alley cat, compassionate vs. dispassionate, heart on sleeve vs. poker face, decisive vs. indecisive, artistic vs. scientific, obedient vs. rebellious, likes to take things apart vs if it ain't broke don't fix it, dependable vs flexible Dustbringer Most similar to Willshaper, Lightweaver, Stonewarden Least similar to Truthwatcher, Edgedancer, Elsecaller, Bondsmith Moderately similar: Windrunner, Skybreaker Which questions show the most difference between the two Orders? (basically, these questions are what distinguish the two). These start with the largest-difference questions, and the Orders begin with the most similar. Willshaper - likes to take things apart vs. if it ain't broke don't fix it, letter of the law vs. spirit of the law, free-spirited vs. disciplined Lightweaver - decisive vs. indecisive, free-spirited vs. disciplined, fencing vs. boxing Stonewarden - dependable vs. flexible, obedient vs. rebellious, likes to take things apart vs. if it ain't broke don't fix it, thinks outside the box vs. colors inside the lines, guard dog vs. alley cat, planner vs. spontaneous Windrunner - paladin vs rogue, peacemaker vs firebrand, dependable vs flexible, guard dog vs alley cat, obedient vs rebellious, fencing vs boxing, likes to take things apart vs if it ain't broke don't fix it Skybreaker - likes to take things apart vs. if it ain't broke don't fix it, paladin vs. rogue, dependable vs. flexible, obedient vs. rebellious, heart vs. head, planner vs. spontaneous Bondsmith - peacemaker vs. firebrand, dependable vs. flexible, obedient vs. rebellious, paladin vs. rogue, fencing vs. boxing Elsecaller - cautious vs. daring, fencing vs. boxing, likes to take things apart vs. if it ain't broke don't fix it, dependable vs. flexible, planner vs. spontaneous, library vs. dojo, heart on sleeve vs. poker face, flamboyant vs. reserved, heart vs. head Edgedancer - fencing vs. boxing, peacemaker vs. firebrand, obedient vs. rebellious, paladin vs. rogue, dependable vs. flexible, cautious vs. daring, competitive vs. casual, guard dog vs. alley cat Truthwatcher - confident vs. needs reassurance, flamboyant vs. reserved, cautious vs. daring, library vs. dojo, heart vs. head, likes to take things apart vs. if it ain't broke don't fix it, book smart vs. street smart, leader vs. facilitator Edgedancer Most similar to Bondsmith, Windrunner Least similar to Dustbringer, Willshaper, Elsecaller, Skybreaker Moderately similar: Truthwatcher, Lightweaver, Stonewarden Which questions show the most difference between the two Orders? (basically, these questions are what distinguish the two). These start with the largest-difference questions, and the Orders begin with the most similar. Bondsmith - cautious vs. daring, heart on sleeve vs. poker face, decisive vs. indecisive Windrunner - down to earth vs head in clouds, hotel vs camping, decisive vs indecisive, creative vs conventional Truthwatcher - down to earth vs. head in the clouds, heart vs. head, spiritual vs. skeptical Lightweaver - tells the truth vs. bends the truth, down to earth vs. head in the clouds, guard dog vs. alley cat, obedient vs. rebellious Stonewarden - hotel vs. camping, competitive vs. casual, creative vs. conventional, fencing vs. boxing Skybreaker - compassionate vs. dispassionate, heart vs. head, letter of the law vs. spirit of the law, competitive vs. casual, down to earth vs. head in the clouds, spiritual vs skeptical Elsecaller - end justifies the means vs. honorable actions, heart vs. head, heart on sleeve vs. poker face, competitive vs. casual, compassionate vs. dispassionate, artistic vs. scientific, wolf pack vs. lone wolf, spiritual vs. skeptical, paladin vs. rogue Willshaper - obedient vs. rebellious, down to earth vs. head in the clouds, hotel vs. camping, paladin vs. rogue, competitive vs. casual Dustbringer - fencing vs. boxing, peacemaker vs. firebrand, obedient vs. rebellious, paladin vs. rogue, dependable vs. flexible, cautious vs. daring, competitive vs. casual, guard dog vs. alley cat Truthwatcher Most similar to Elsecaller, Skybreaker, Windrunner, Edgedancer Least similar to Dustbringer, Stonewarden, Lightweaver Moderately similar: Willshaper, Bondsmith Which questions show the most difference between the two Orders? (basically, these questions are what distinguish the two). These start with the largest-difference questions, and the Orders begin with the most similar. Elsecaller - down to earth vs. head in the clouds, confident vs. needs reassurance, leader vs. facilitator, decisive vs. indecisive, competitive vs. casual, likes change vs. likes stability, tells the truth vs. bends the truth Skybreaker - confident vs. needs reassurance, wolf pack vs. lone wolf, leader vs. facilitator, book smart vs. street smart, competitive vs casual Windrunner - leader vs facilitator, decisive vs indecisive, library vs dojo, book smart vs street smart, confident vs needs reassurance, wolf pack vs lone wolf, heart vs head Edgedancer - down to earth vs. head in the clouds, heart vs. head, spiritual vs. skeptical Willshaper - flamboyant vs. reserved, leader vs. facilitator, heart vs. head, confident vs. needs reassurance, likes change vs. likes stability Bondsmith - leader vs. facilitator, heart vs. head, spiritual vs. skeptical, book smart vs. street smart, confident vs. needs reassurance, down to earth vs. head in the clouds, decisive vs. indecisive Lightweaver - heart vs. head, tells the truth vs. bends the truth, artistic vs. scientific, heart on sleeve vs. poker face, confident vs. needs reassurance, cautious vs. daring, transparency vs. need-to-know Stonewarden - book smart vs. street smart, down to earth vs. head in the clouds, confident vs. needs reassurance, competitive vs. casual, library vs. dojo, decisive vs. indecisive, transparency vs. need-to-know Dustbringer - confident vs. needs reassurance, flamboyant vs. reserved, cautious vs. daring, library vs. dojo, heart vs. head, likes to take things apart vs. if it ain't broke don't fix it, book smart vs. street smart Lightweaver Most similar to Willshaper, Dustbringer Least similar to Skybreaker, Elsecaller, Truthwatcher, Stonewarden Moderately similar: Windrunner, Edgedancer, Bondsmith Which questions show the most difference between the two Orders? (basically, these questions are what distinguish the two). These start with the largest-difference questions, and the Orders begin with the most similar. Willshaper - likes to take things apart vs. if it ain't broke don't fix it, artistic vs. scientific, transparency vs. need-to-know Dustbringer - decisive vs. indecisive, free-spirited vs. disciplined, fencing vs. boxing, Windrunner - decisive vs indecisive, guard dog vs alley cat, tells the truth vs bends the truth, creative vs conventional, paladin vs rogue Edgedancer - tells the truth vs. bends the truth, down to earth vs. head in the clouds, guard dog vs. alley cat, obedient vs. rebellious Bondsmith - tells the truth vs bends the truth, decisive vs indecisive, obedient vs rebellious, guard dog vs alley cat, transparency vs need-to-know, heart on sleeve vs poker face, dependable vs. flexible Stonewarden - creative vs conventional, decisive vs indecisive, dependable vs flexible, artistic vs scientific, guard dog vs alley cat, down to earth vs head in the clouds Truthwatcher - heart vs. head, tells the truth vs. bends the truth, artistic vs. scientific, heart on sleeve vs. poker face, confident vs. needs reassurance, cautious vs. daring, transparency vs. need-to-know Elsecaller - artistic vs. scientific, heart on sleeve vs. poker face, cautious vs. daring, decisive vs. indecisive, planner vs. spontaneous, down to earth vs. head in the clouds Skybreaker - letter of the law vs. spirit of the law, creative vs. conventional, heart vs. head, guard dog vs. alley cat, compassionate vs. dispassionate, heart on sleeve vs. poker face, decisive vs. indecisive, artistic vs. scientific, obedient vs. rebellious, likes to take things apart vs if it ain't broke don't fix it, dependable vs flexible Elsecaller Most similar to Skybreaker, Truthwatcher, Stonewarden, Willshaper Least similar to Dustbringer, Lightweaver, Edgedancer Moderately similar: Bondsmith, Windrunner Which questions show the most difference between the two Orders? (basically, these questions are what distinguish the two). These start with the largest-difference questions, and the Orders begin with the most similar. Skybreaker - wolf pack vs. lone wolf, thinks outside the box vs. colors inside the lines, end justifies the means vs. honorable actions, letter of the law vs. spirit of the law, paladin vs rogue, down to earth vs head in the clouds, likes change vs likes stability Truthwatcher - down to earth vs. head in the clouds, confident vs. needs reassurance, leader vs. facilitator, decisive vs. indecisive, competitive vs. casual, likes change vs. likes stability, tells the truth vs. bends the truth Stonewarden - hotel vs camping, library vs dojo, wolf pack vs lone wolf, cautious vs daring, creative vs conventional, end justifies the means vs honorable actions, fencing vs boxing Willshaper - flamboyant vs reserved, down to earth vs head in the clouds, hotel vs camping, planner vs spontaneous, fencing vs boxing, heart vs head, heart on sleeve vs poker face, cautious vs daring, artistic vs. scientific, free-spirited vs. disciplined Bondsmith - end justifies the means vs honorable actions, artistic vs scientific, cautious vs daring, wolf pack vs lone wolf, spiritual vs skeptical, heart vs head, likes change vs likes stability, likes change vs. likes stability, tells the truth vs. bends the truth Windrunner - wolf pack vs lone wolf, end justifies the means vs honorable actions, paladin vs rogue, library vs dojo, compassionate vs dispassionate, heart on sleeve vs poker face Edgedancer - end justifies the means vs. honorable actions, heart vs. head, heart on sleeve vs. poker face, competitive vs. casual, compassionate vs. dispassionate, artistic vs. scientific, wolf pack vs. lone wolf, spiritual vs. skeptical, paladin vs. rogue Lightweaver - artistic vs. scientific, heart on sleeve vs. poker face, cautious vs. daring, decisive vs. indecisive, planner vs. spontaneous, down to earth vs. head in the clouds Dustbringer - cautious vs. daring, fencing vs. boxing, likes to take things apart vs. if it ain't broke don't fix it, dependable vs. flexible, planner vs. spontaneous, library vs. dojo, heart on sleeve vs. poker face, flamboyant vs. reserved, heart vs. head Willshaper Most similar to Lightweaver, Dustbringer, Windrunner, Stonewarden Least similar to Skybreaker, Edgedancer, Bondsmith, Truthwatcher Moderately similar: Elsecaller Which questions show the most difference between the two Orders? (basically, these questions are what distinguish the two). These start with the largest-difference questions, and the Orders begin with the most similar. Lightweaver - likes to take things apart vs. if it ain't broke don't fix it, artistic vs. scientific, transparency vs. need-to-know Dustbringer - likes to take things apart vs. if it ain't broke don't fix it, letter of the law vs. spirit of the law, free-spirited vs. disciplined Windrunner - paladin vs rogue, obedient vs rebellious, decisive vs indecisive, guard dog vs alley cat, likes change vs likes stability Stonewarden - obedient vs rebellious, down to earth vs head in the clouds, letter of the law vs spirit of the law, free-spirited vs disciplined, creative vs conventional, decisive vs indecisive, transparency vs. need-to-know, dependable vs. flexible Elsecaller - flamboyant vs reserved, down to earth vs head in the clouds, hotel vs camping, planner vs spontaneous, fencing vs boxing, heart vs head, heart on sleeve vs poker face, cautious vs daring, artistic vs. scientific, free-spirited vs. disciplined Truthwatcher - flamboyant vs. reserved, leader vs. facilitator, heart vs. head, confident vs. needs reassurance, likes change vs. likes stability Bondsmith - obedient vs rebellious, flamboyant vs reserved, likes change vs likes stability, likes to take things apart vs if it ain't broke don't fix it, end justifies the means vs honorable actions Edgedancer - obedient vs. rebellious, down to earth vs. head in the clouds, hotel vs. camping, paladin vs. rogue, competitive vs. casual Skybreaker - letter of the law vs. spirit of the law, obedient vs. rebellious, thinks outside the box vs. colors inside the lines, paladin vs. rogue Stonewarden Most similar to Windrunner, Skybreaker Least similar to Truthwatcher, Lightweaver, Edgedancer Moderately similar: Bondsmith, Dustbringer, Willshaper, Elsecaller Which questions show the most difference between the two Orders? (basically, these questions are what distinguish the two). These start with the largest-difference questions, and the Orders begin with the most similar. Windrunner - down to earth vs head in clouds, competitive vs casual, pacemaker vs firebrand, fencing vs boxing, paladin vs rogue, likes change vs likes stability, transparency vs need-to-know Skybreaker - thinks outside the box vs. colors inside the lines, hotel vs. camping, down to earth vs. head in the clouds Bondsmith - creative vs. conventional, hotel vs. camping, competitive vs. casual, transparency vs. need-to-know, peacemaker vs. firebrand, artistic vs. scientific, library vs. dojo, likes change vs. likes stability, fencing vs. boxing Dustbringer - dependable vs. flexible, obedient vs. rebellious, likes to take things apart vs. if it ain't broke don't fix it, thinks outside the box vs. colors inside the lines, guard dog vs. alley cat, planner vs. spontaneous Willshaper - obedient vs rebellious, down to earth vs head in the clouds, letter of the law vs spirit of the law, free-spirited vs discipline, creative vs conventional, decisive vs indecisive, transparency vs. need-to-know, dependable vs. flexible Elsecaller - hotel vs camping, library vs dojo, wolf pack vs lone wolf, cautious vs daring, creative vs conventional, end justifies the means vs honorable actions, fencing vs boxing Edgedancer - hotel vs. camping, competitive vs. casual, creative vs. conventional, fencing vs. boxing Lightweaver - creative vs conventional, decisive vs indecisive, dependable vs flexible, artistic vs scientific, guard dog vs alley cat, down to earth vs head in the clouds Truthwatcher - book smart vs. street smart, down to earth vs. head in the clouds, confident vs. needs reassurance, competitive vs. casual, library vs. dojo, decisive vs. indecisive, transparency vs. need-to-know Bondsmith Most similar to Edgedancer, Windrunner Least similar to Dustbringer, Willshaper, Truthwatcher, Lightweaver, Elsecaller Moderately similar: Stonewarden, Skybreaker Which questions show the most difference between the two Orders? (basically, these questions are what distinguish the two). These start with the largest-difference questions, and the Orders begin with the most similar. Edgedancer - cautious vs. daring, heart on sleeve vs. poker face, decisive vs. indecisive Windrunner - library vs dojo, likes to take things apart vs if it ain't broke don't fix it, creative vs conventional, hotel vs camping, tense vs relaxed, spiritual vs skeptical, down to earth vs head in clouds Stonewarden - creative vs. conventional, hotel vs. camping, competitive vs. casual, transparency vs. need-to-know, peacemaker vs. firebrand, artistic vs. scientific, library vs. dojo, likes change vs. likes stability, fencing vs. boxing Skybreaker - thinks outside the box vs. colors inside the lines, spiritual vs. skeptical, compassionate vs. dispassionate, heart vs. head, letter of the law vs. spirit of the law, likes to take things apart vs. if it ain't broke don't fix it, artistic vs scientific, creative vs conventional, tense vs relaxed Elsecaller - end justifies the means vs honorable actions, artistic vs scientific, cautious vs daring, wolf pack vs lone wolf, spiritual vs skeptical, heart vs head, likes change vs likes stability, likes change vs. likes stability, tells the truth vs. bends the truth Lightweaver - tells the truth vs bends the truth, decisive vs indecisive, obedient vs rebellious, guard dog vs alley cat, transparency vs need-to-know, heart on sleeve vs poker face, dependable vs. flexible Truthwatcher - leader vs. facilitator, heart vs. head, spiritual vs. skeptical, book smart vs. street smart, confident vs. needs reassurance, down to earth vs. head in the clouds, decisive vs. indecisive Willshaper - obedient vs rebellious, flamboyant vs reserved, likes change vs likes stability, likes to take things apart vs if it ain't broke don't fix it, end justifies the means vs honorable actions Dustbringer - peacemaker vs. firebrand, dependable vs. flexible, obedient vs. rebellious, paladin vs. rogue, fencing vs. boxing, leader vs. facilitator


