

Wendy McGee
-
Posts
12 -
Joined
-
Last visited
1 Follower

Wendy McGee's Achievements
22
Reputation
-
That looks awesome! I don't think we will do it now, but possibly in the future because we still think it would be an awesome detail.
-
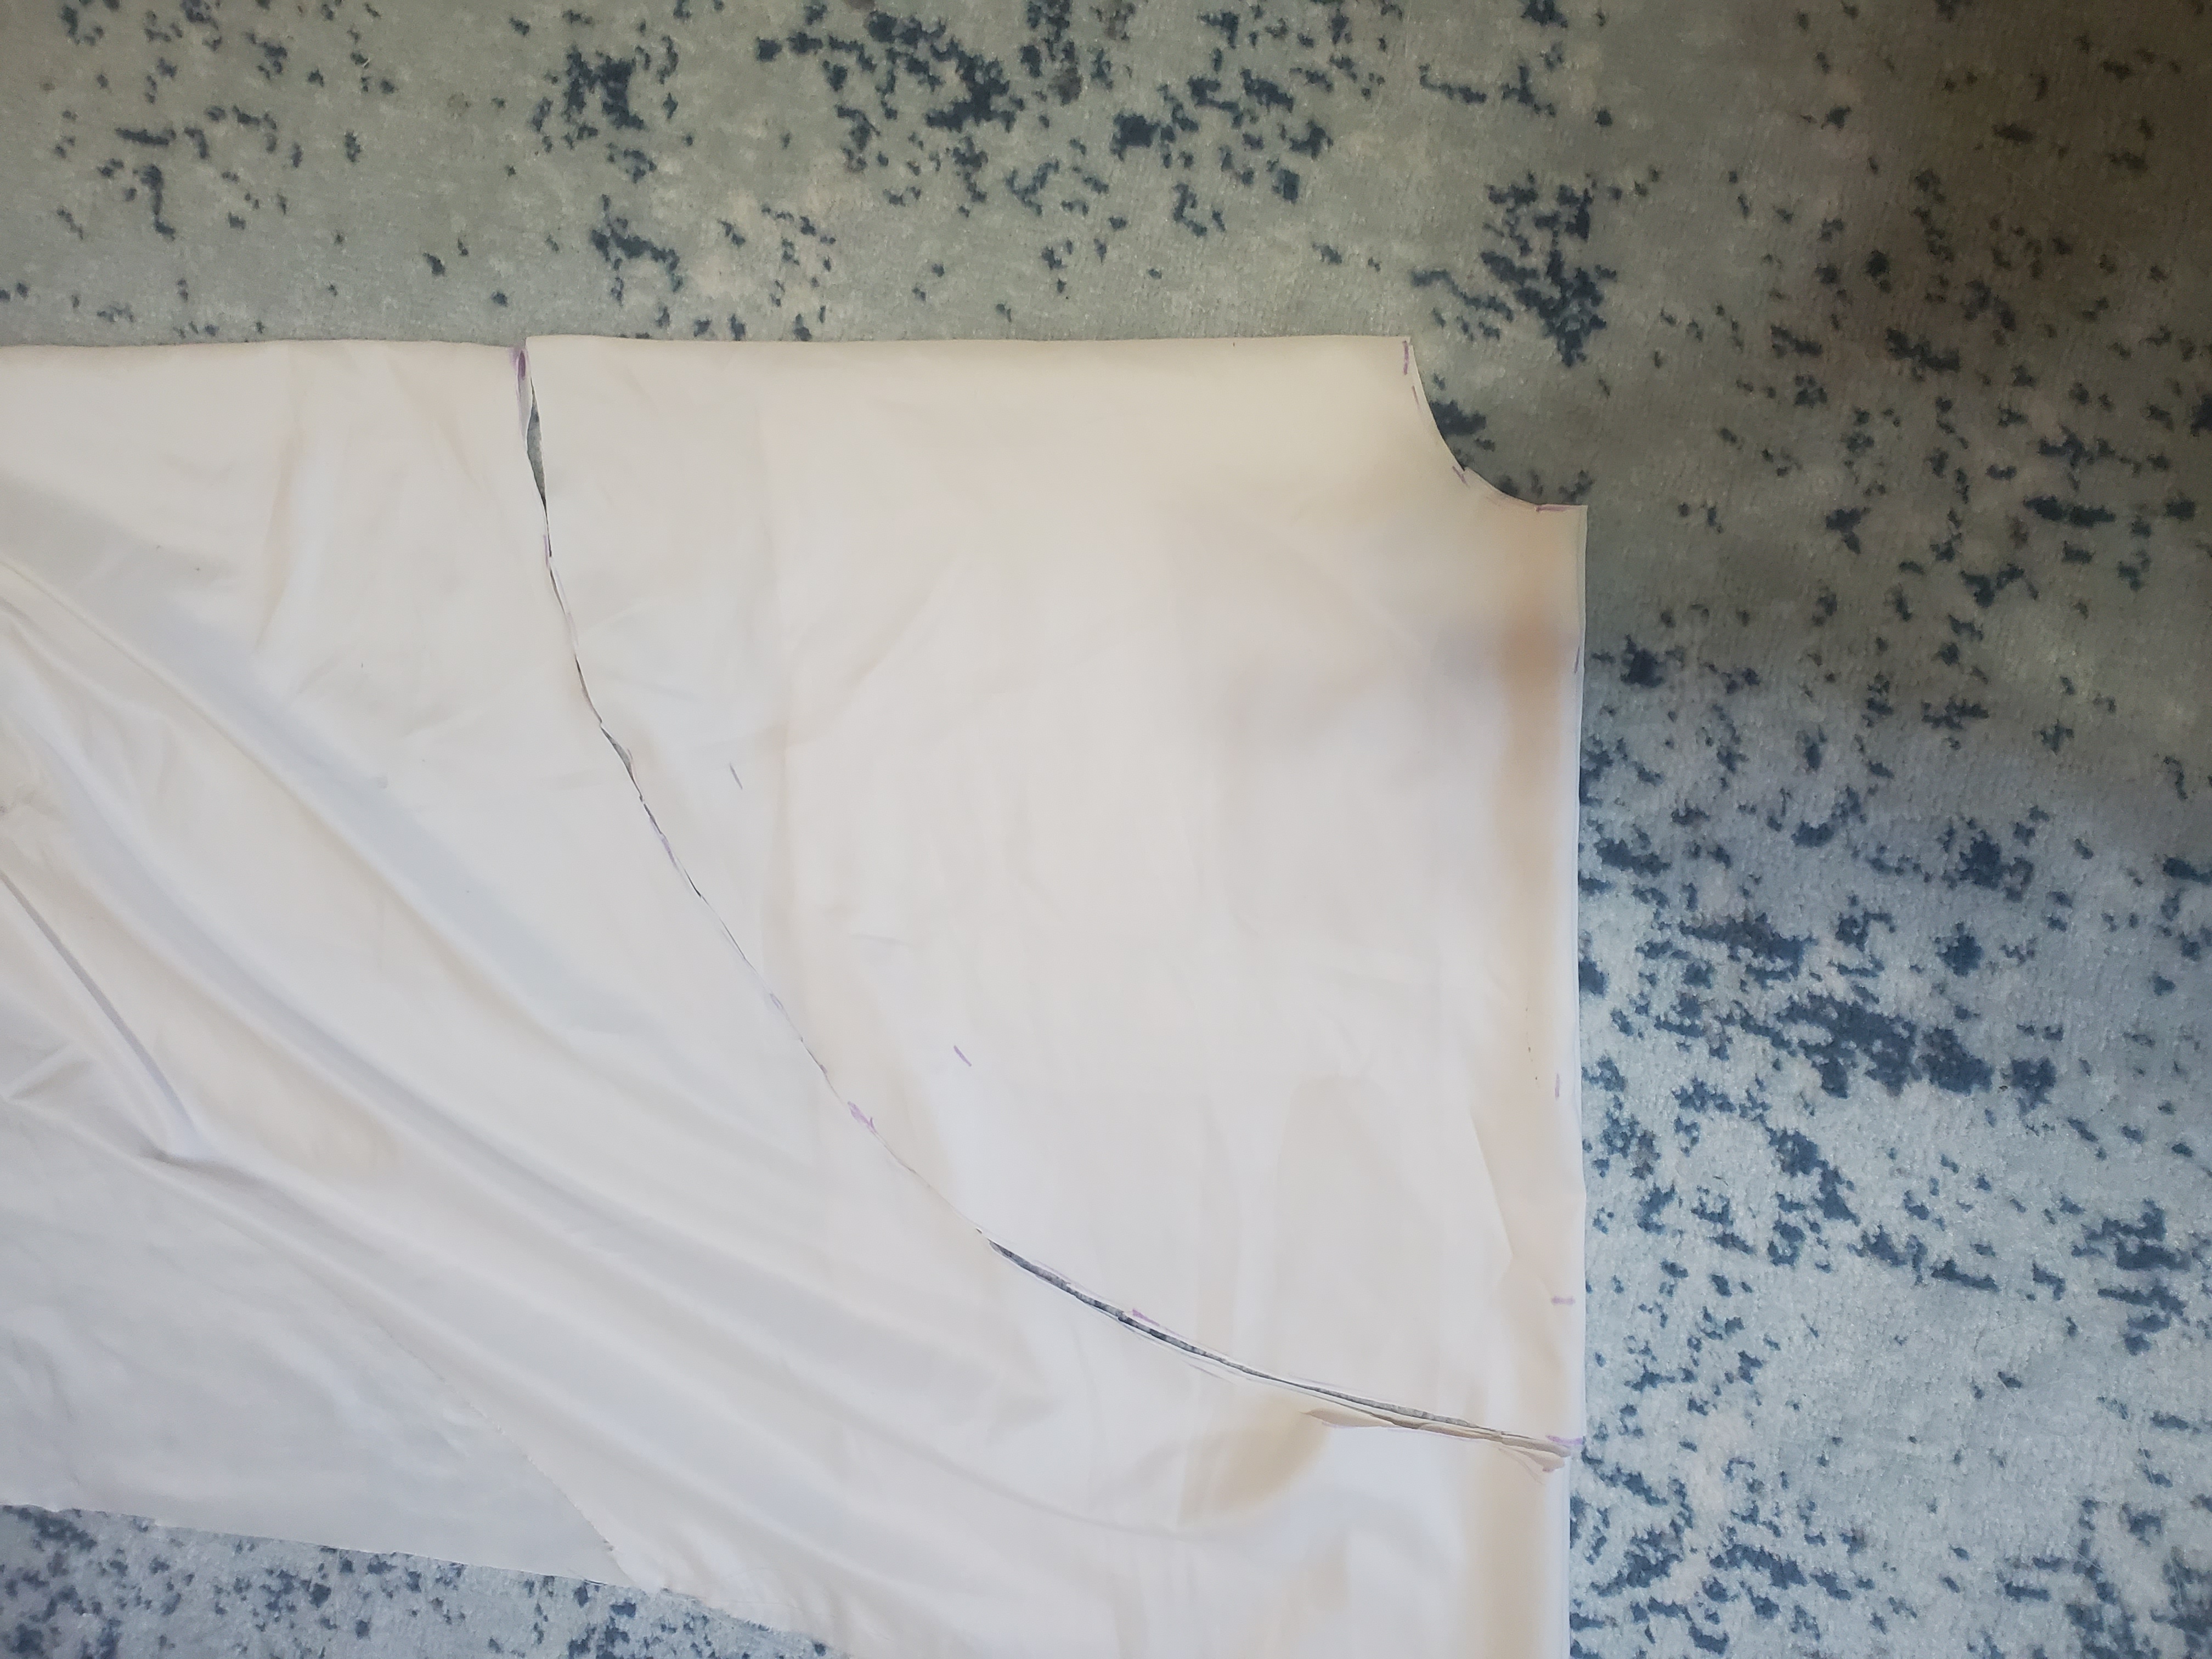
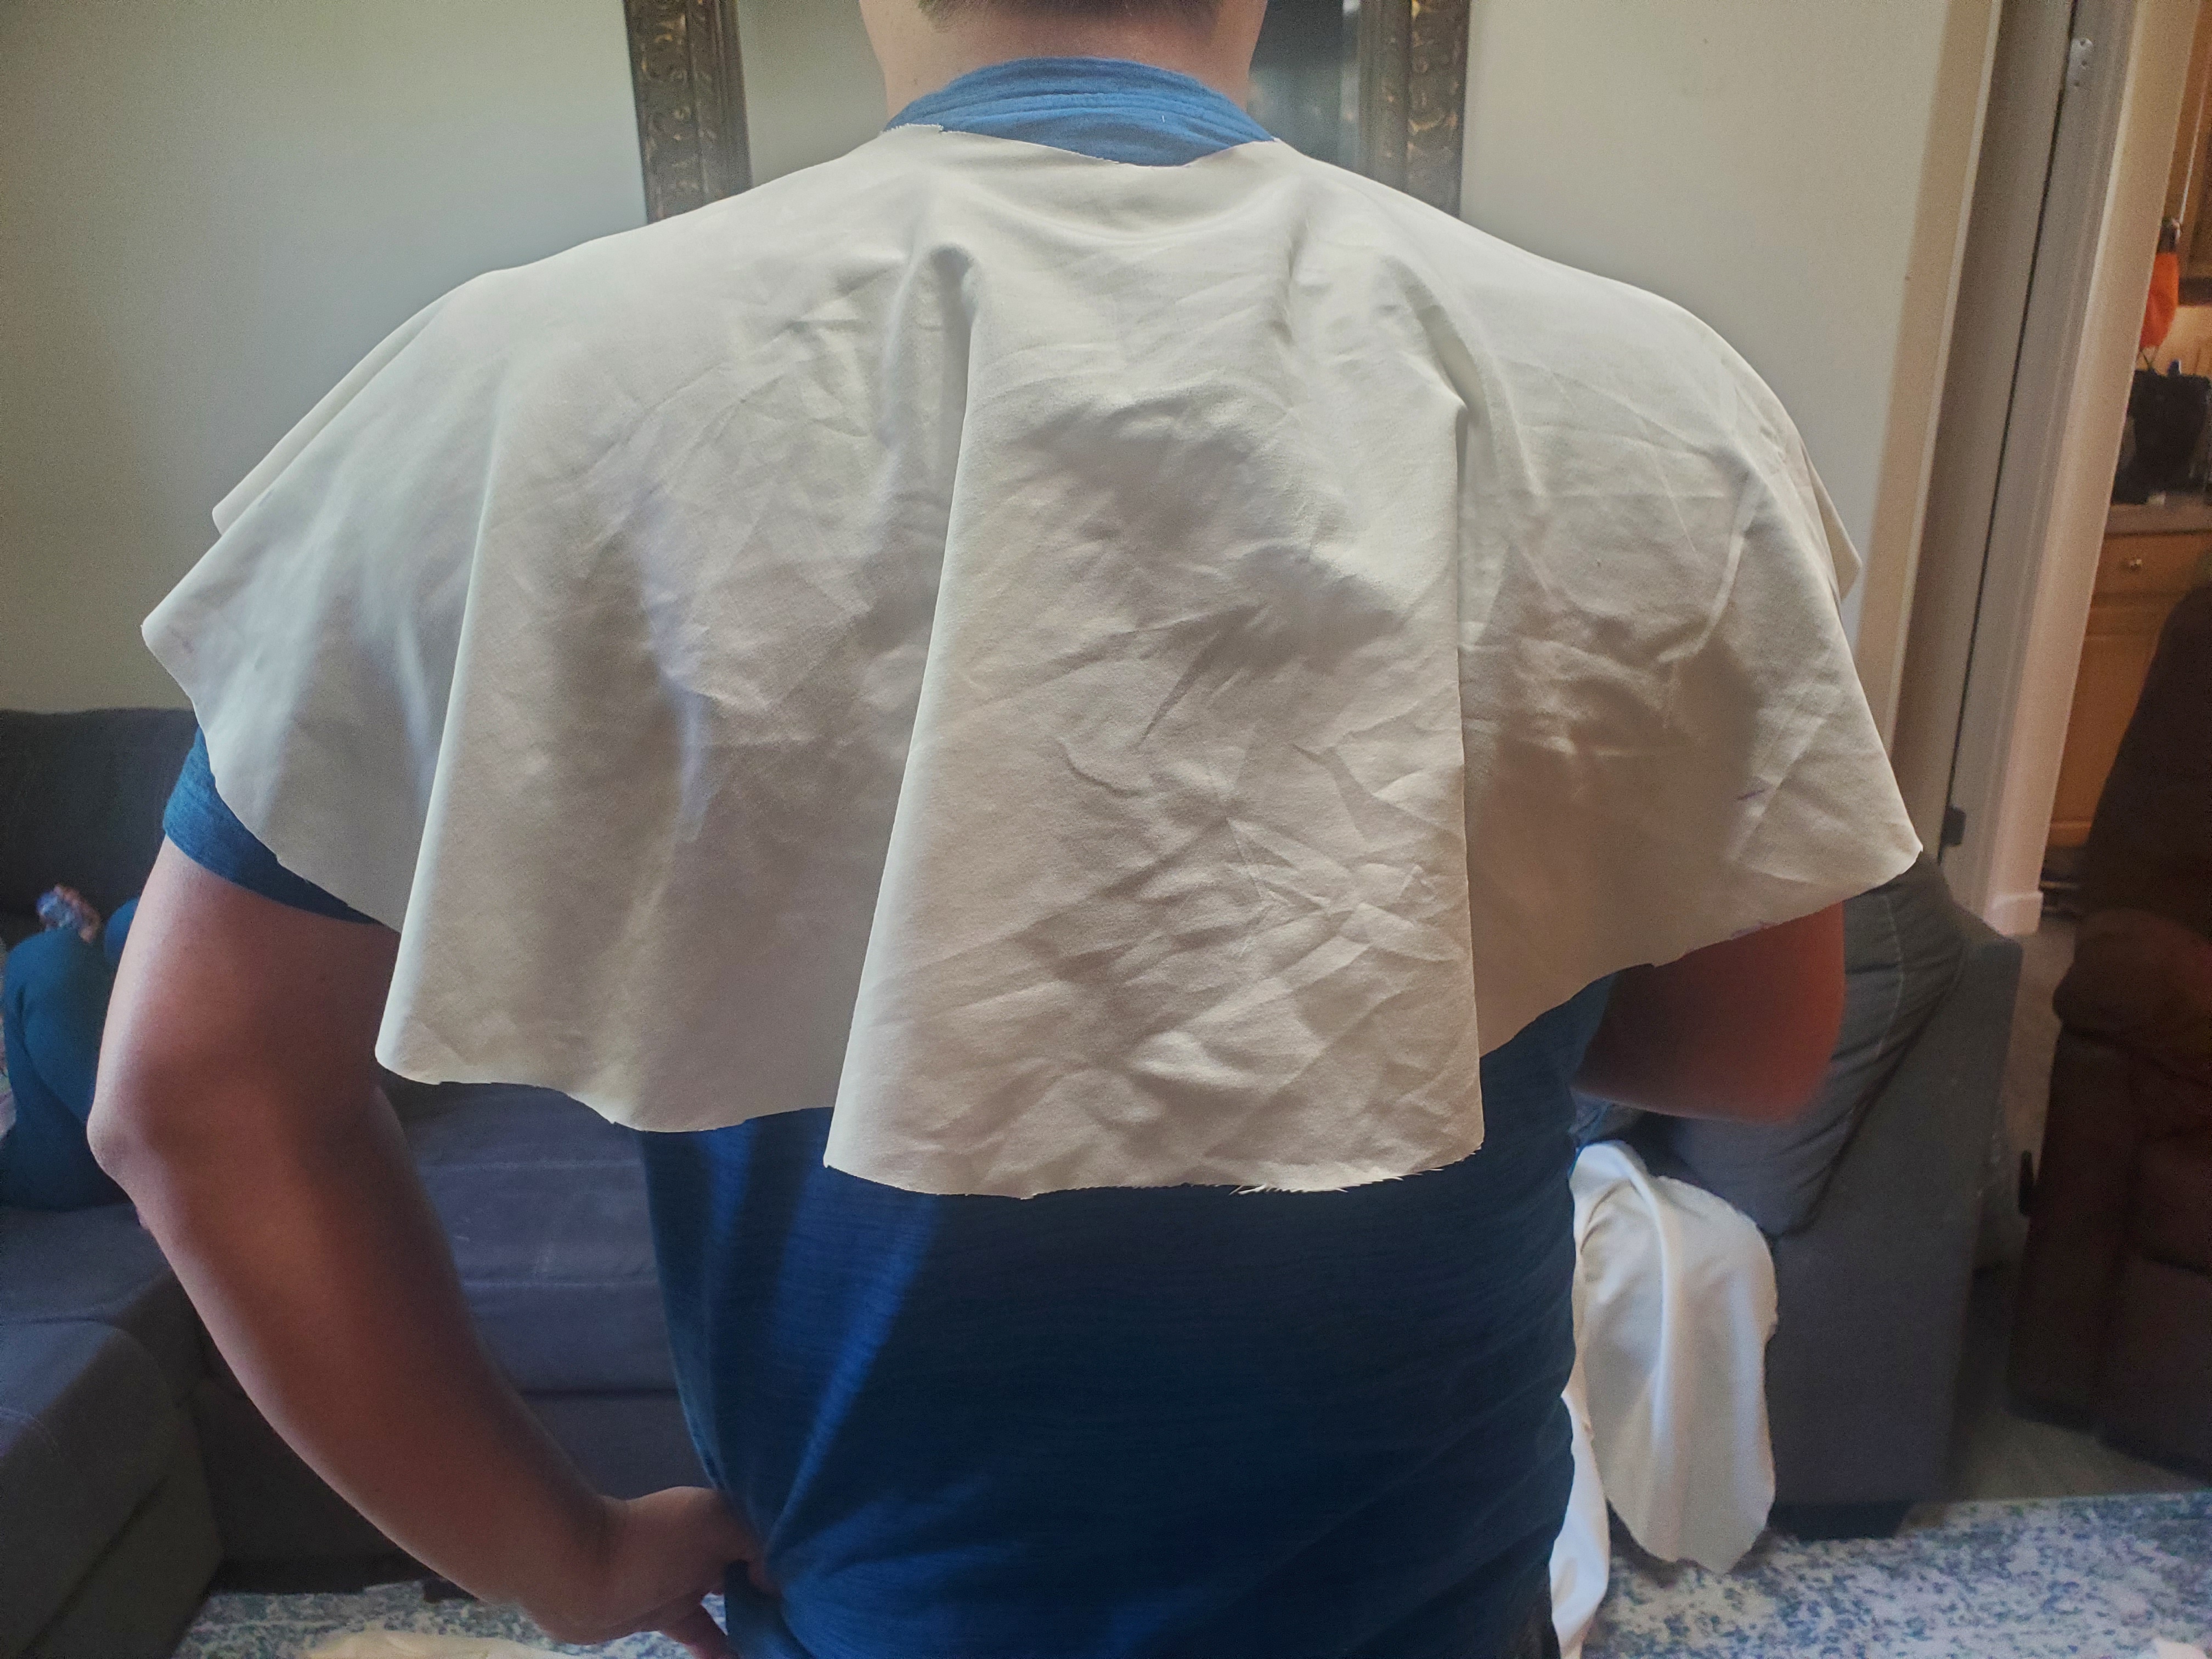
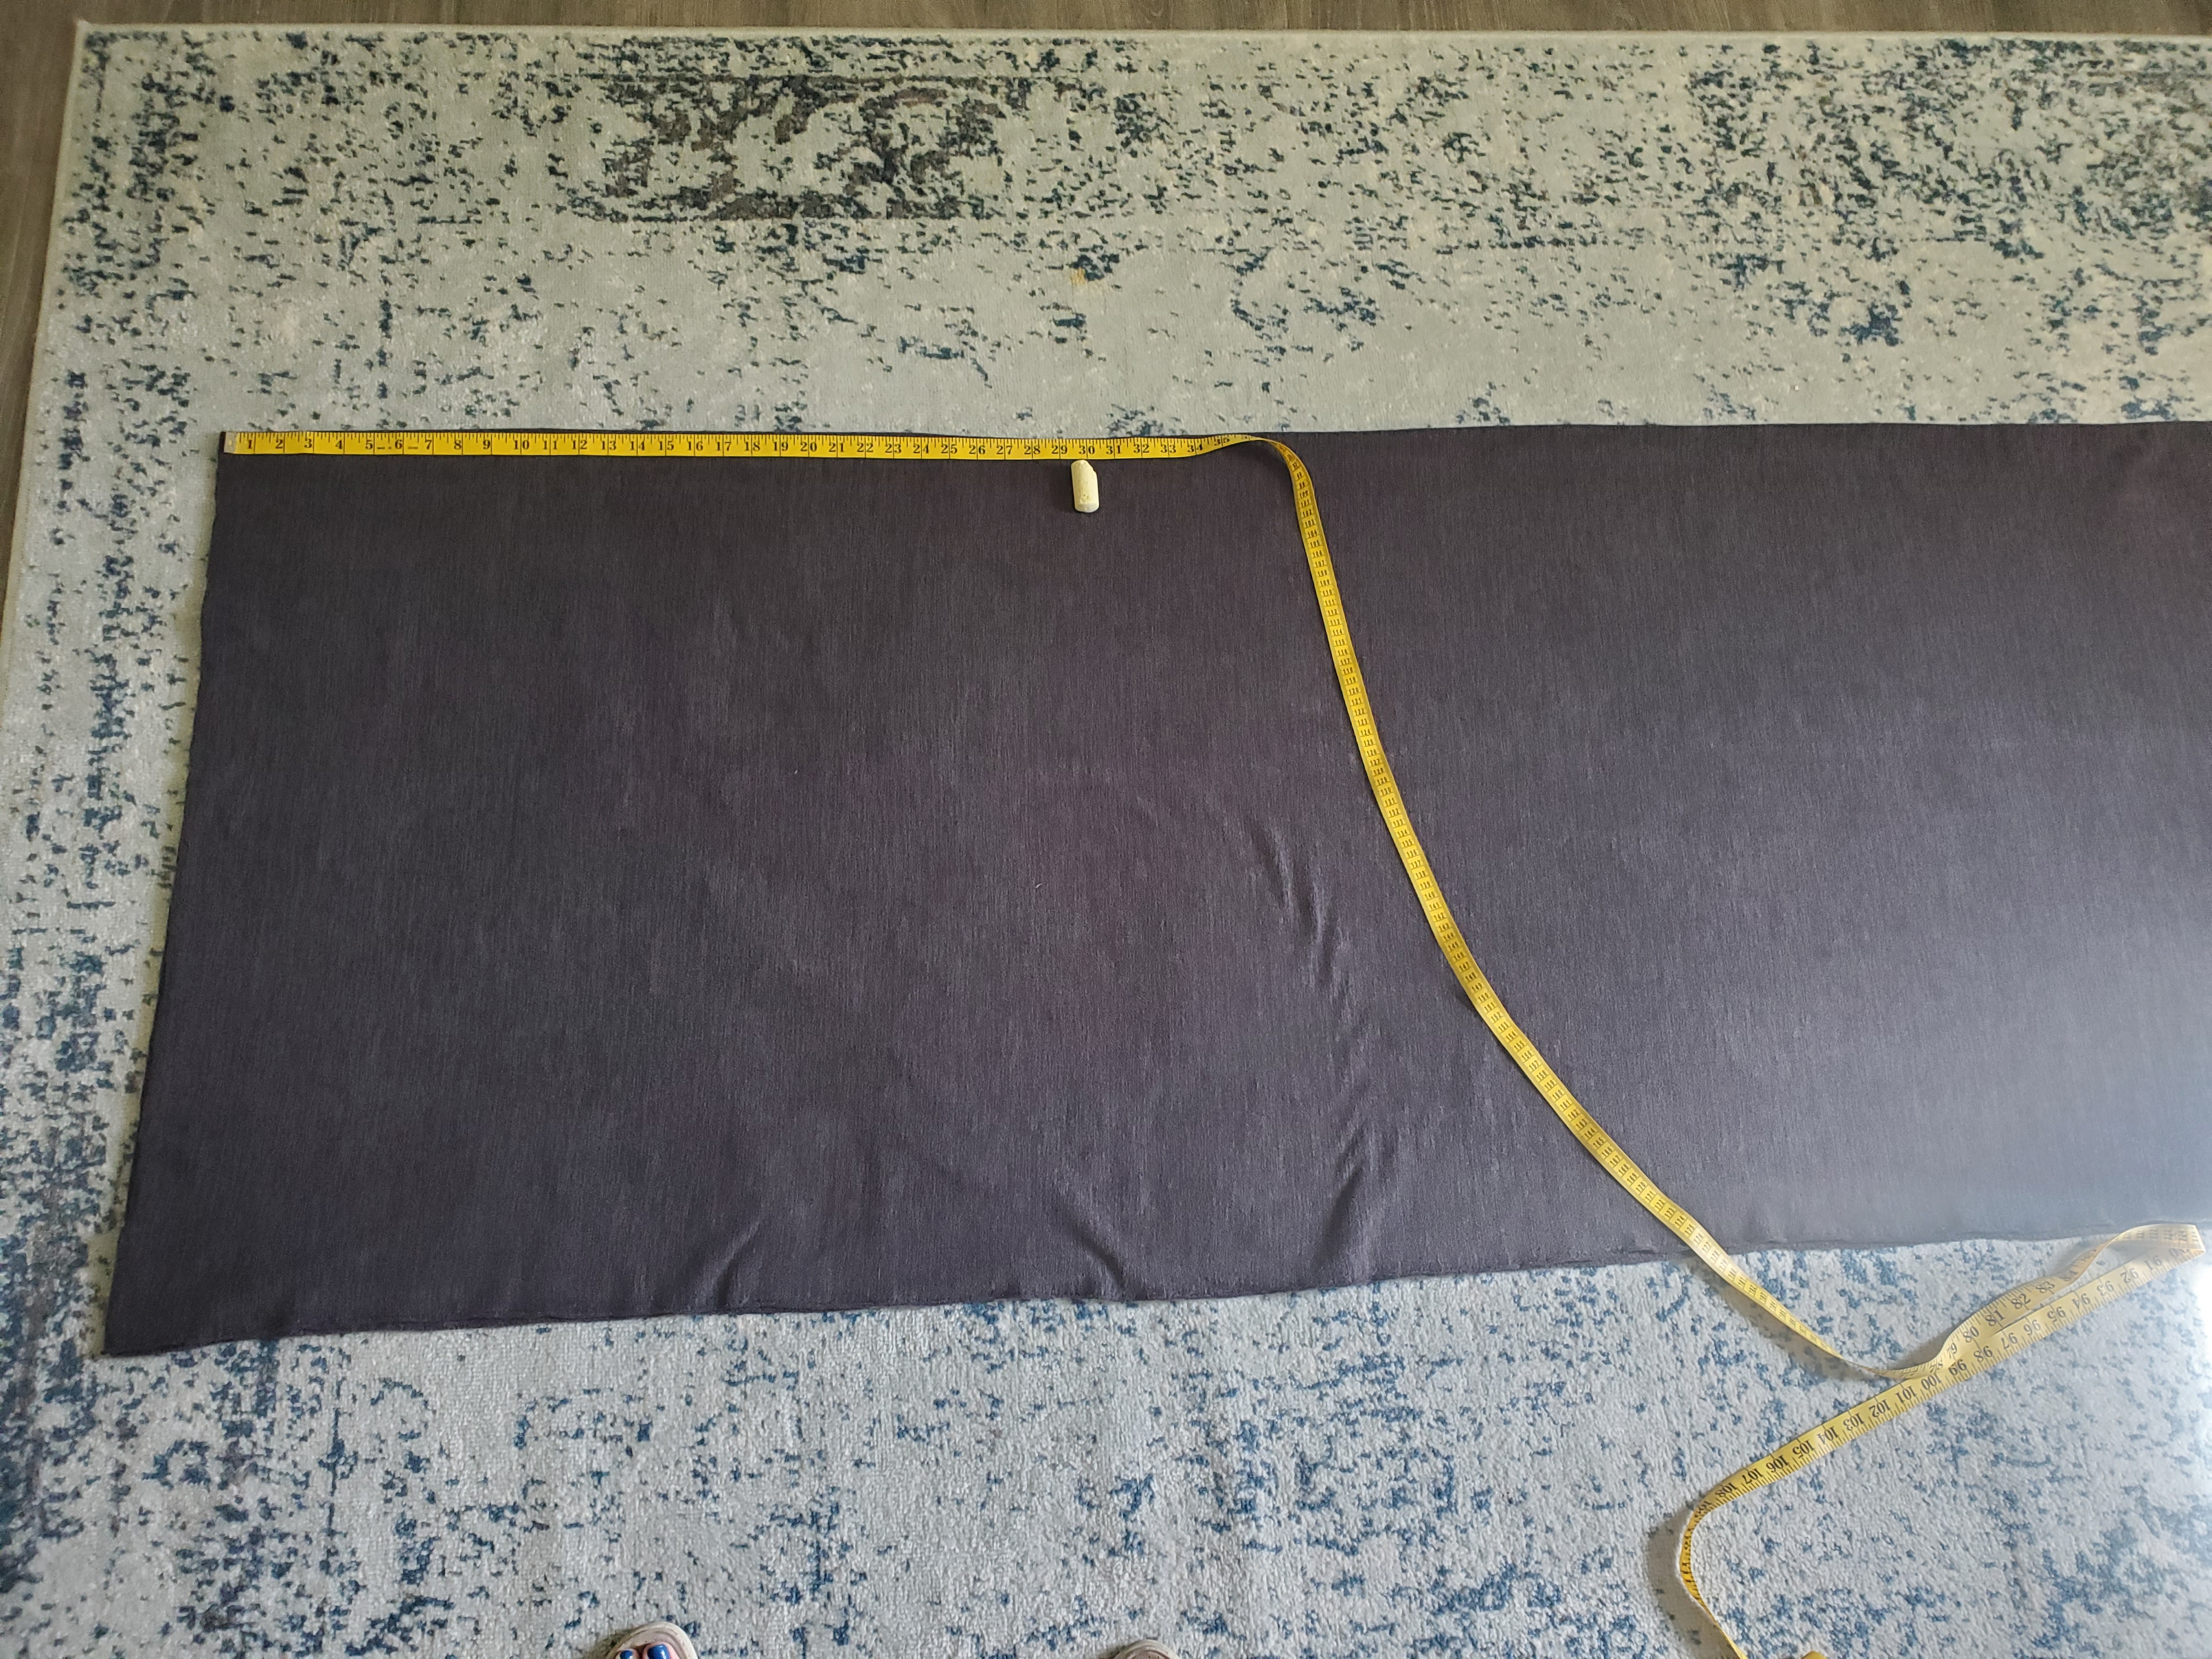
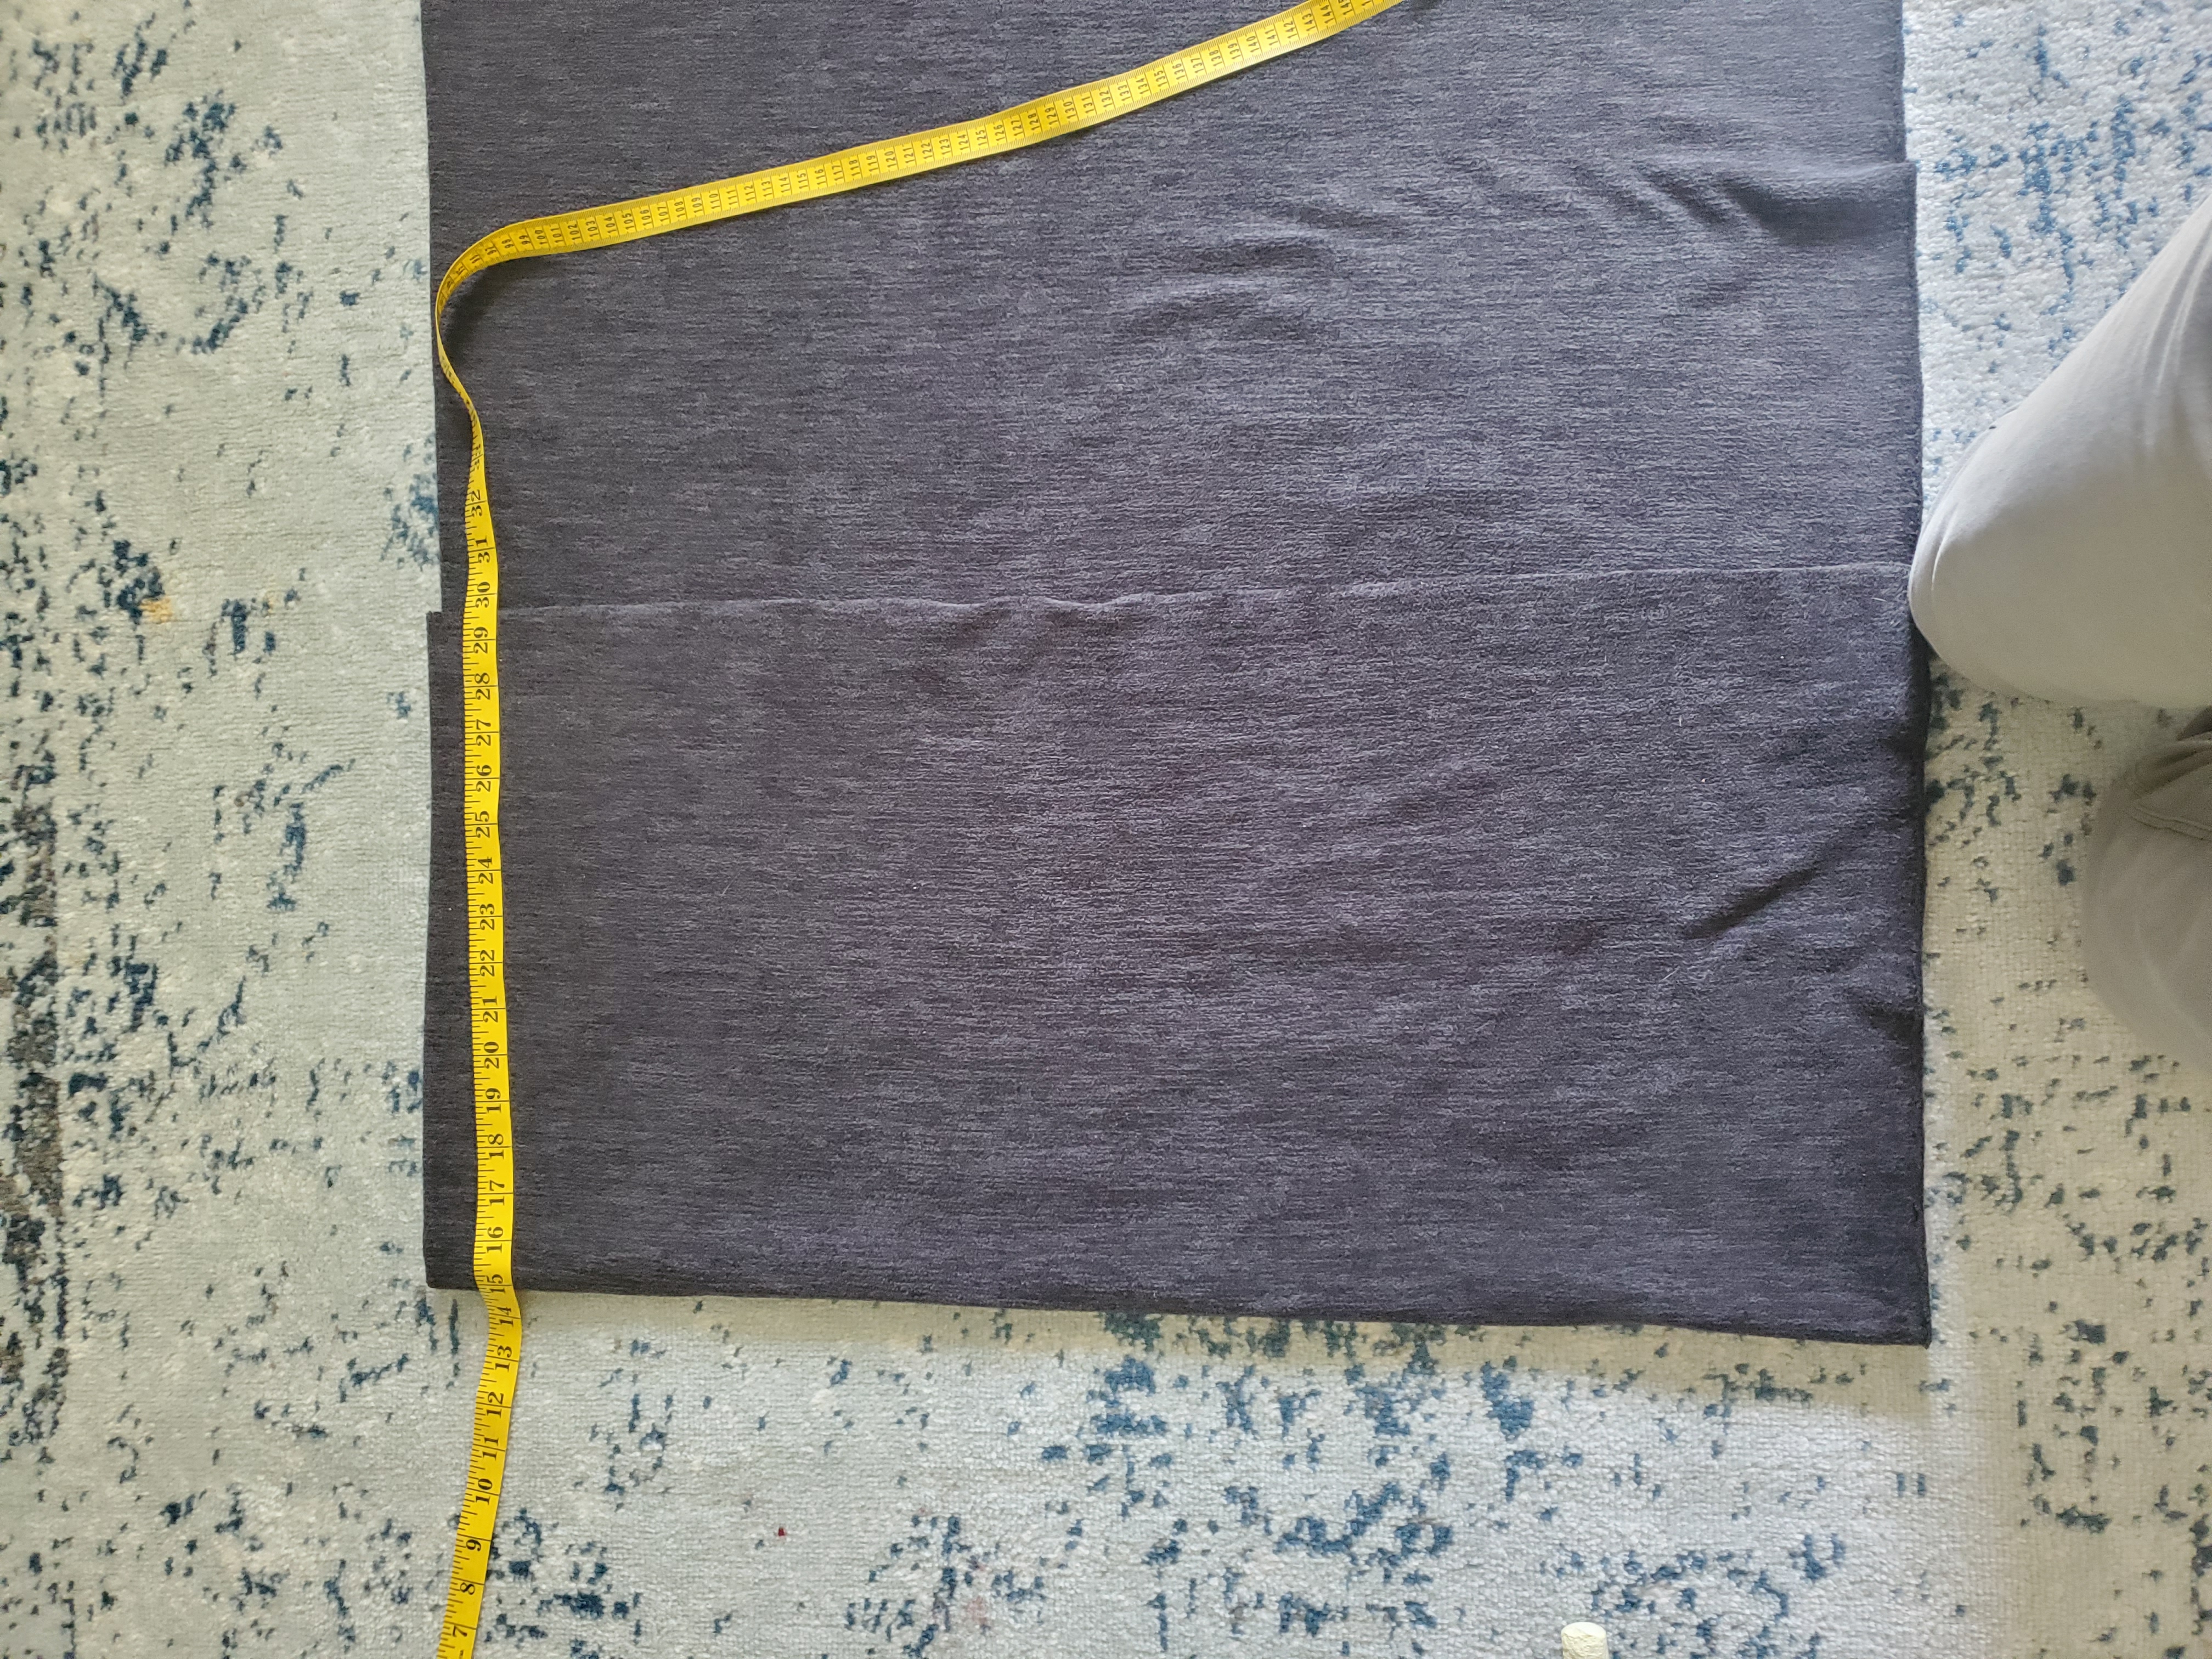
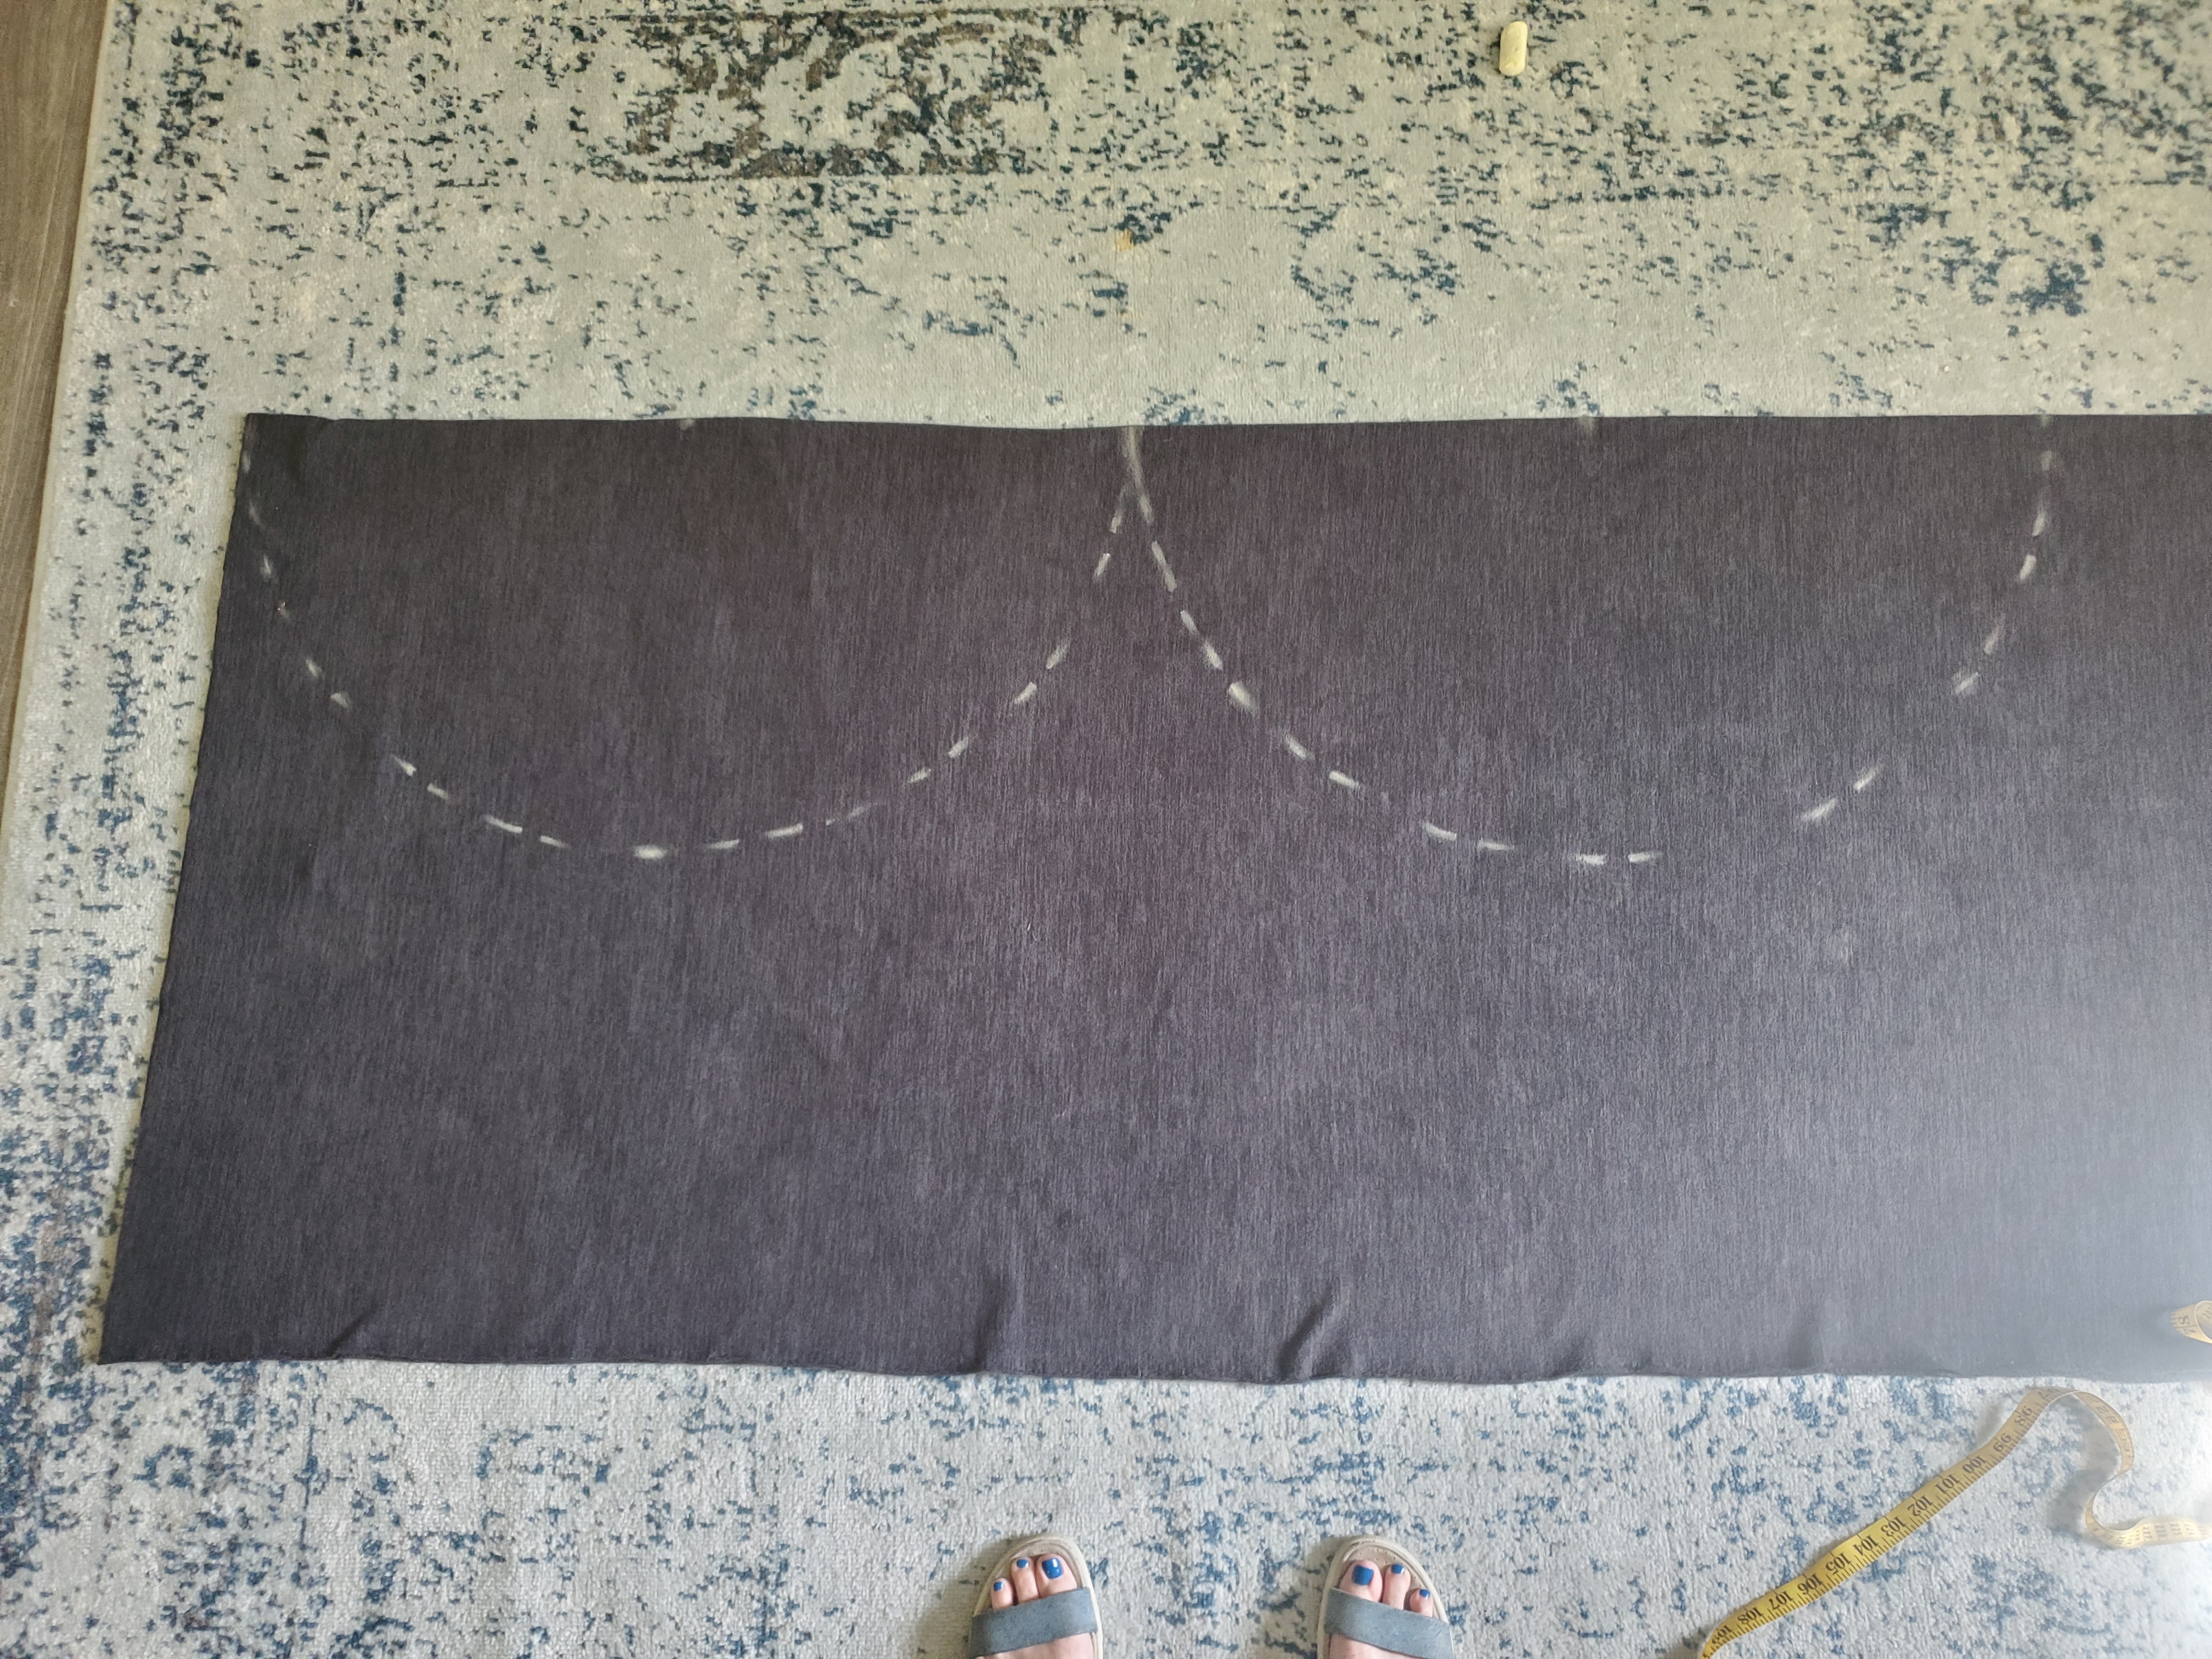
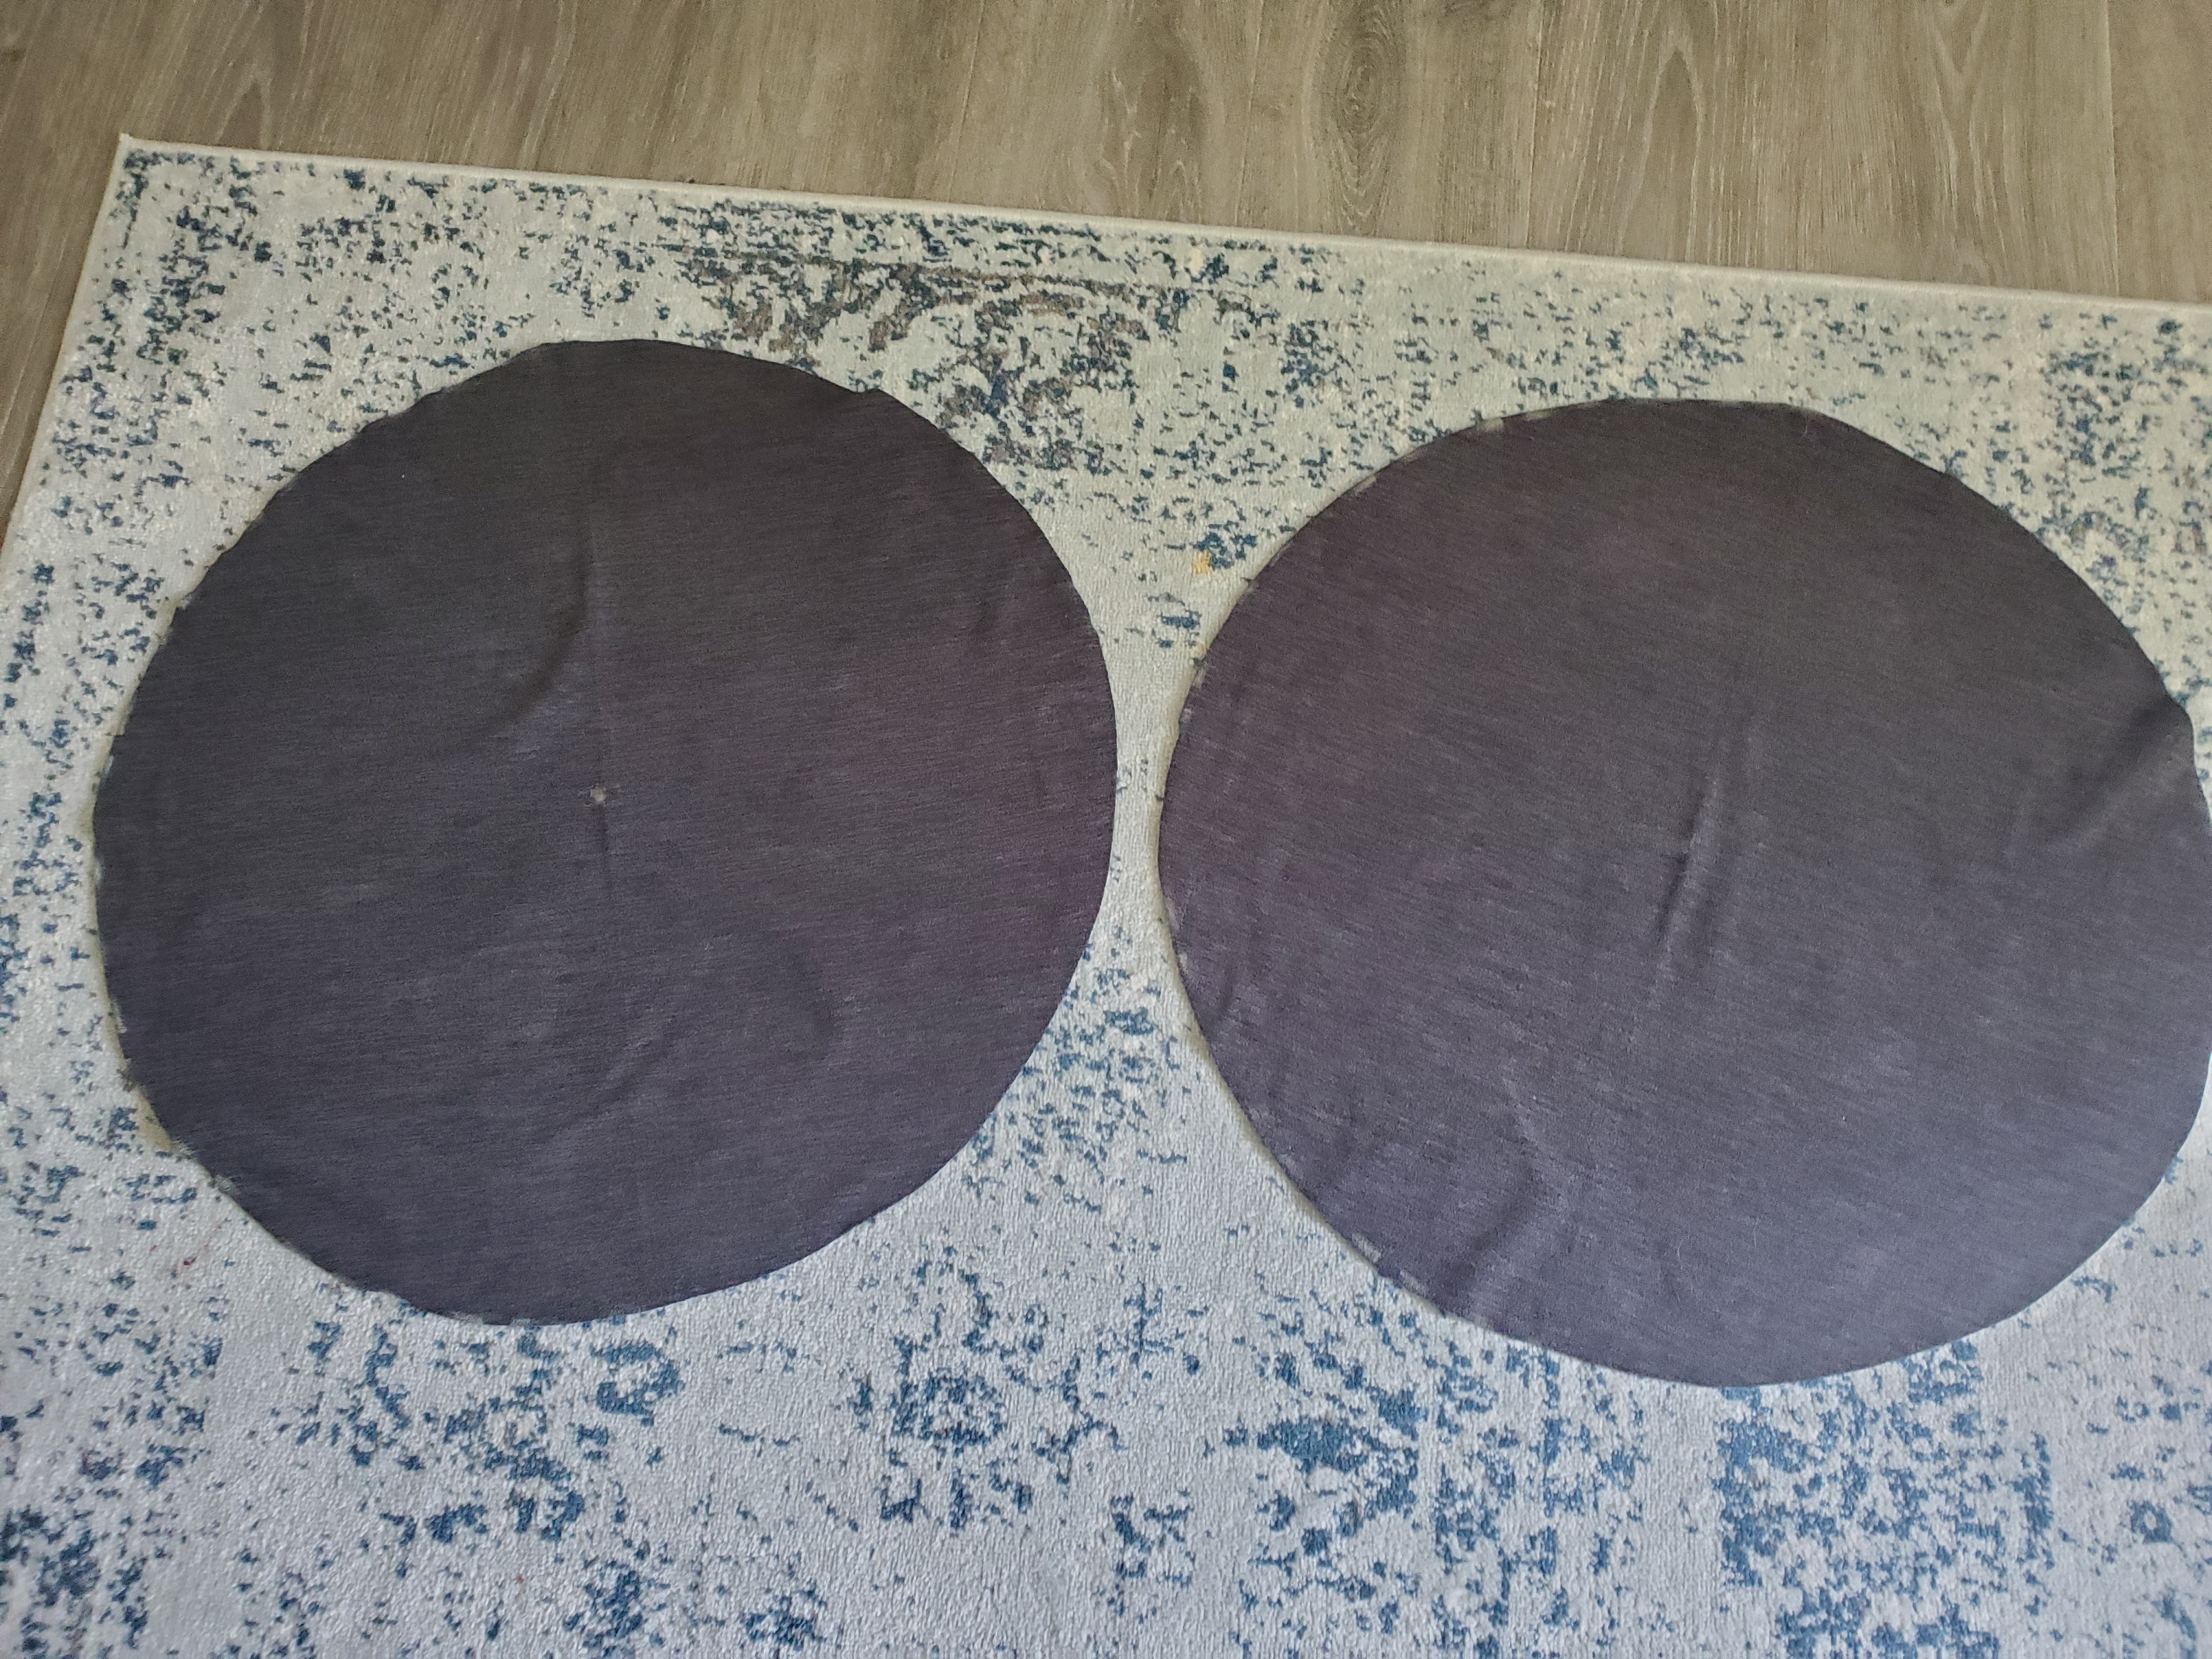
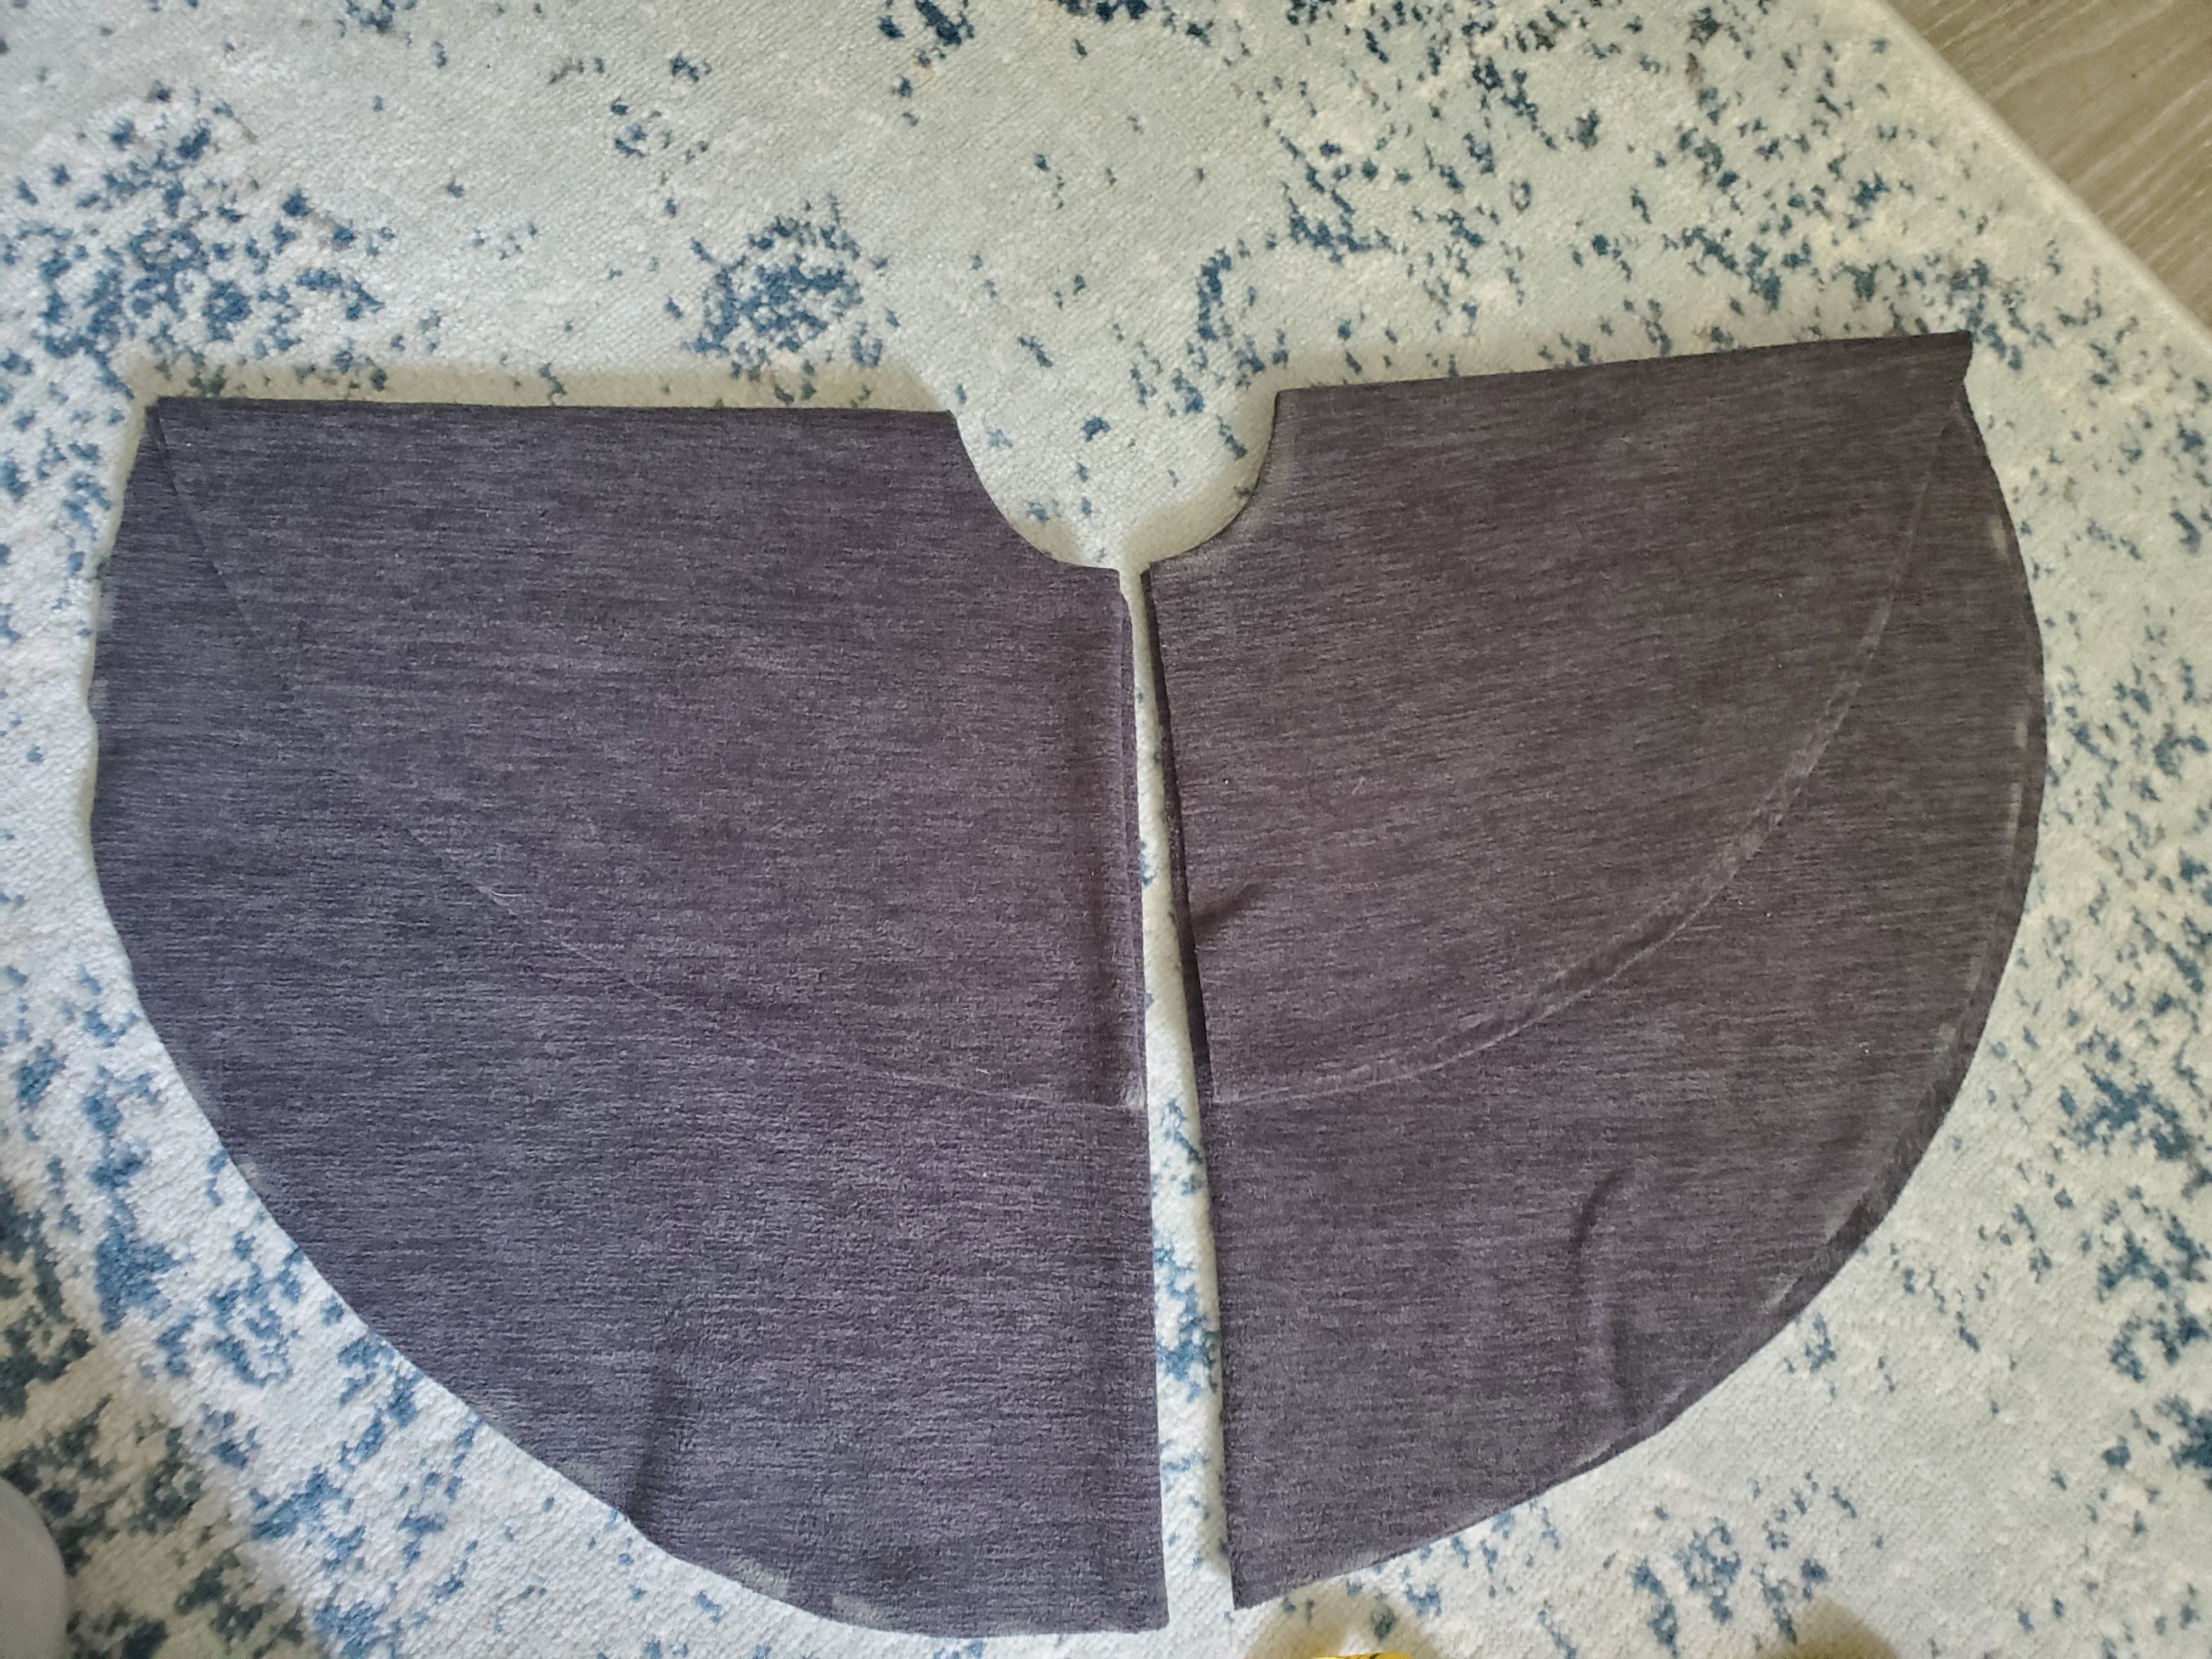
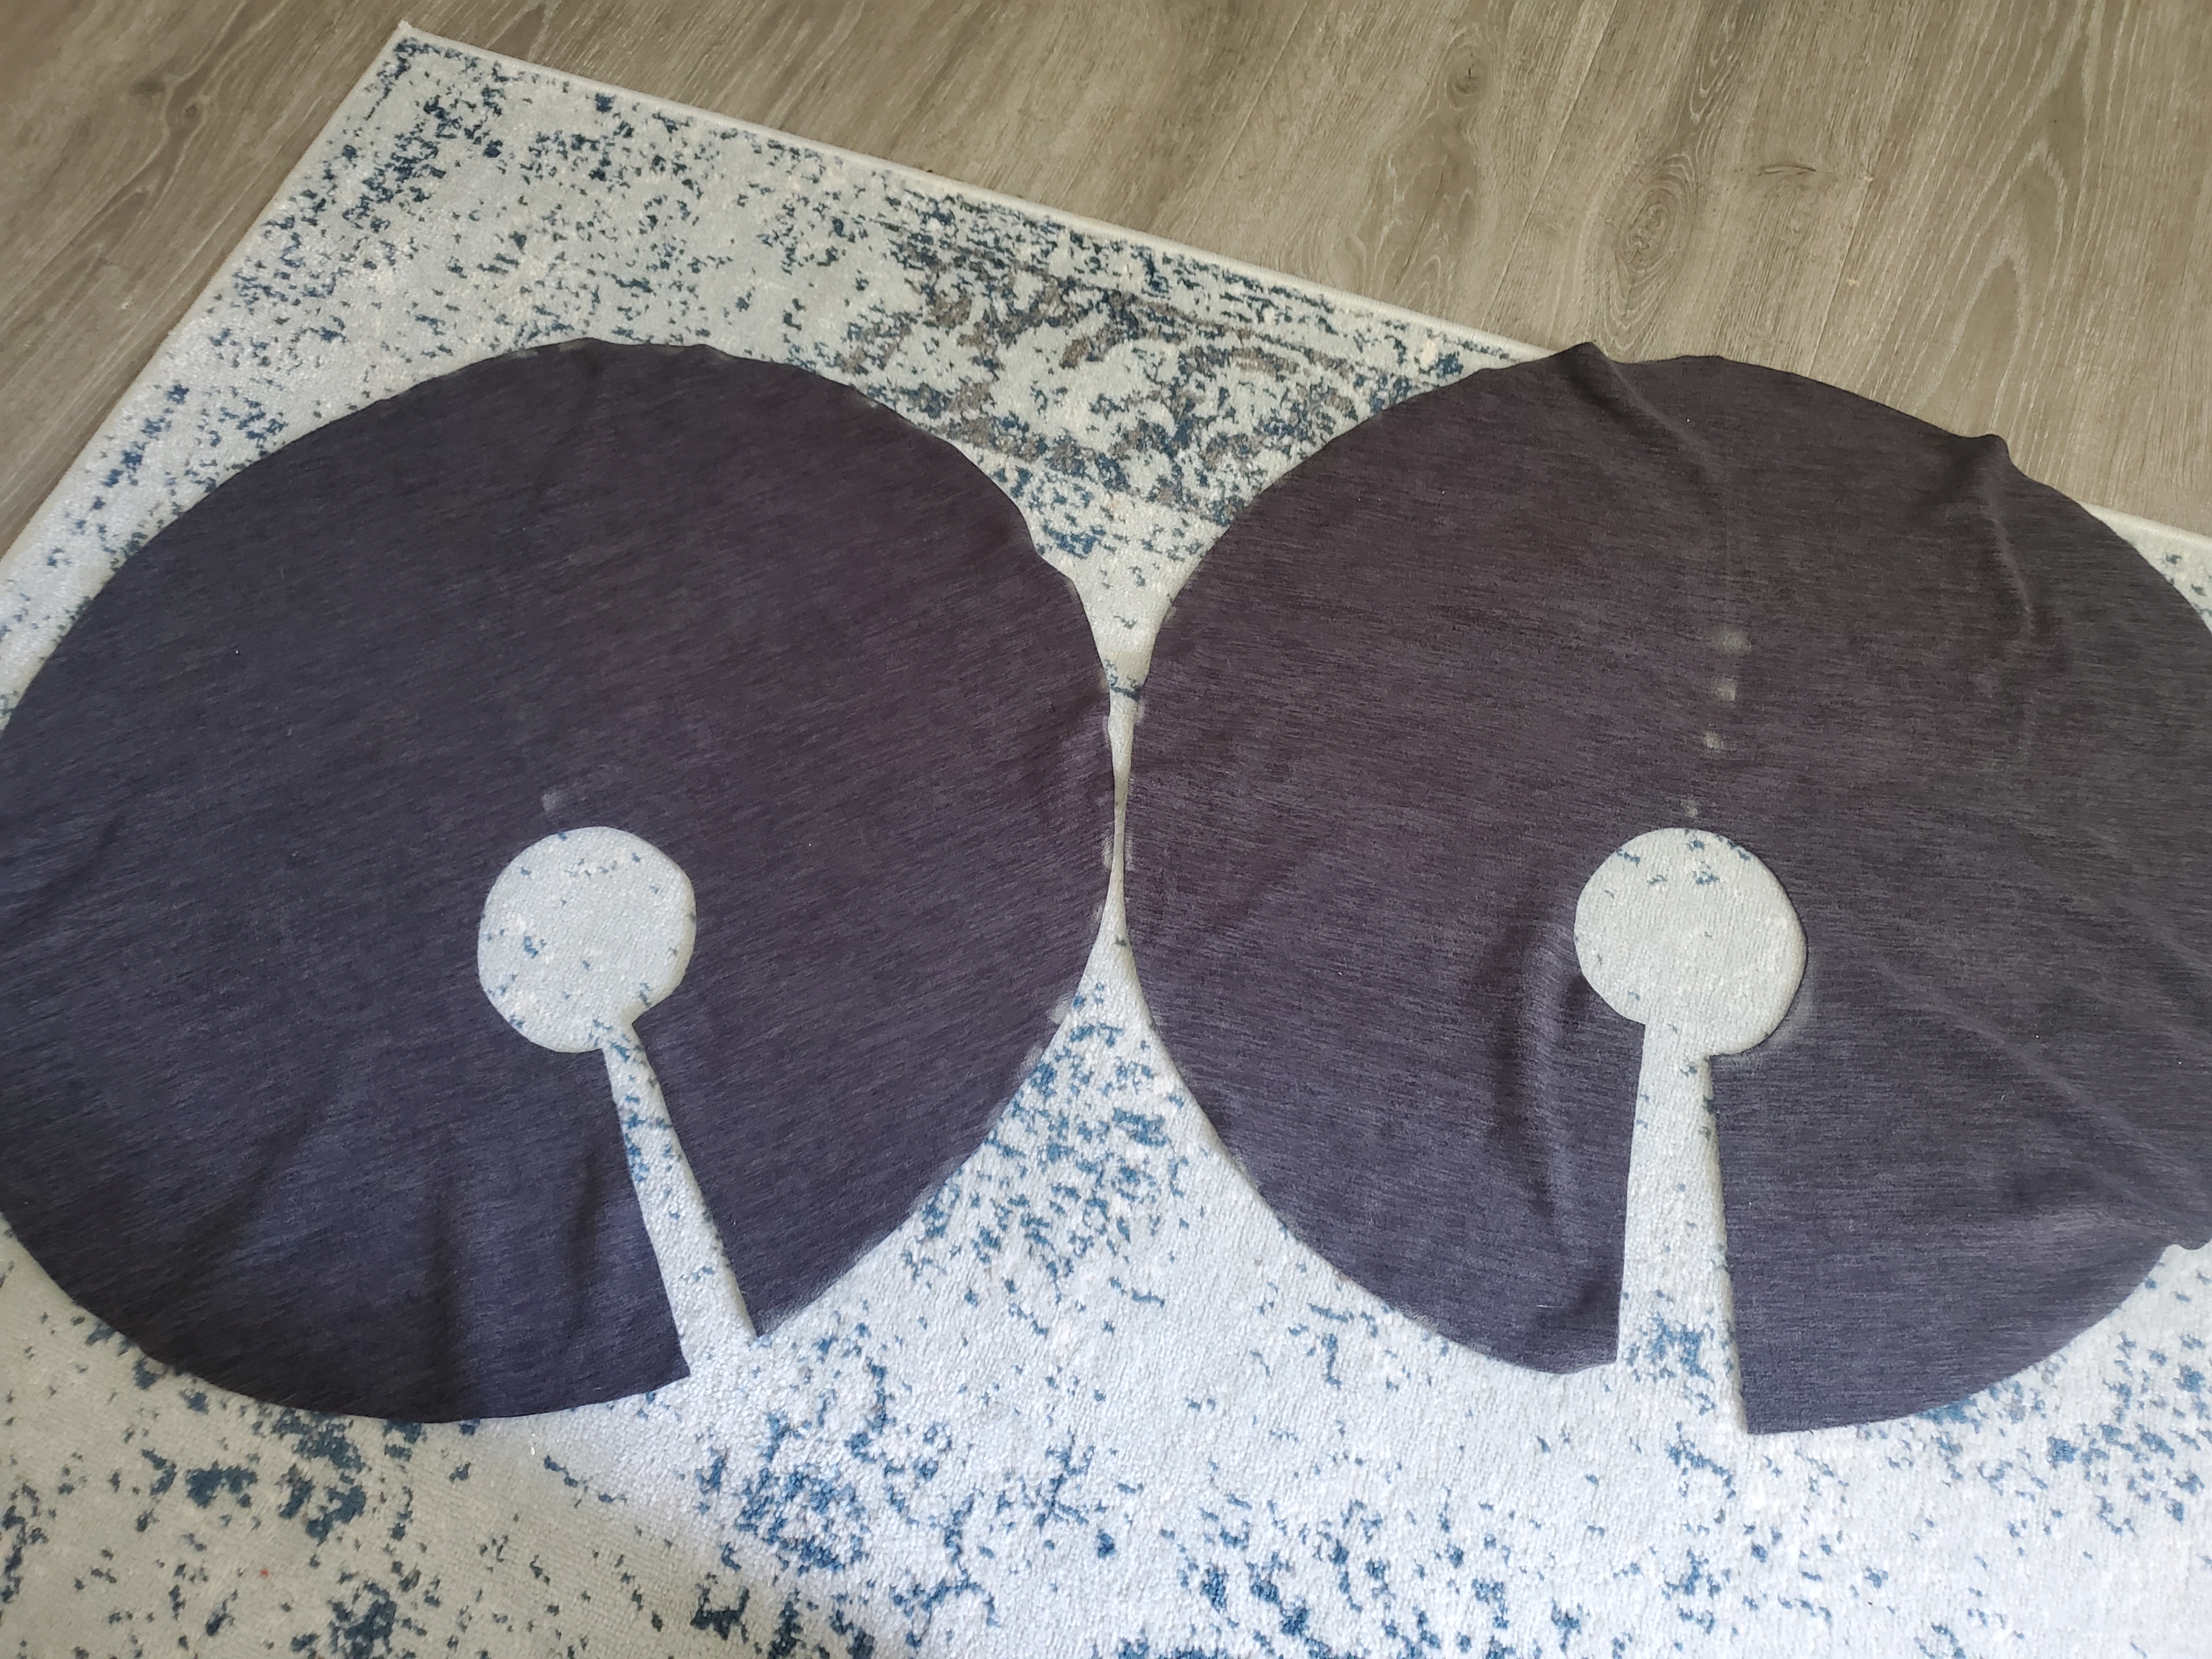
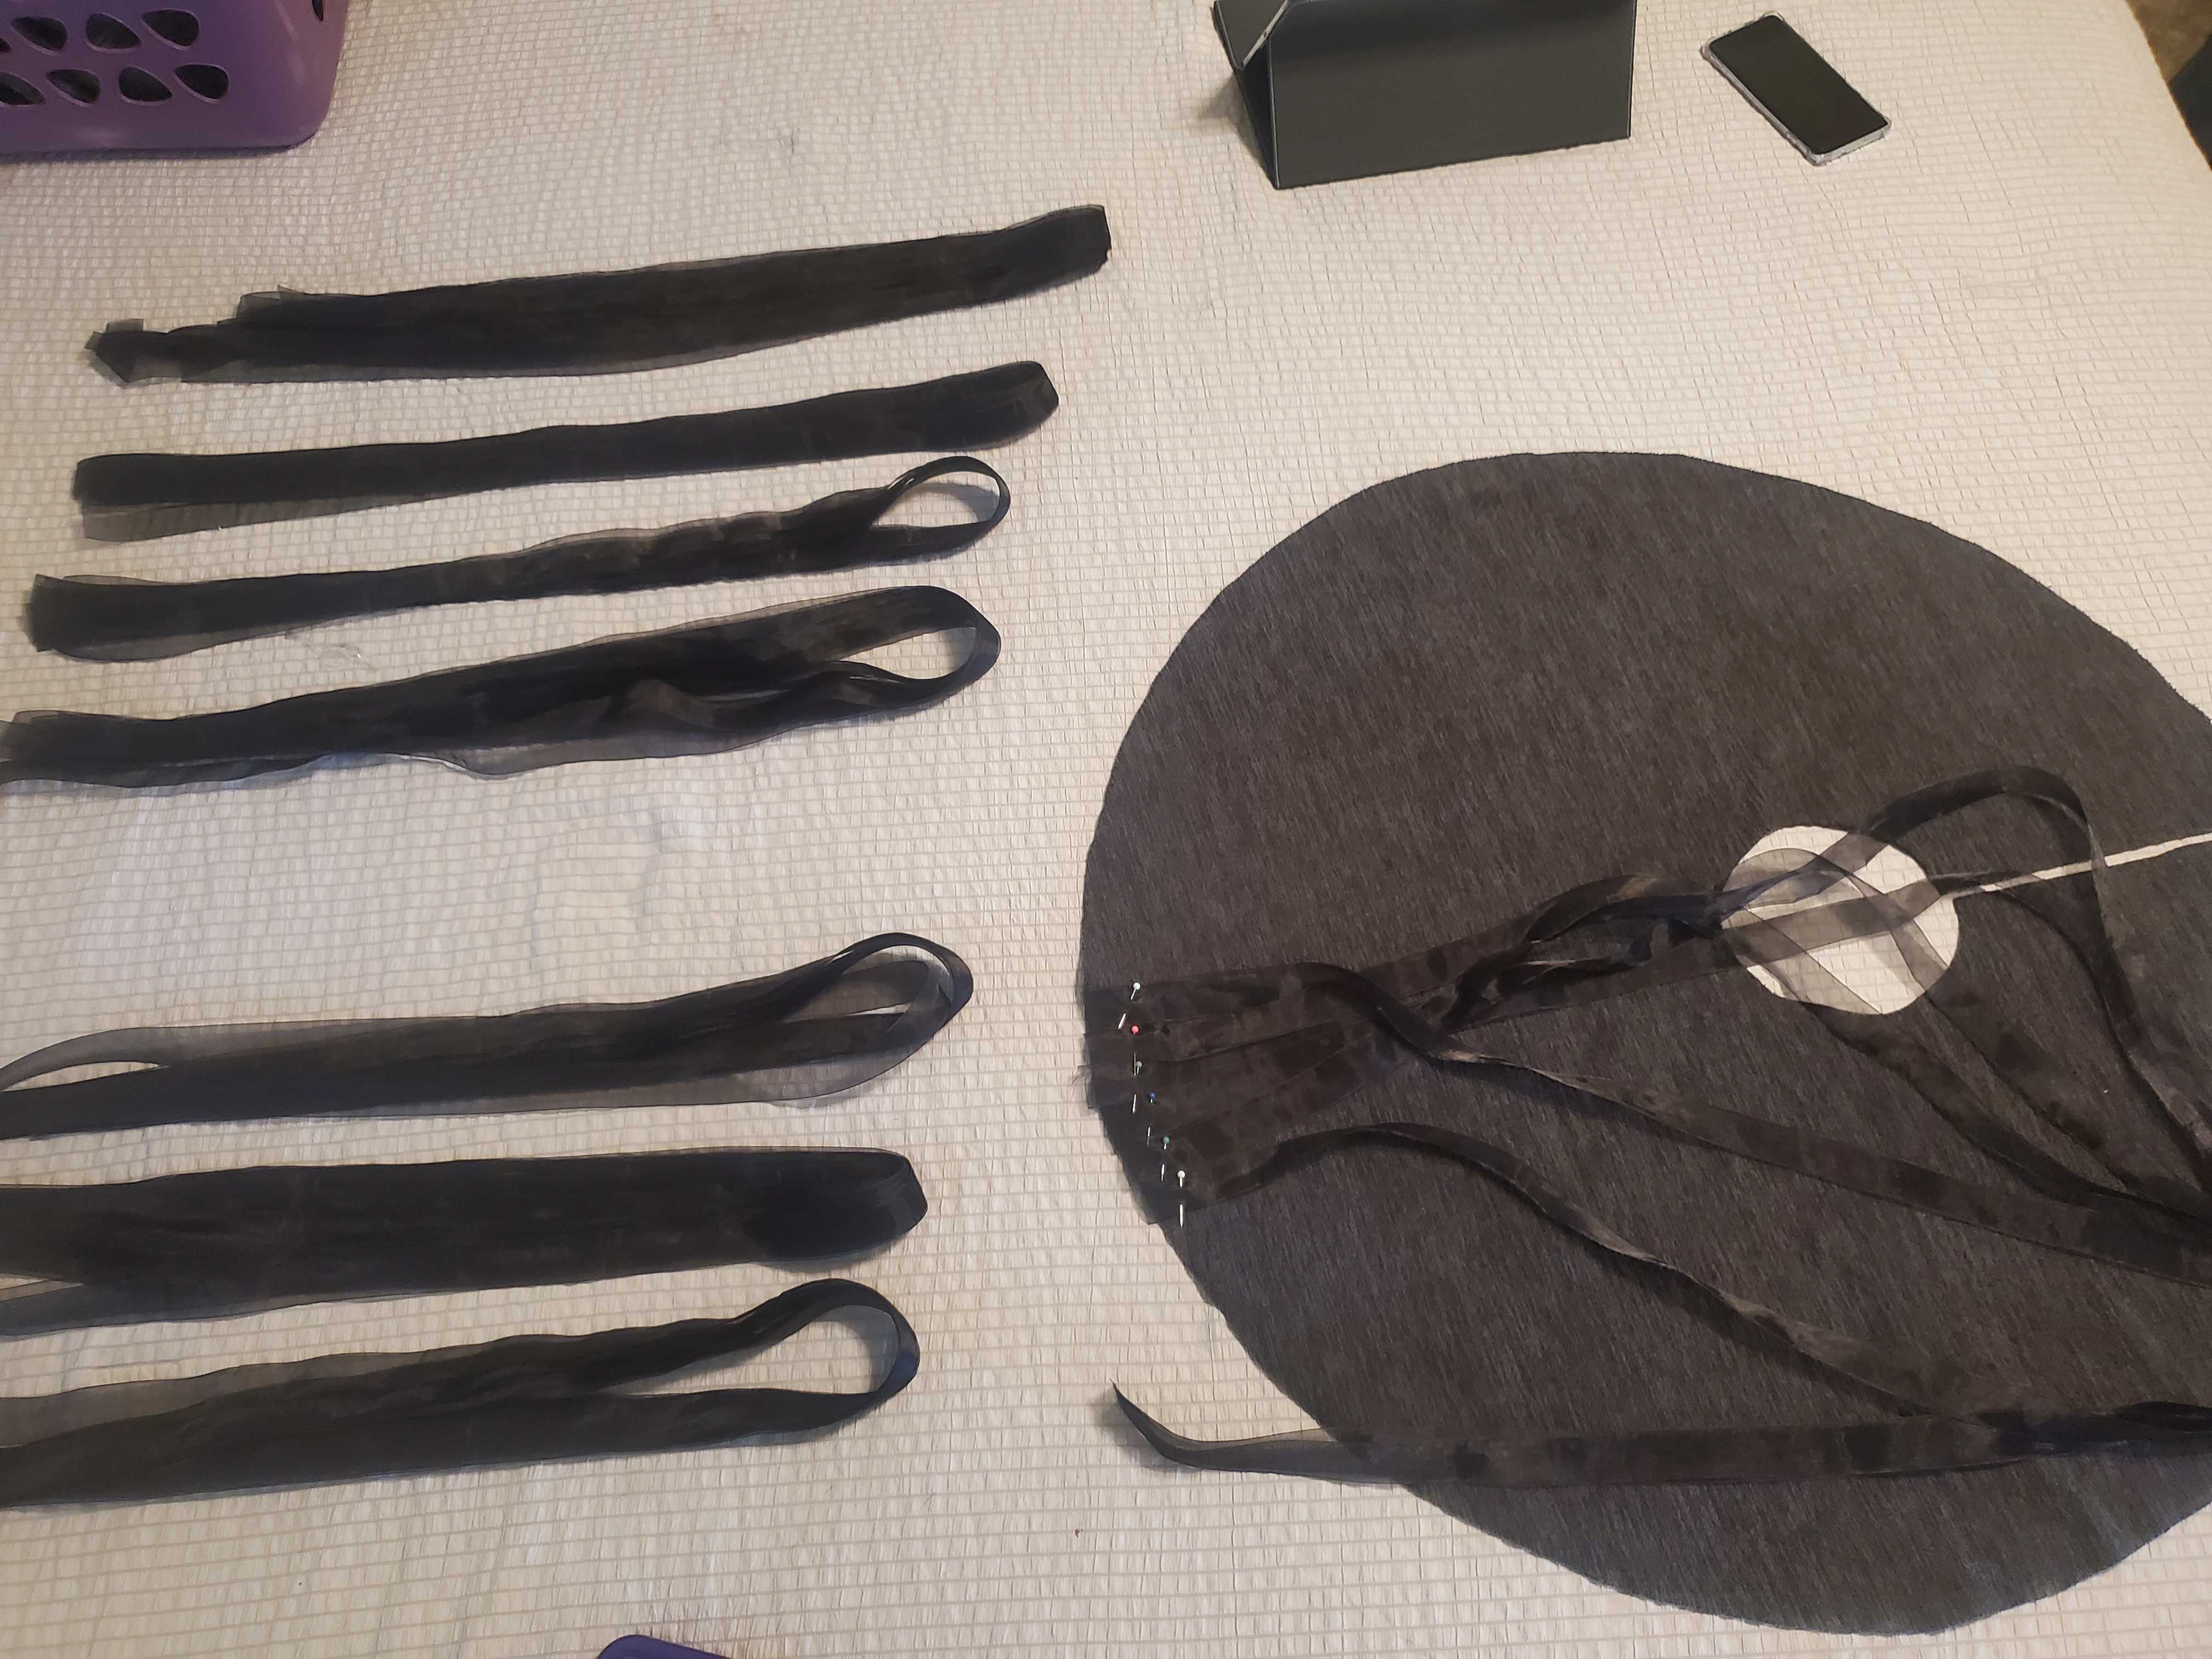
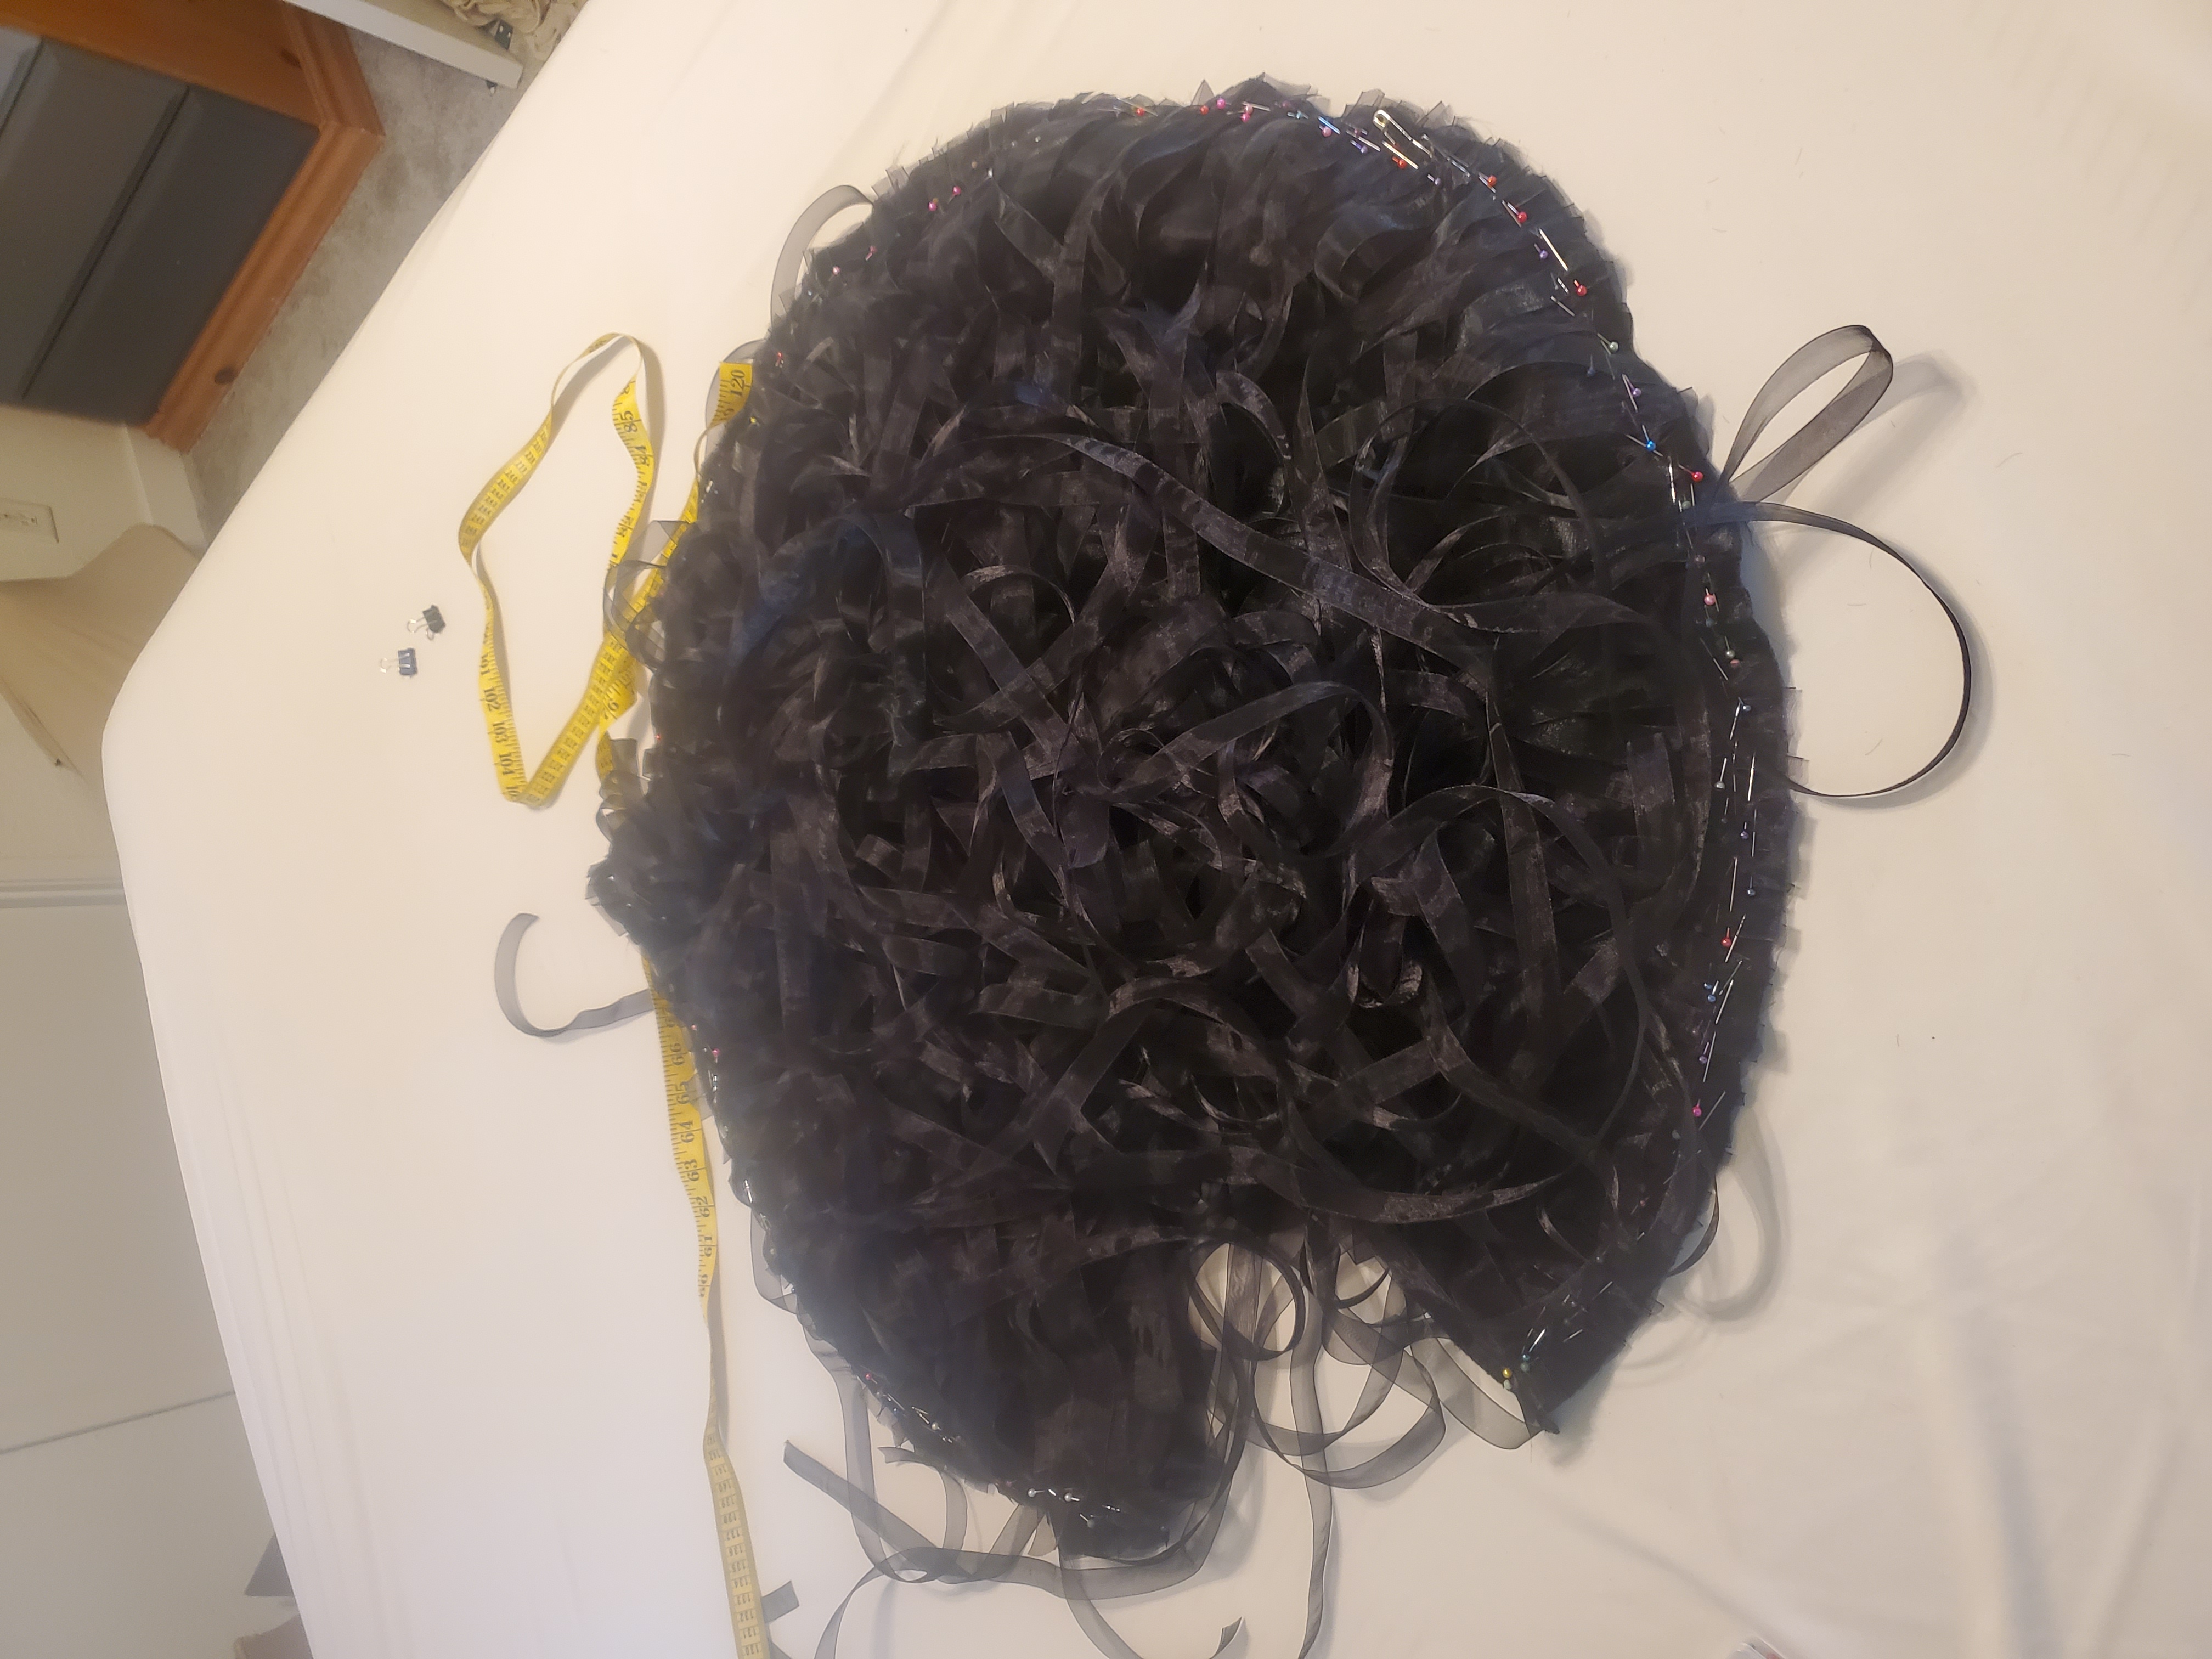
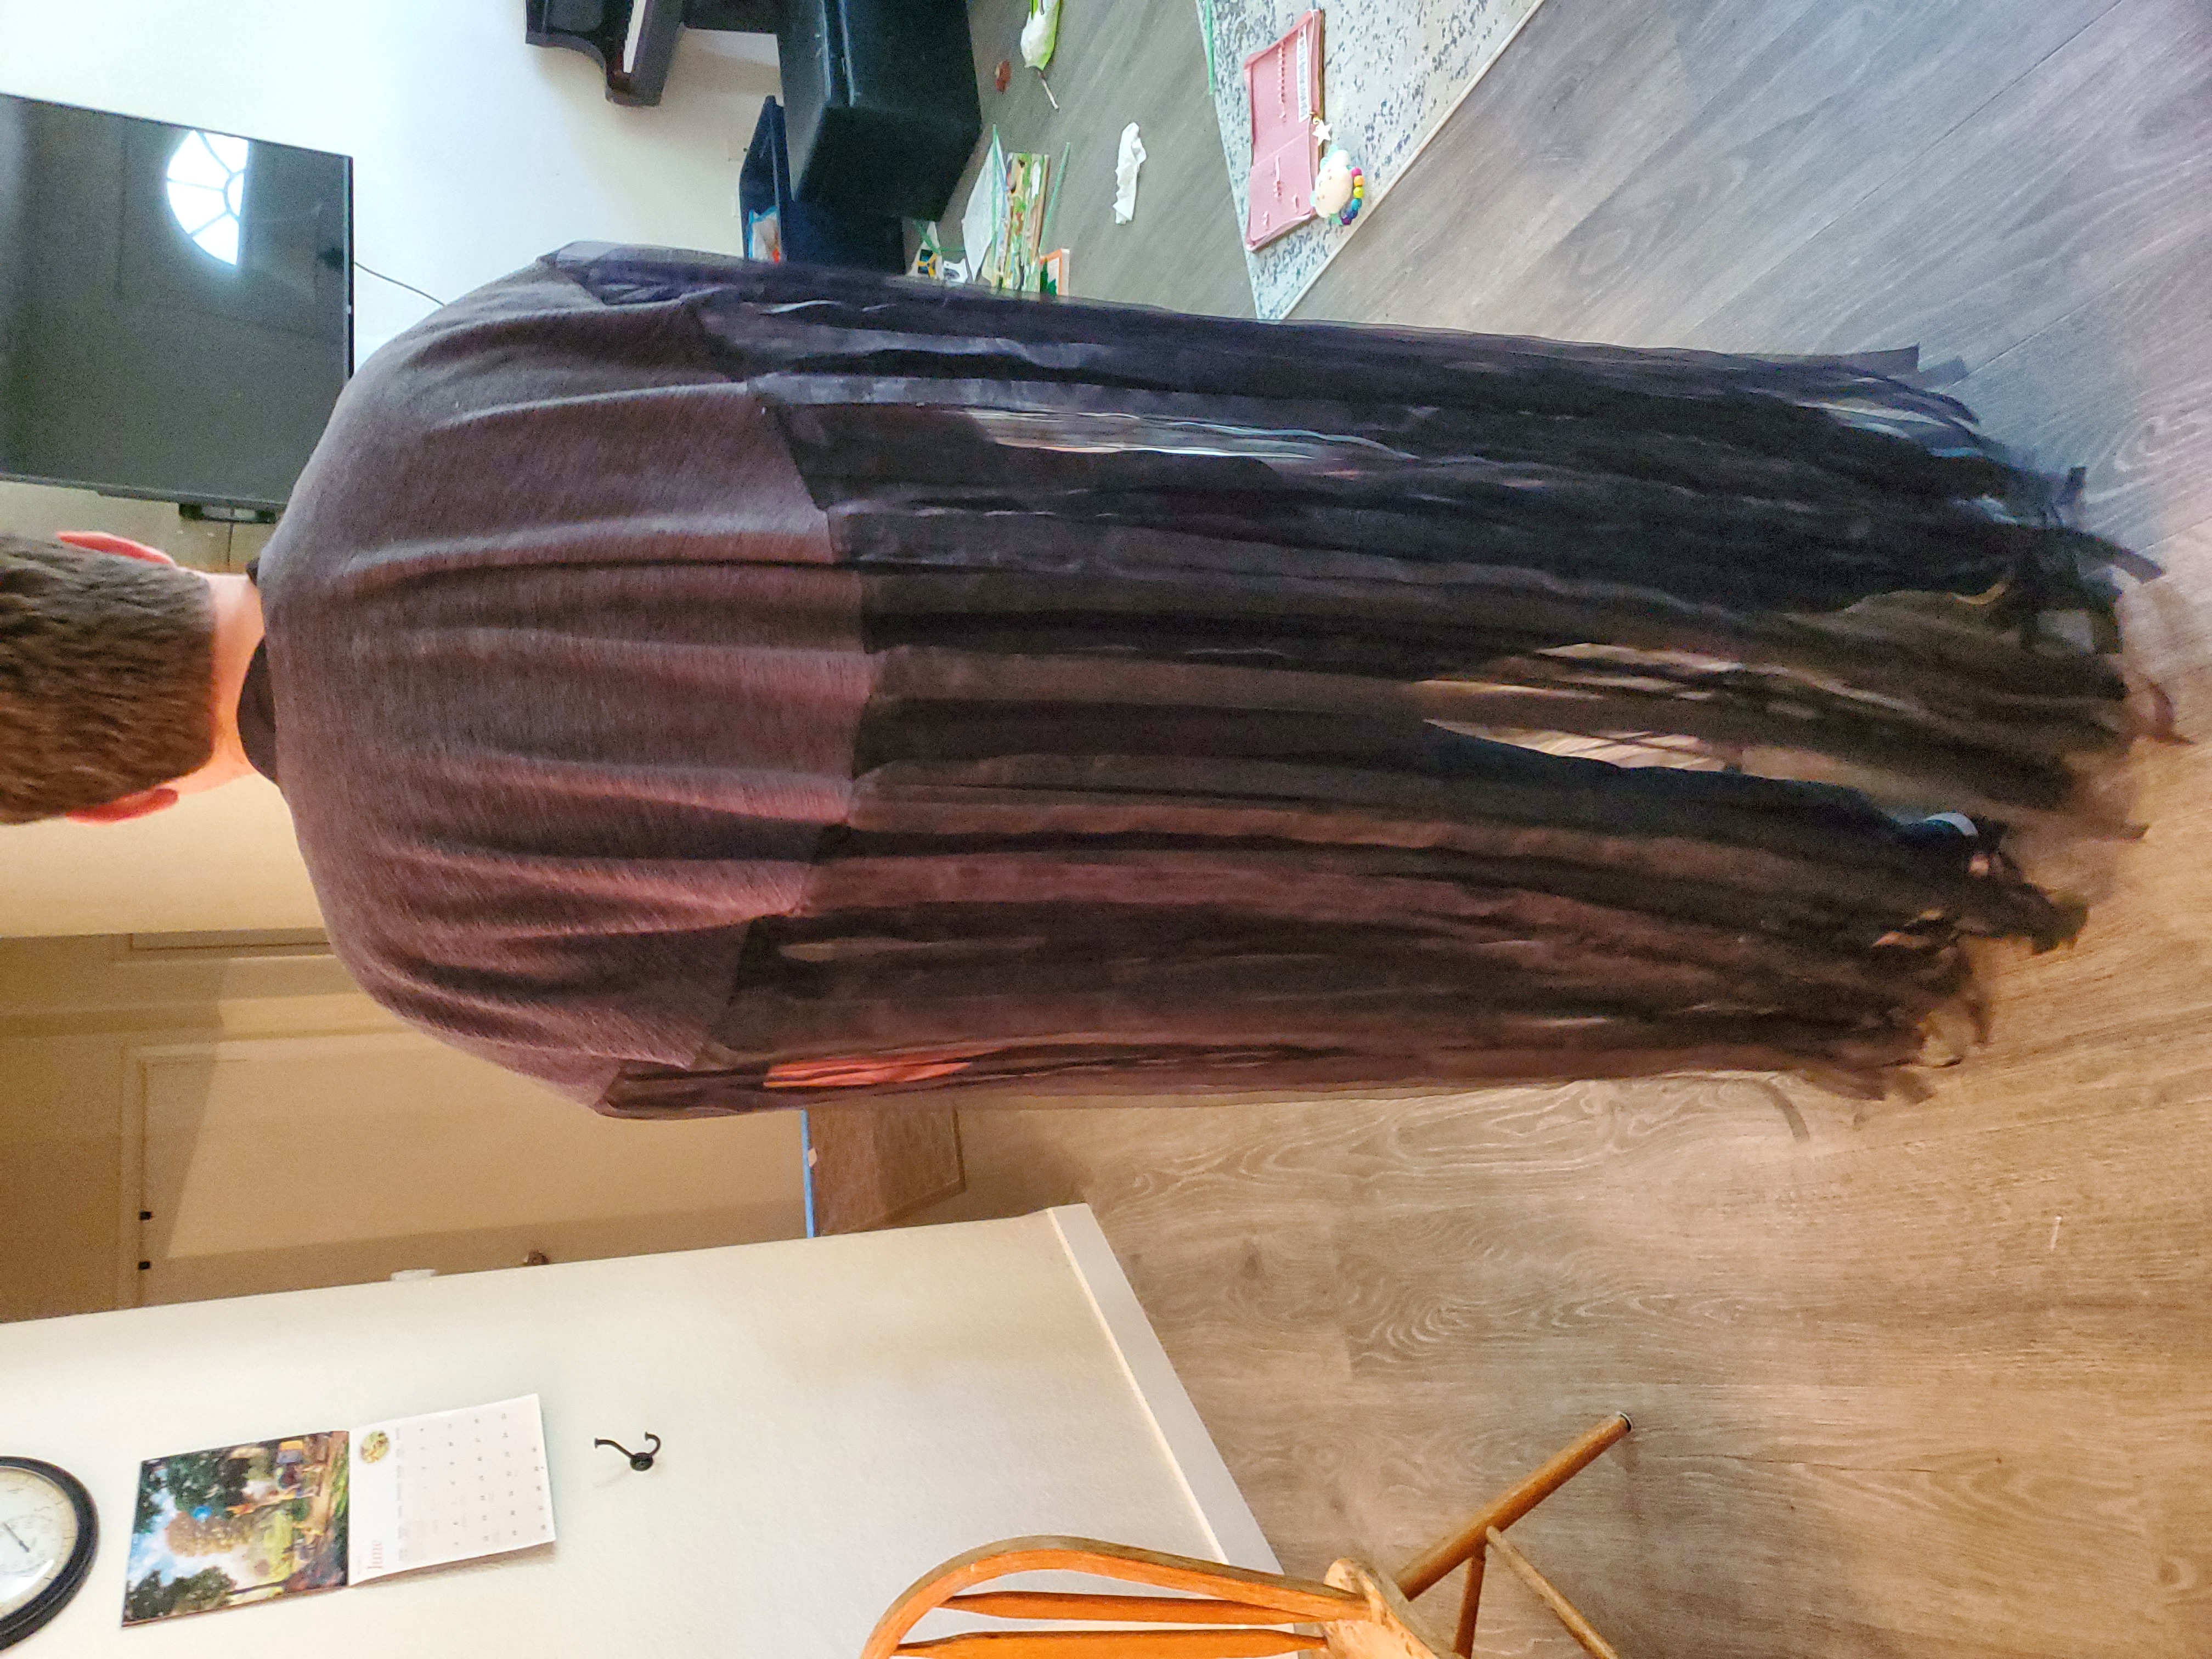
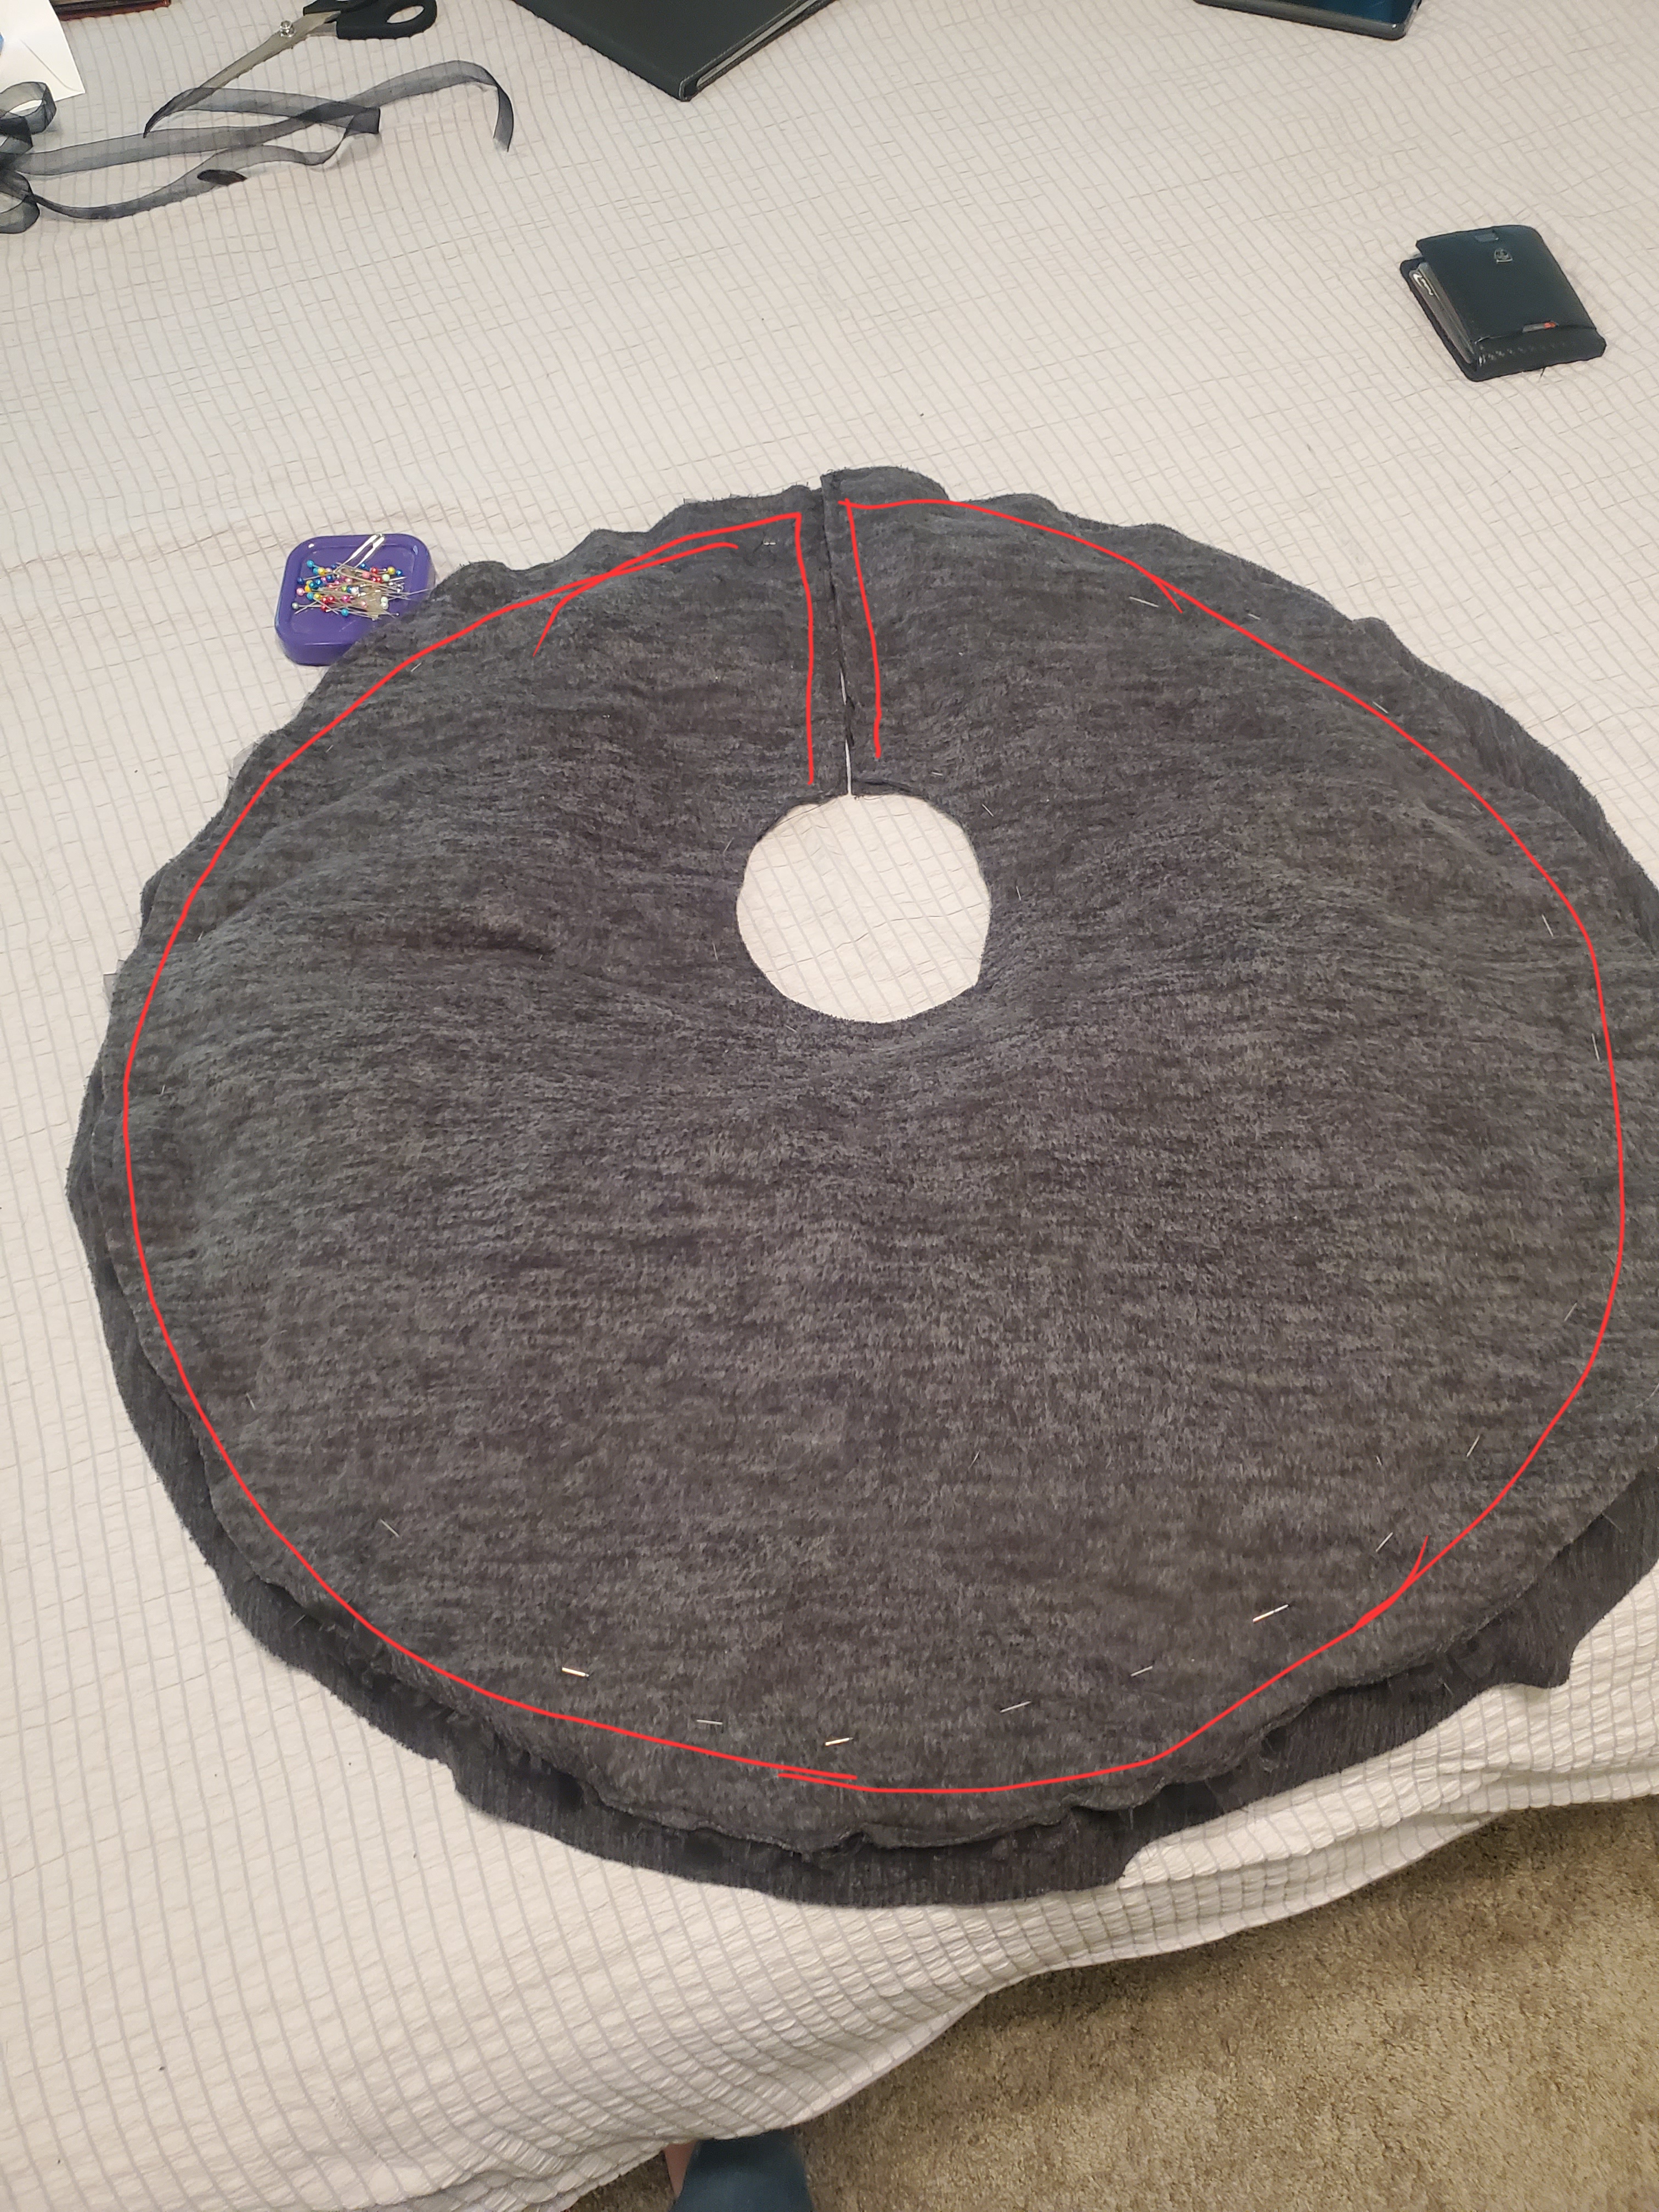
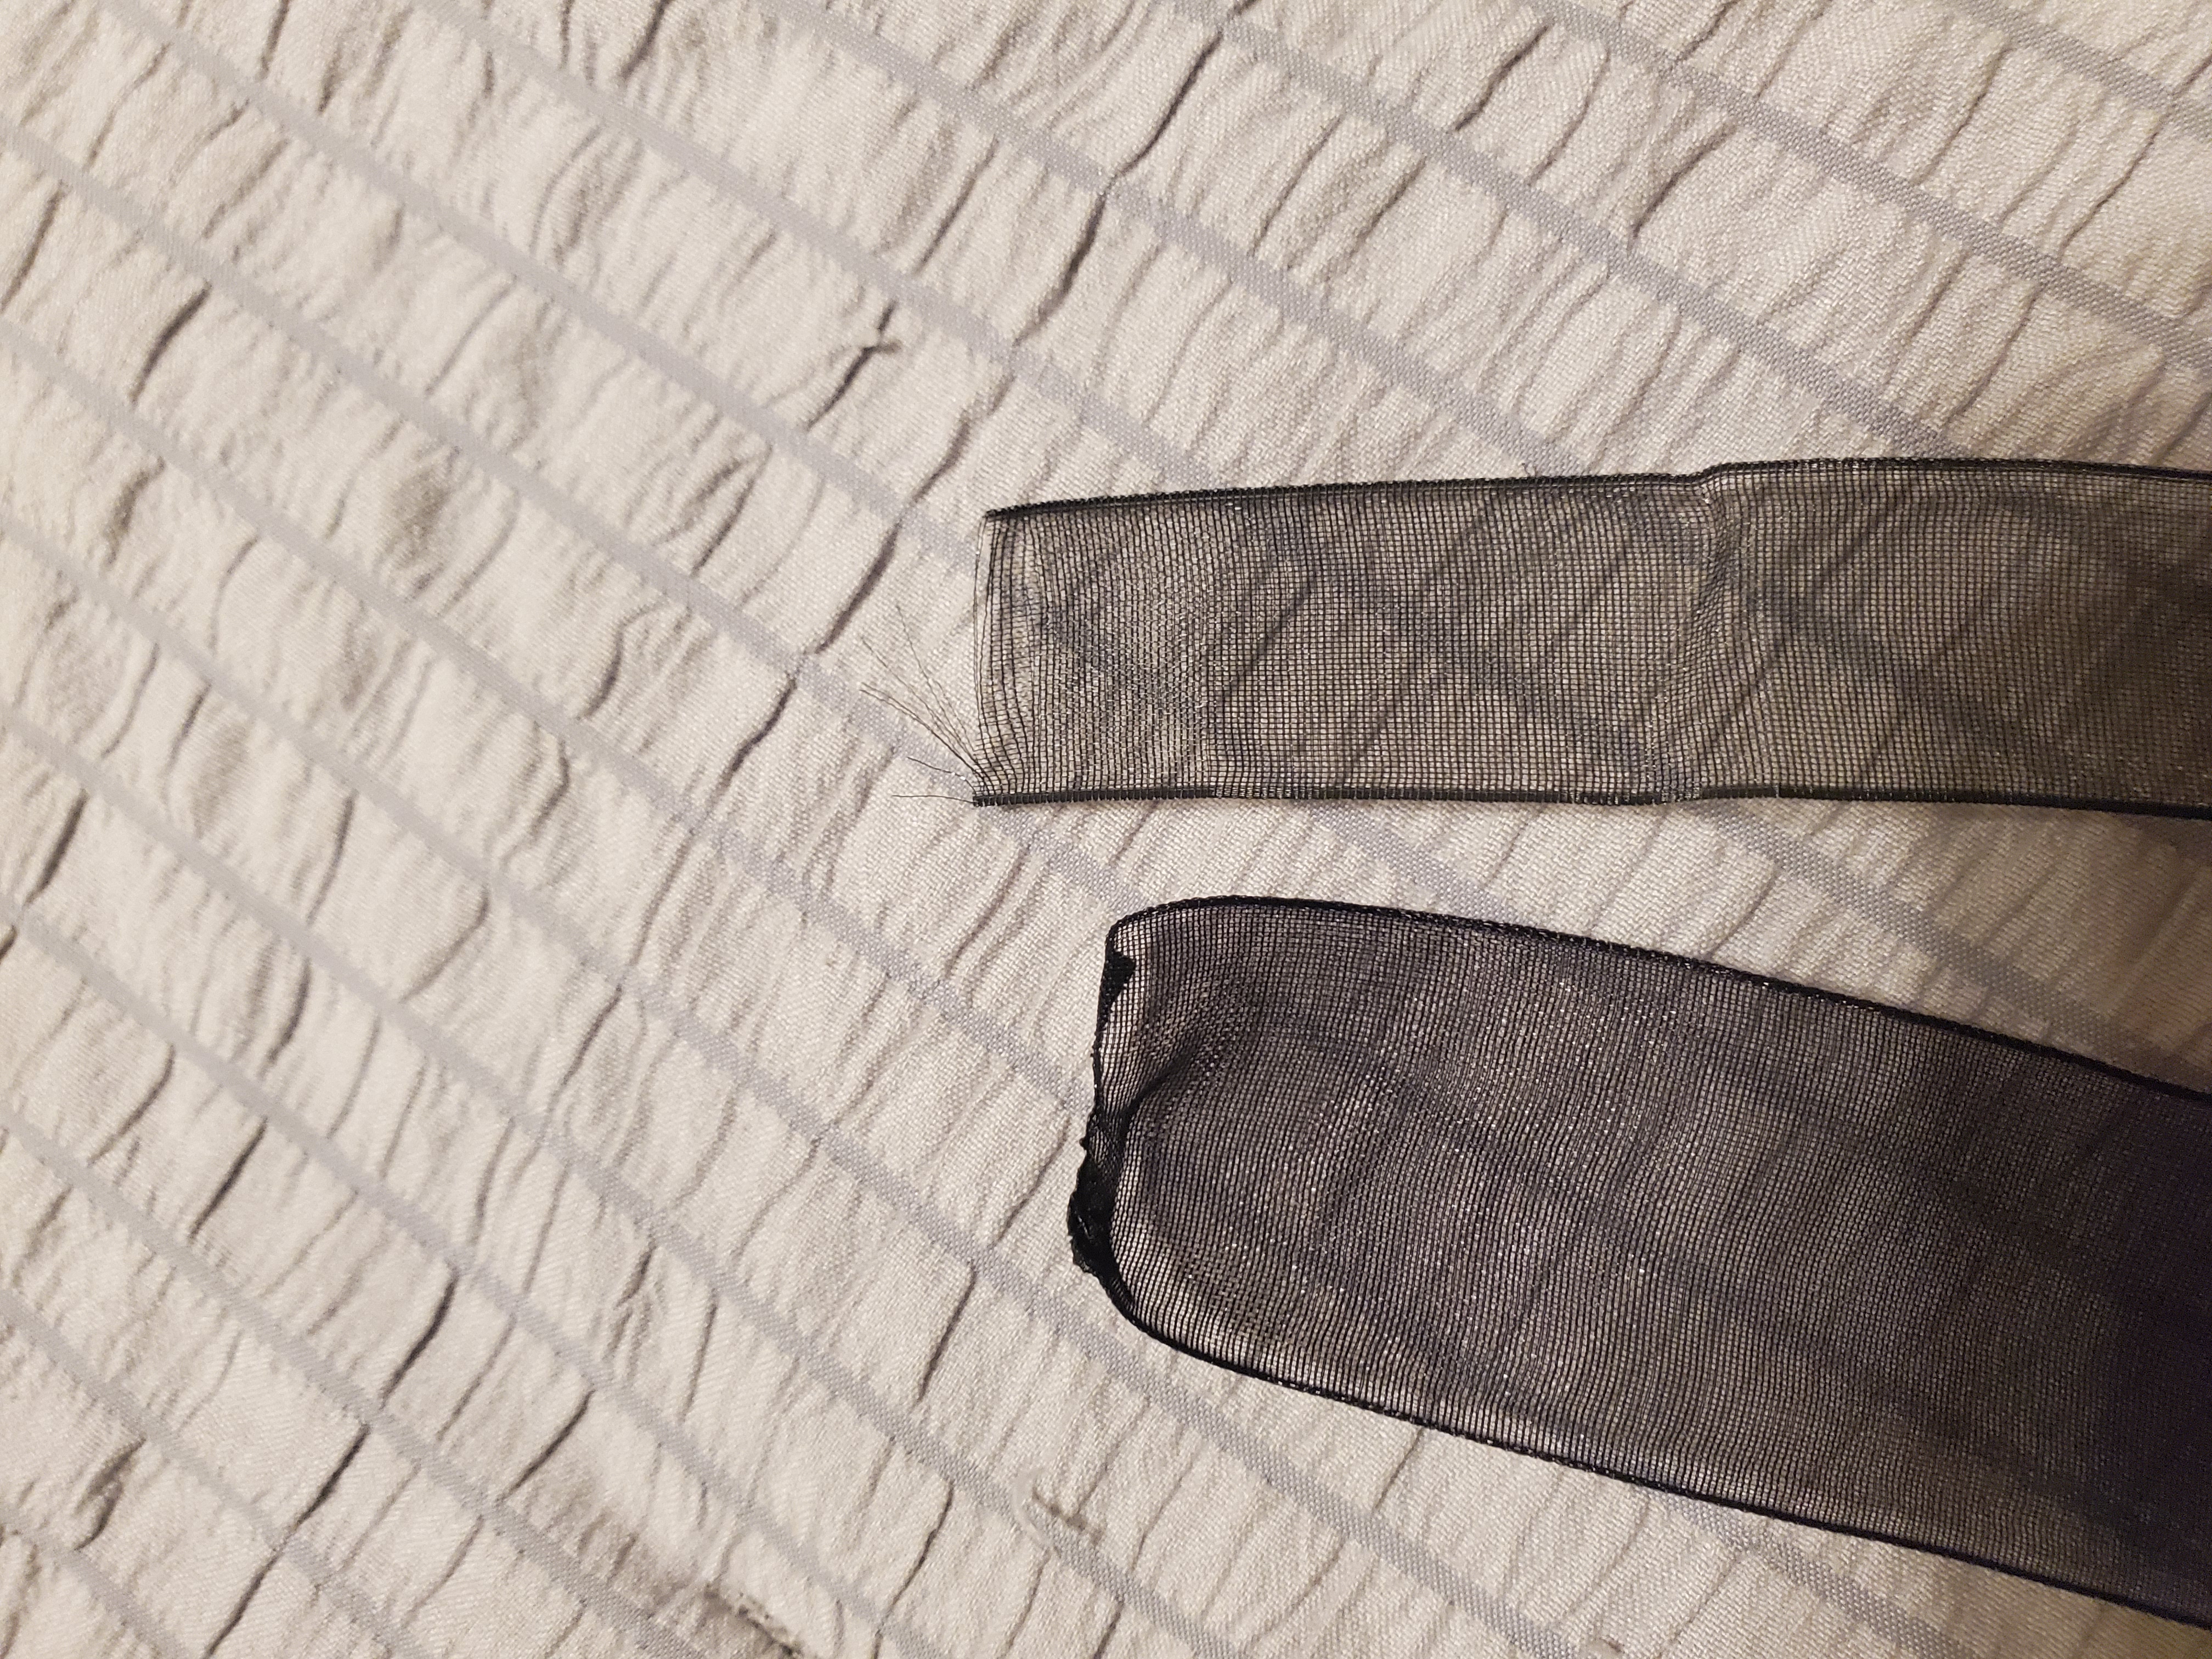
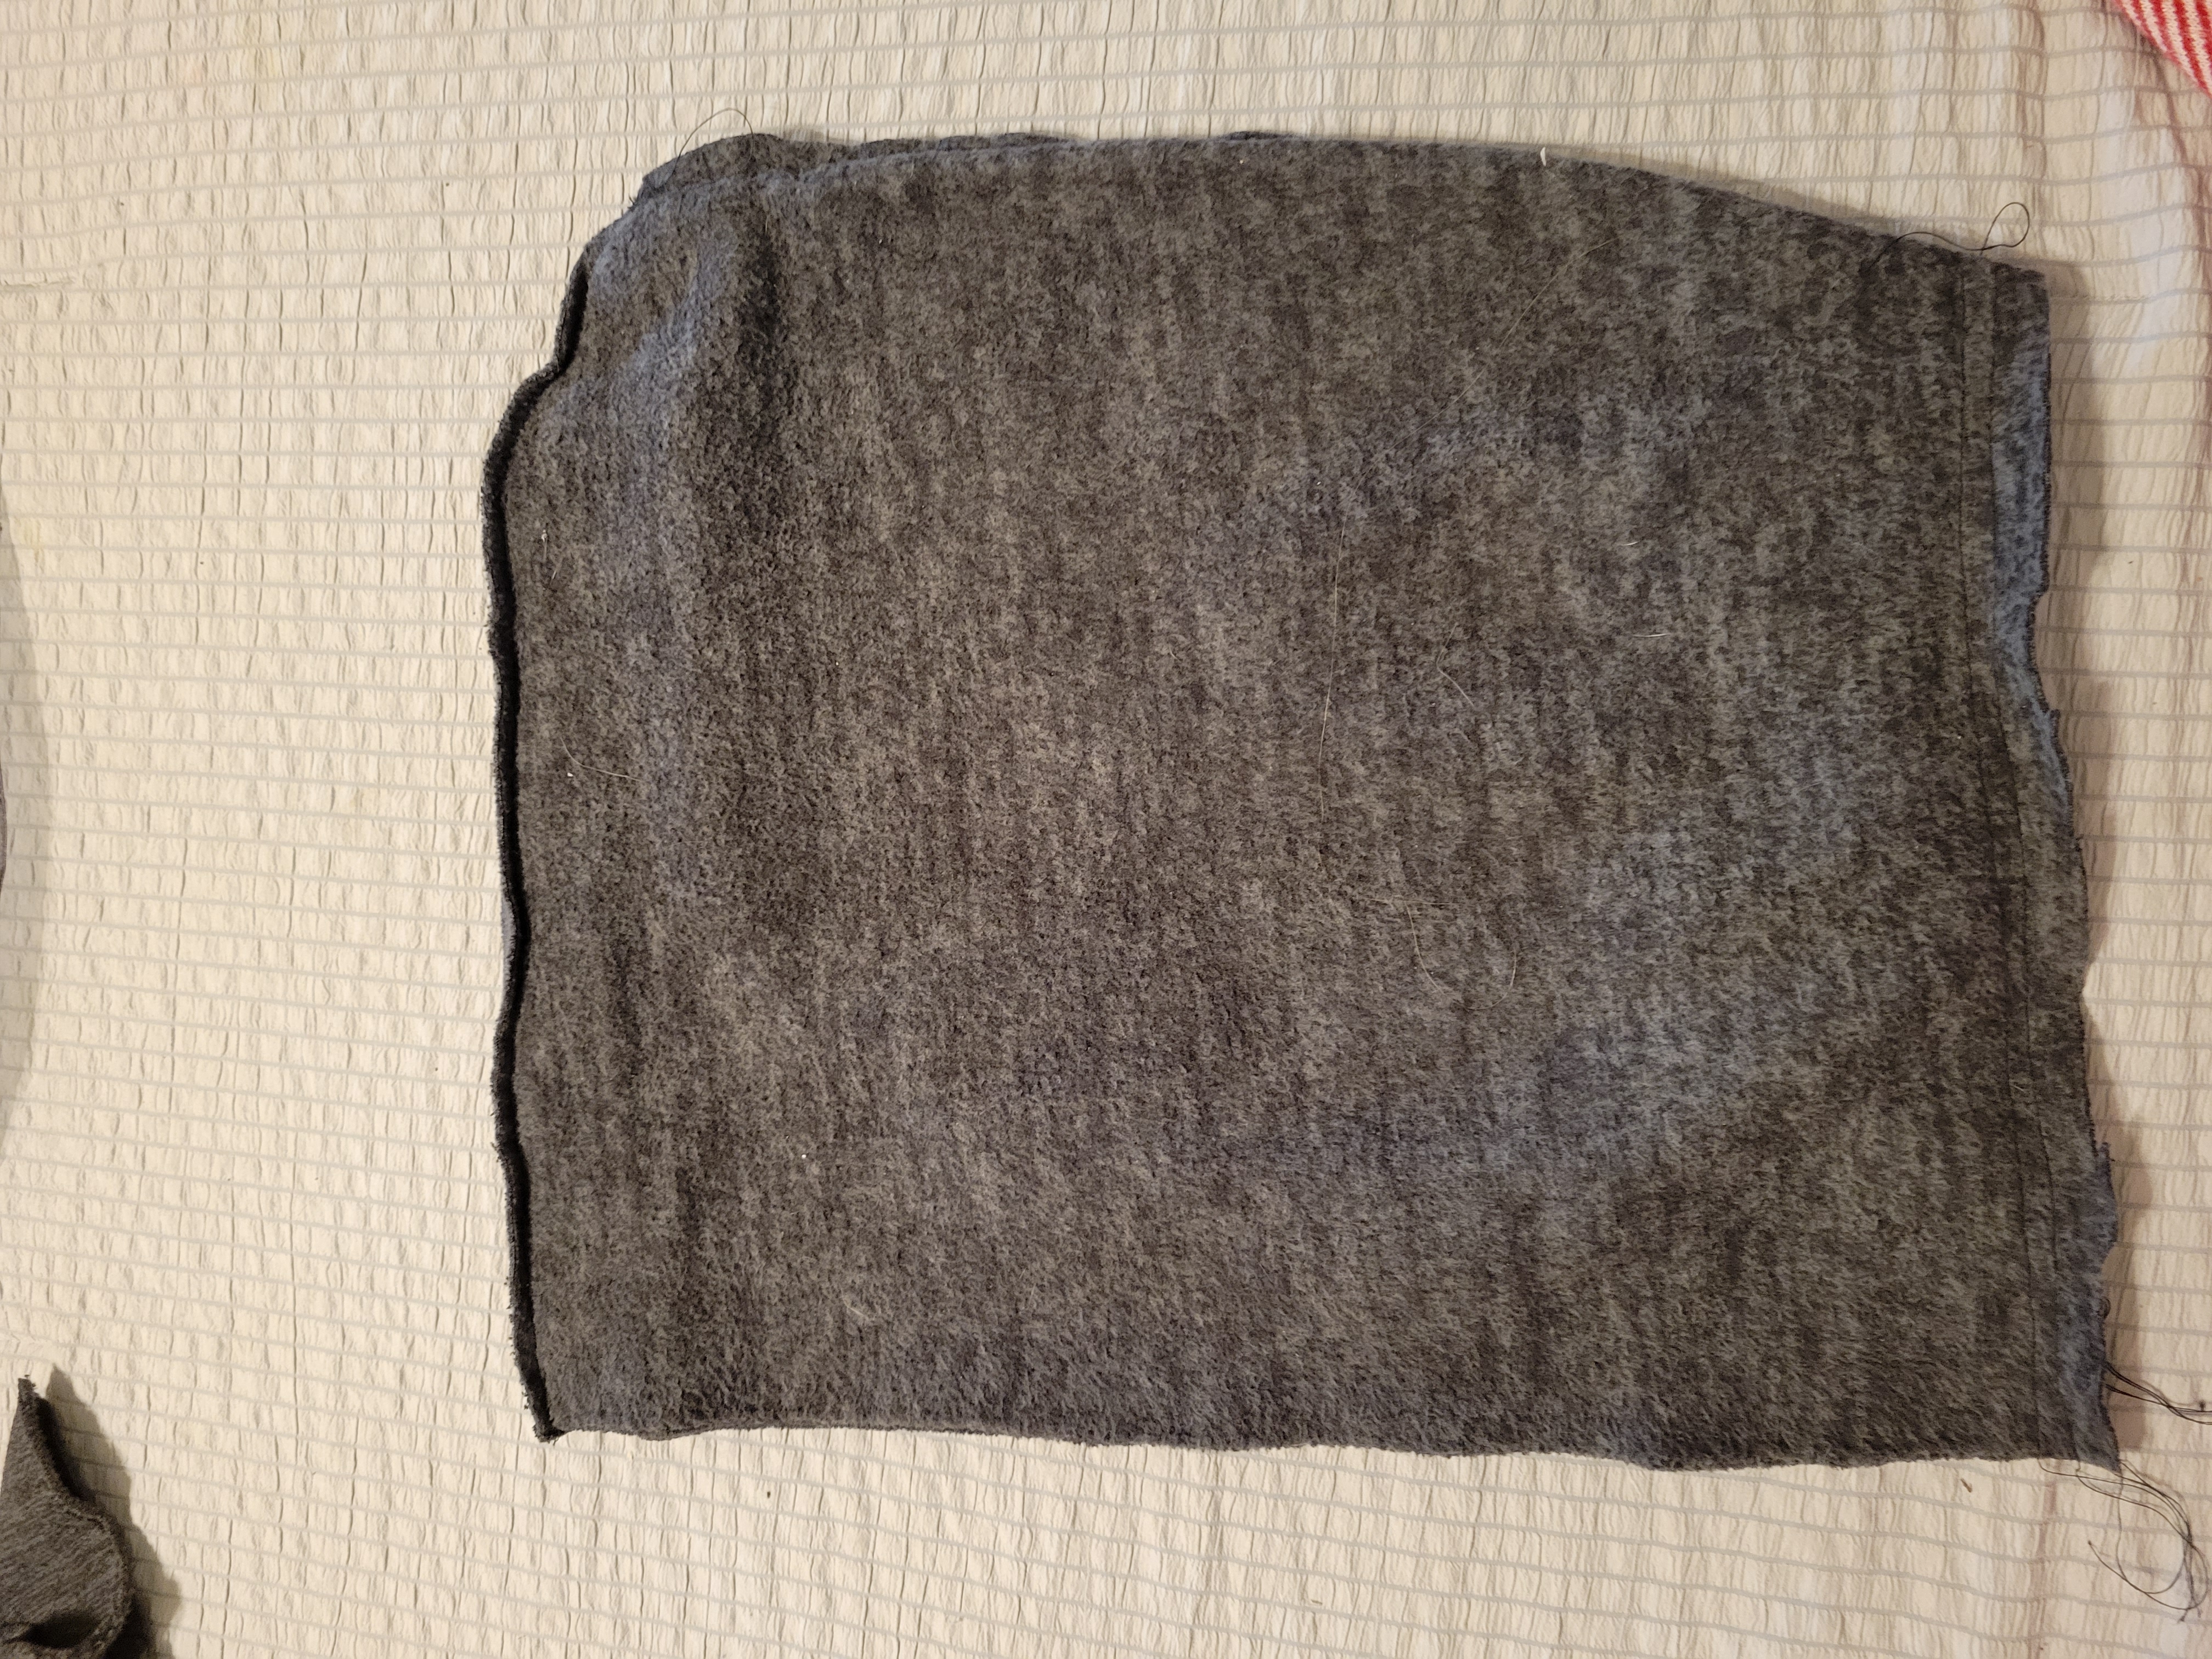
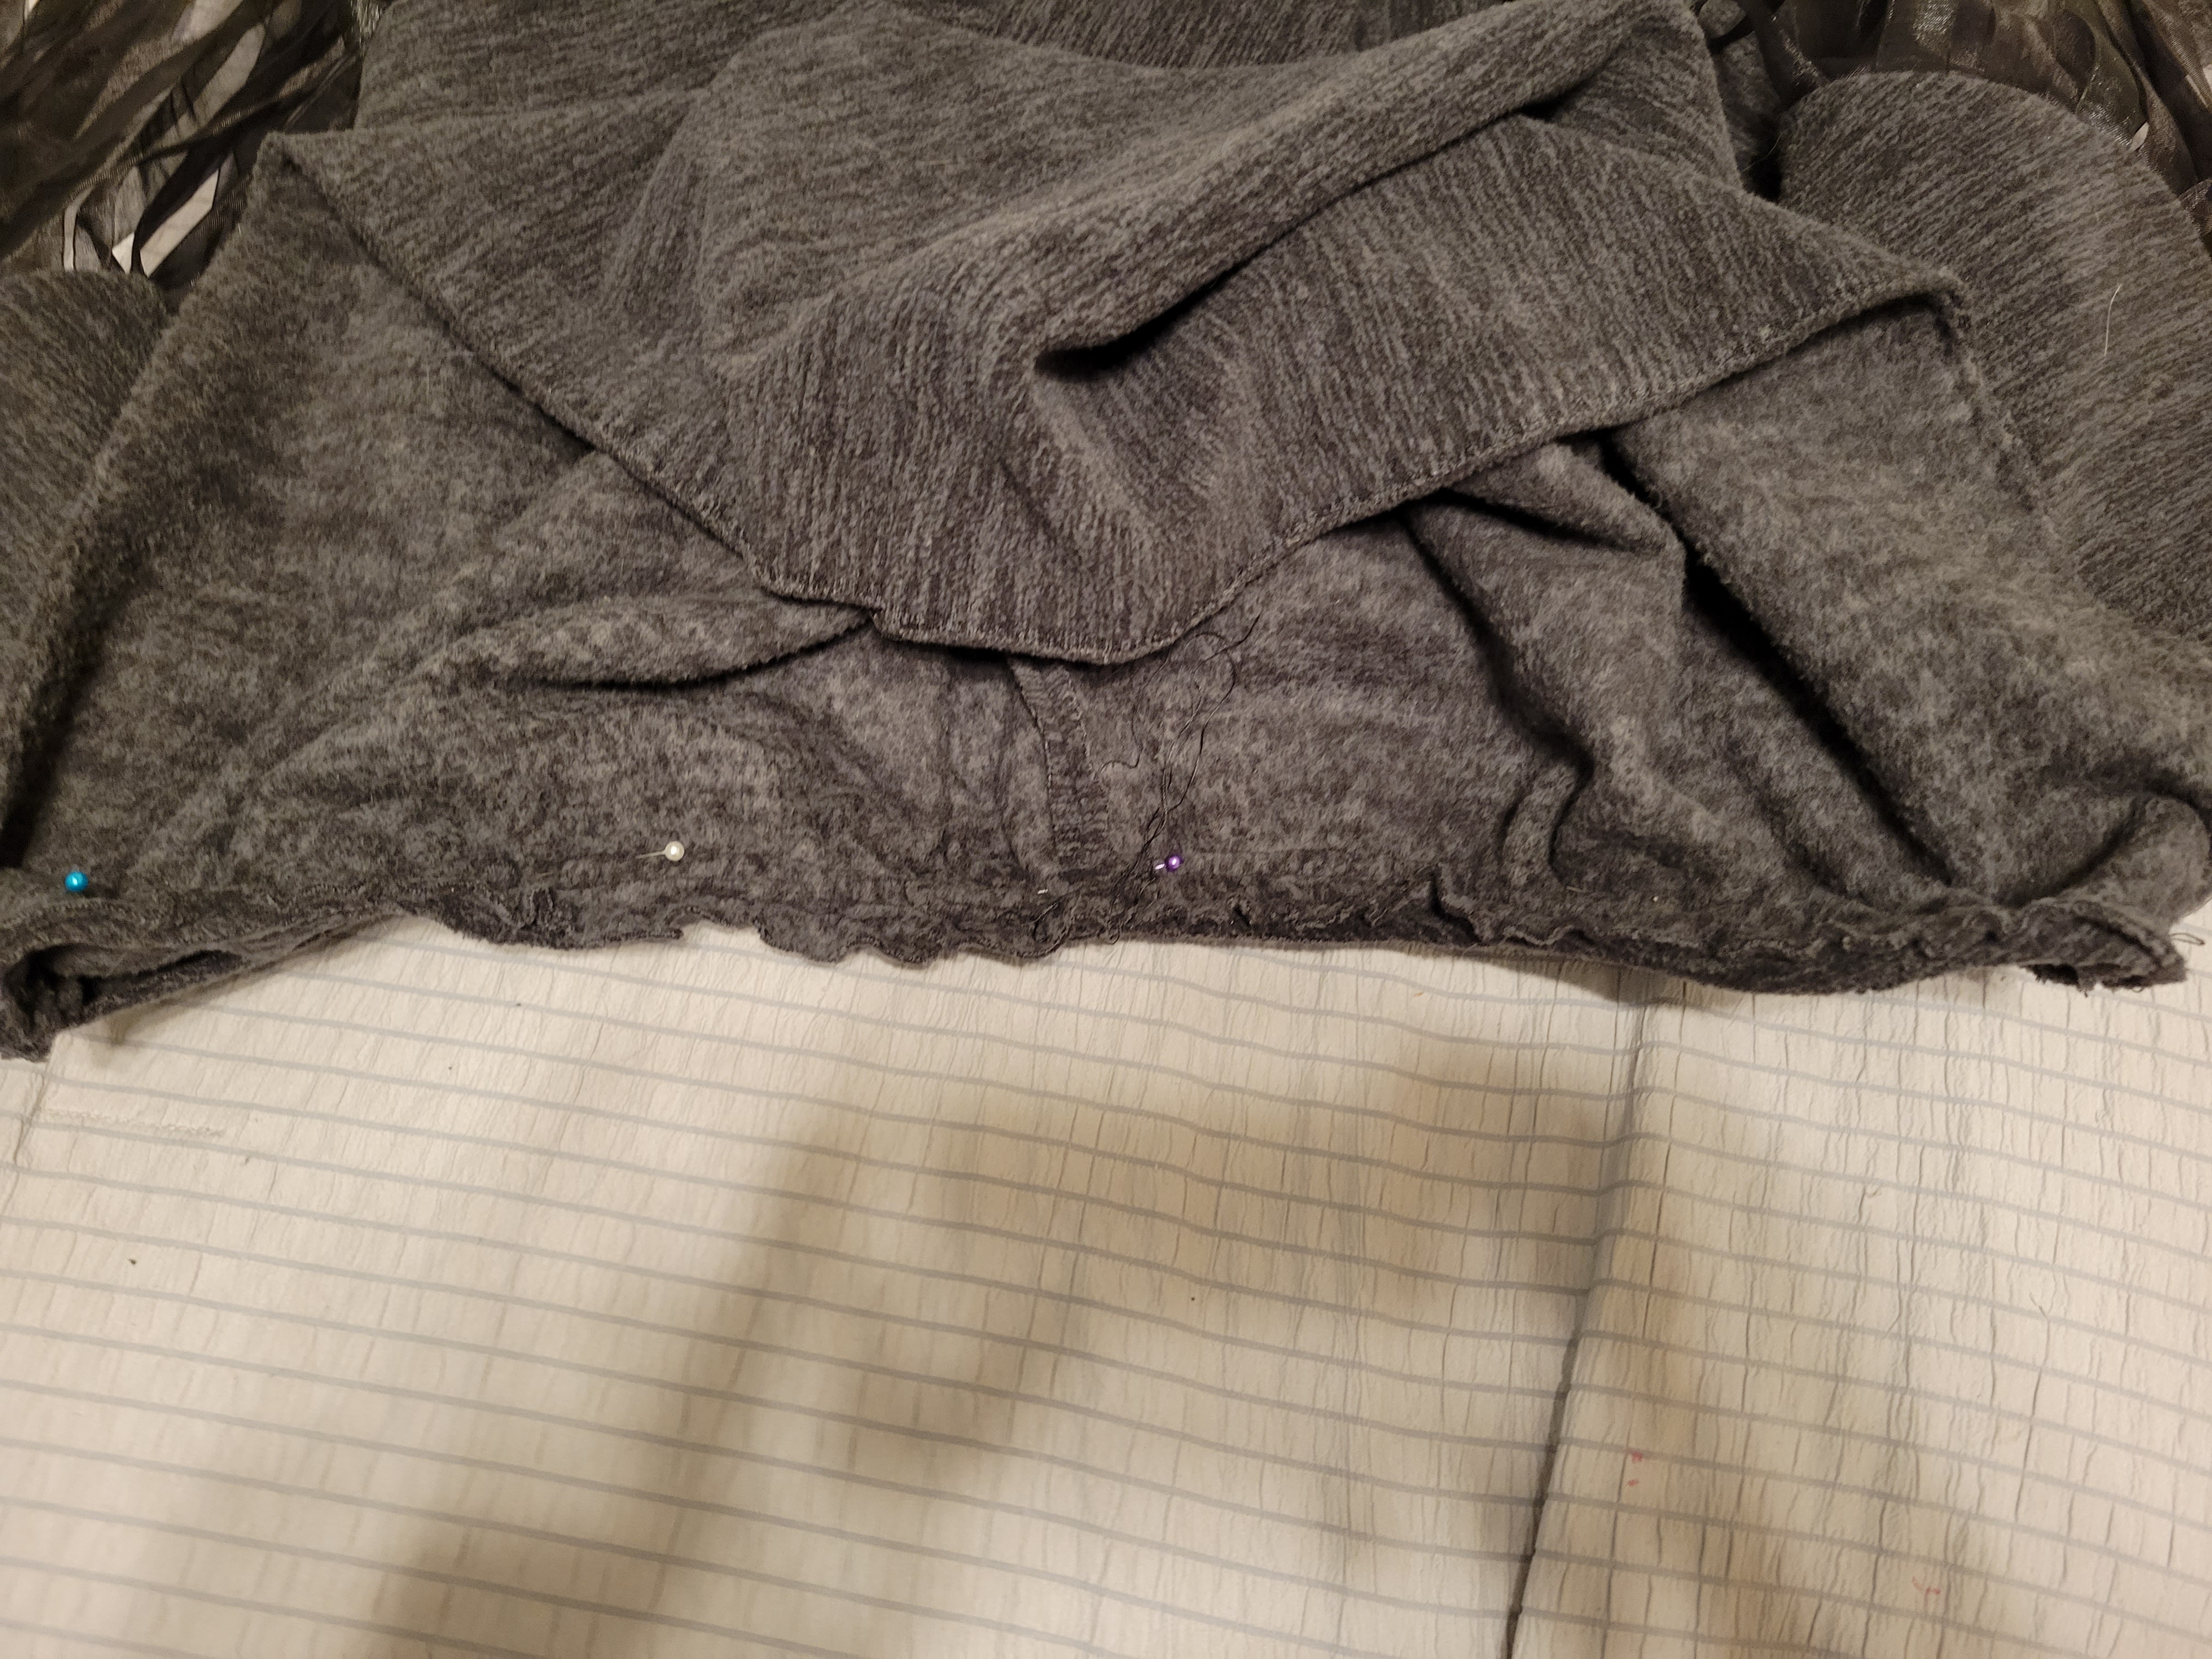
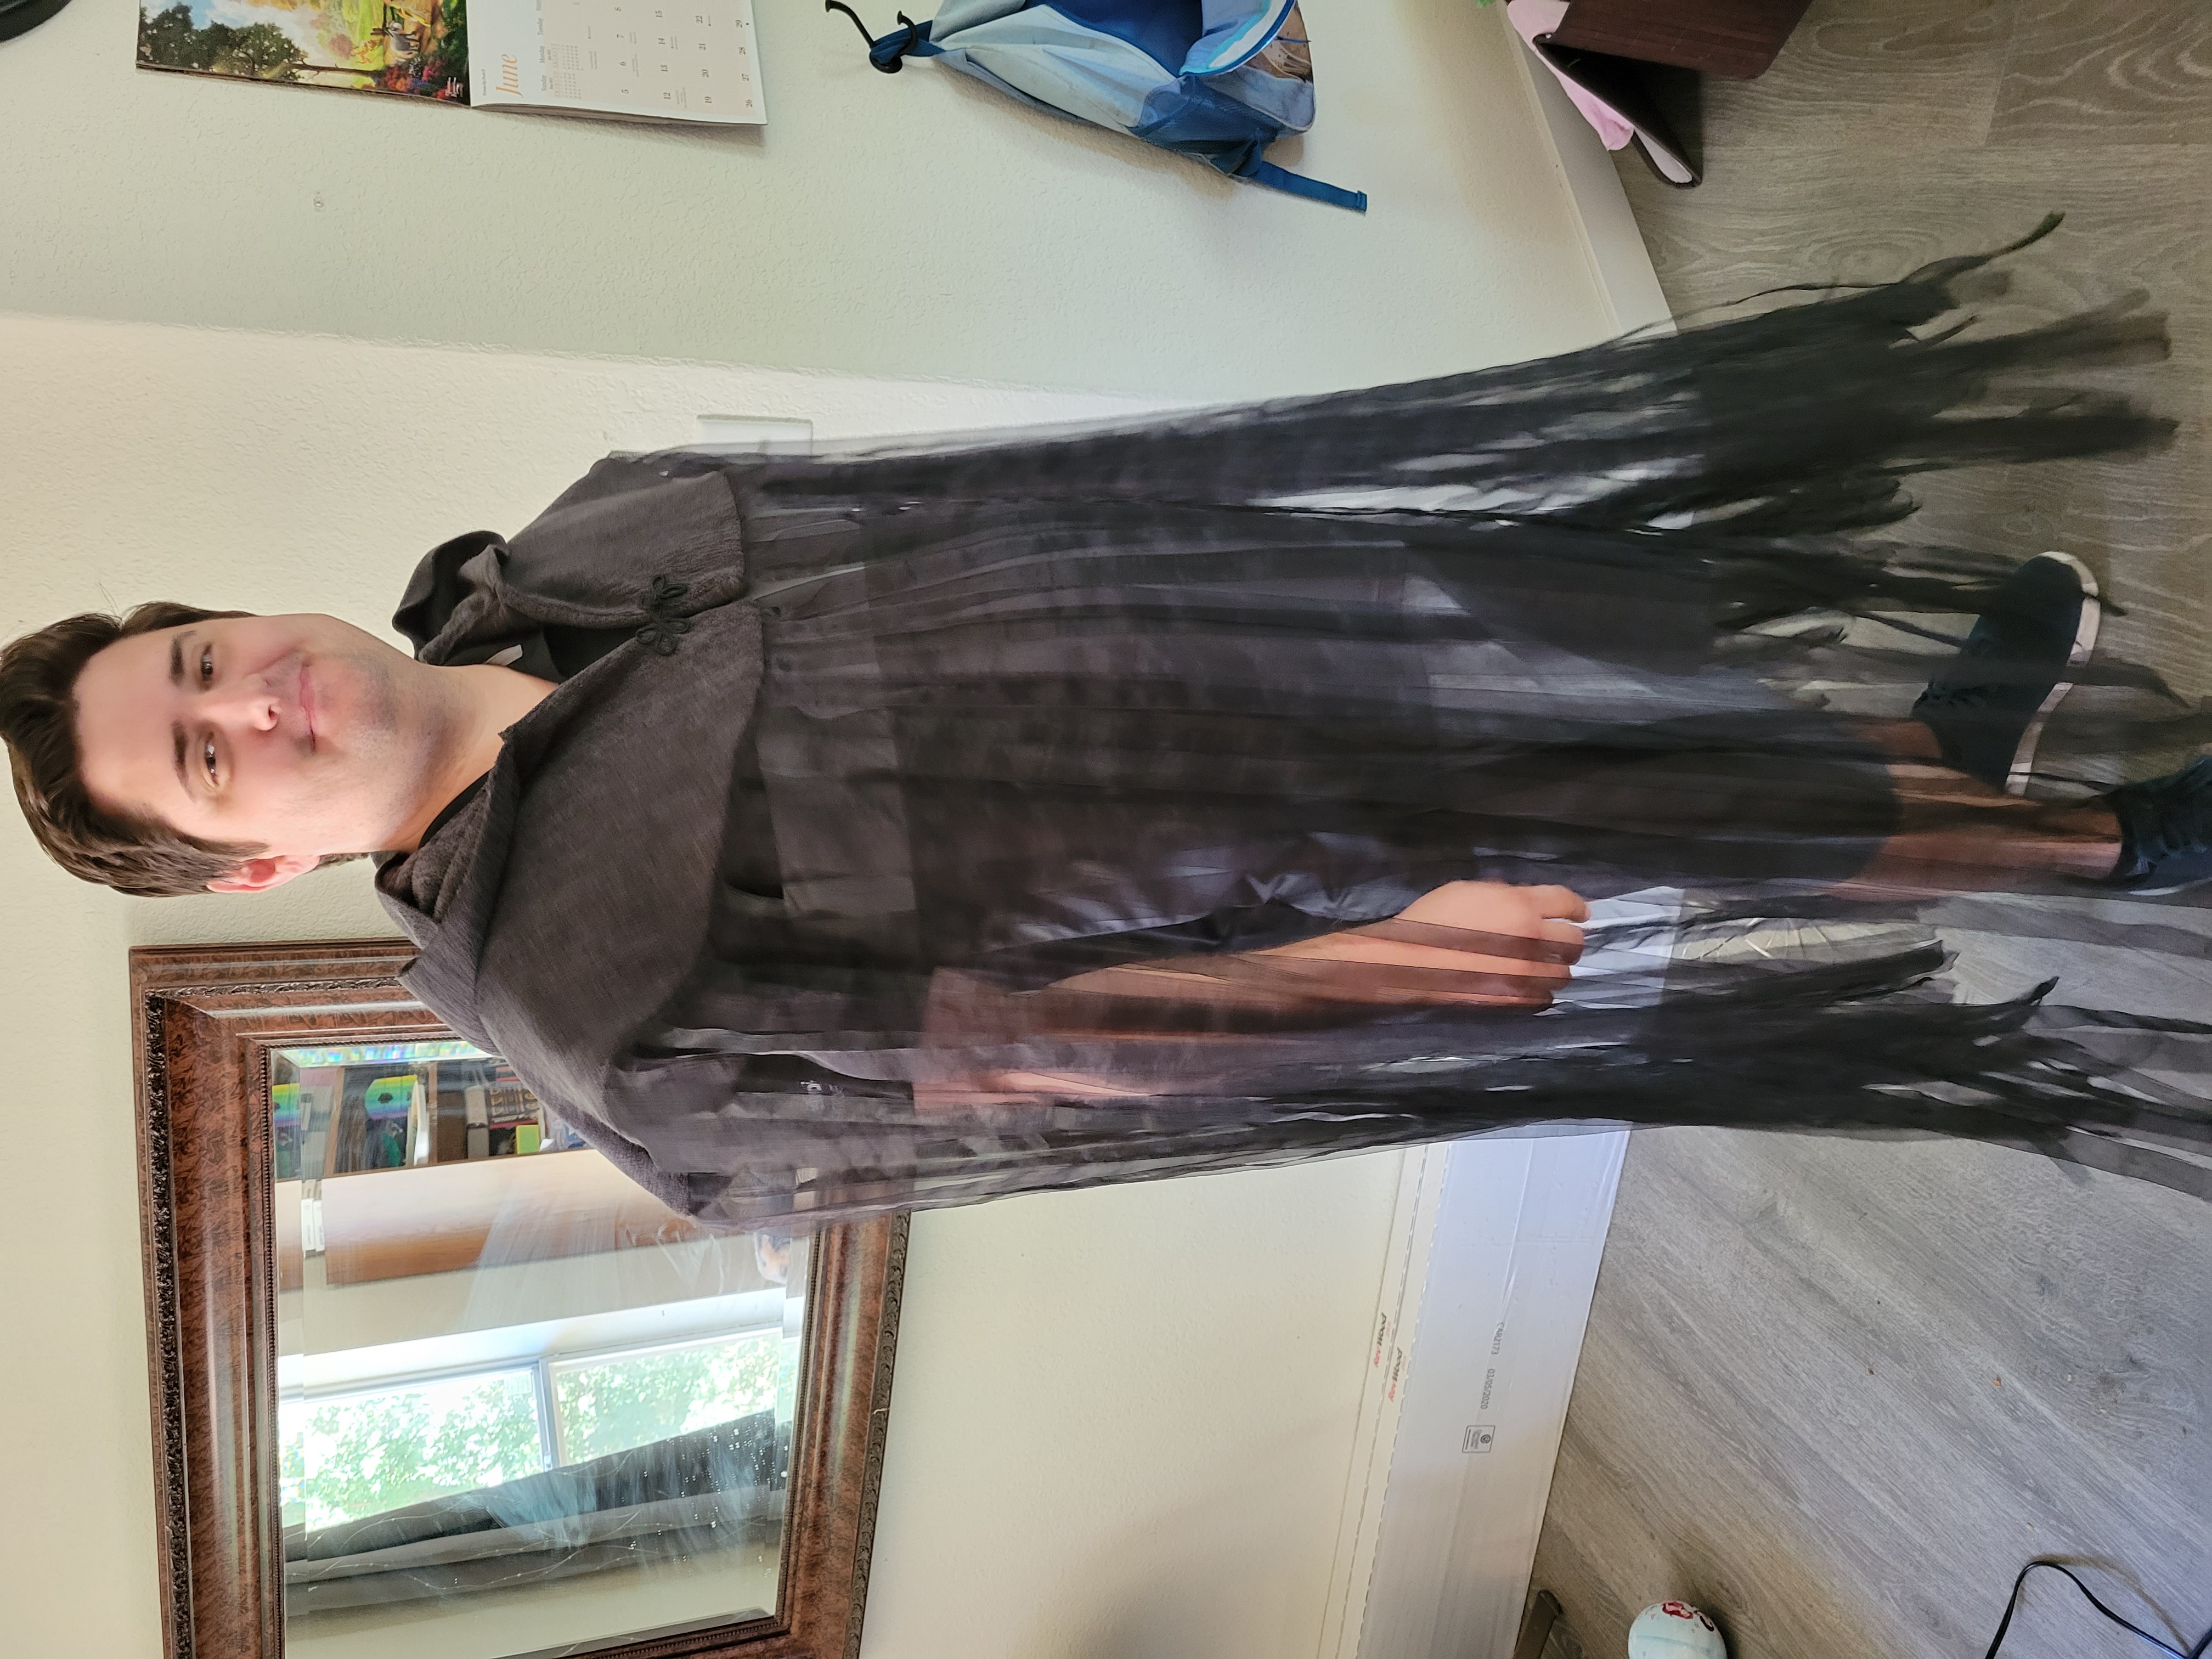
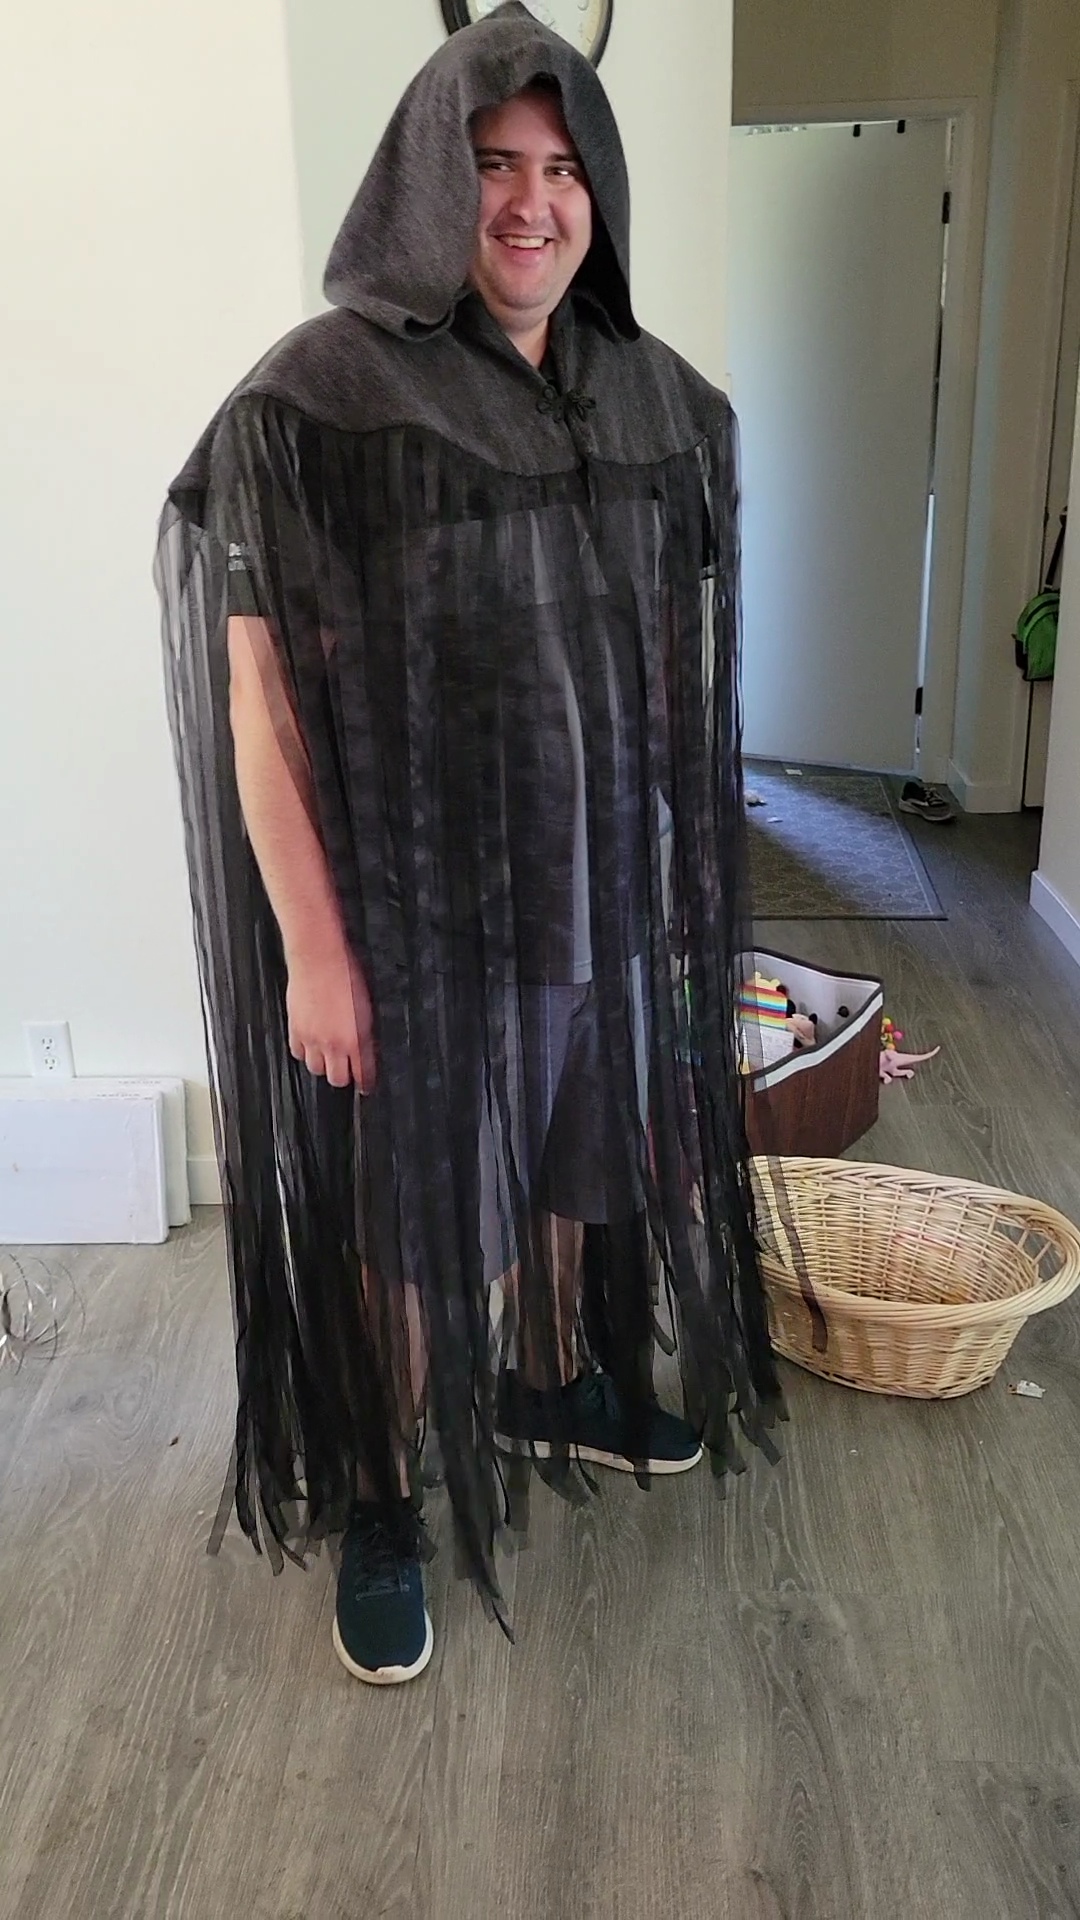
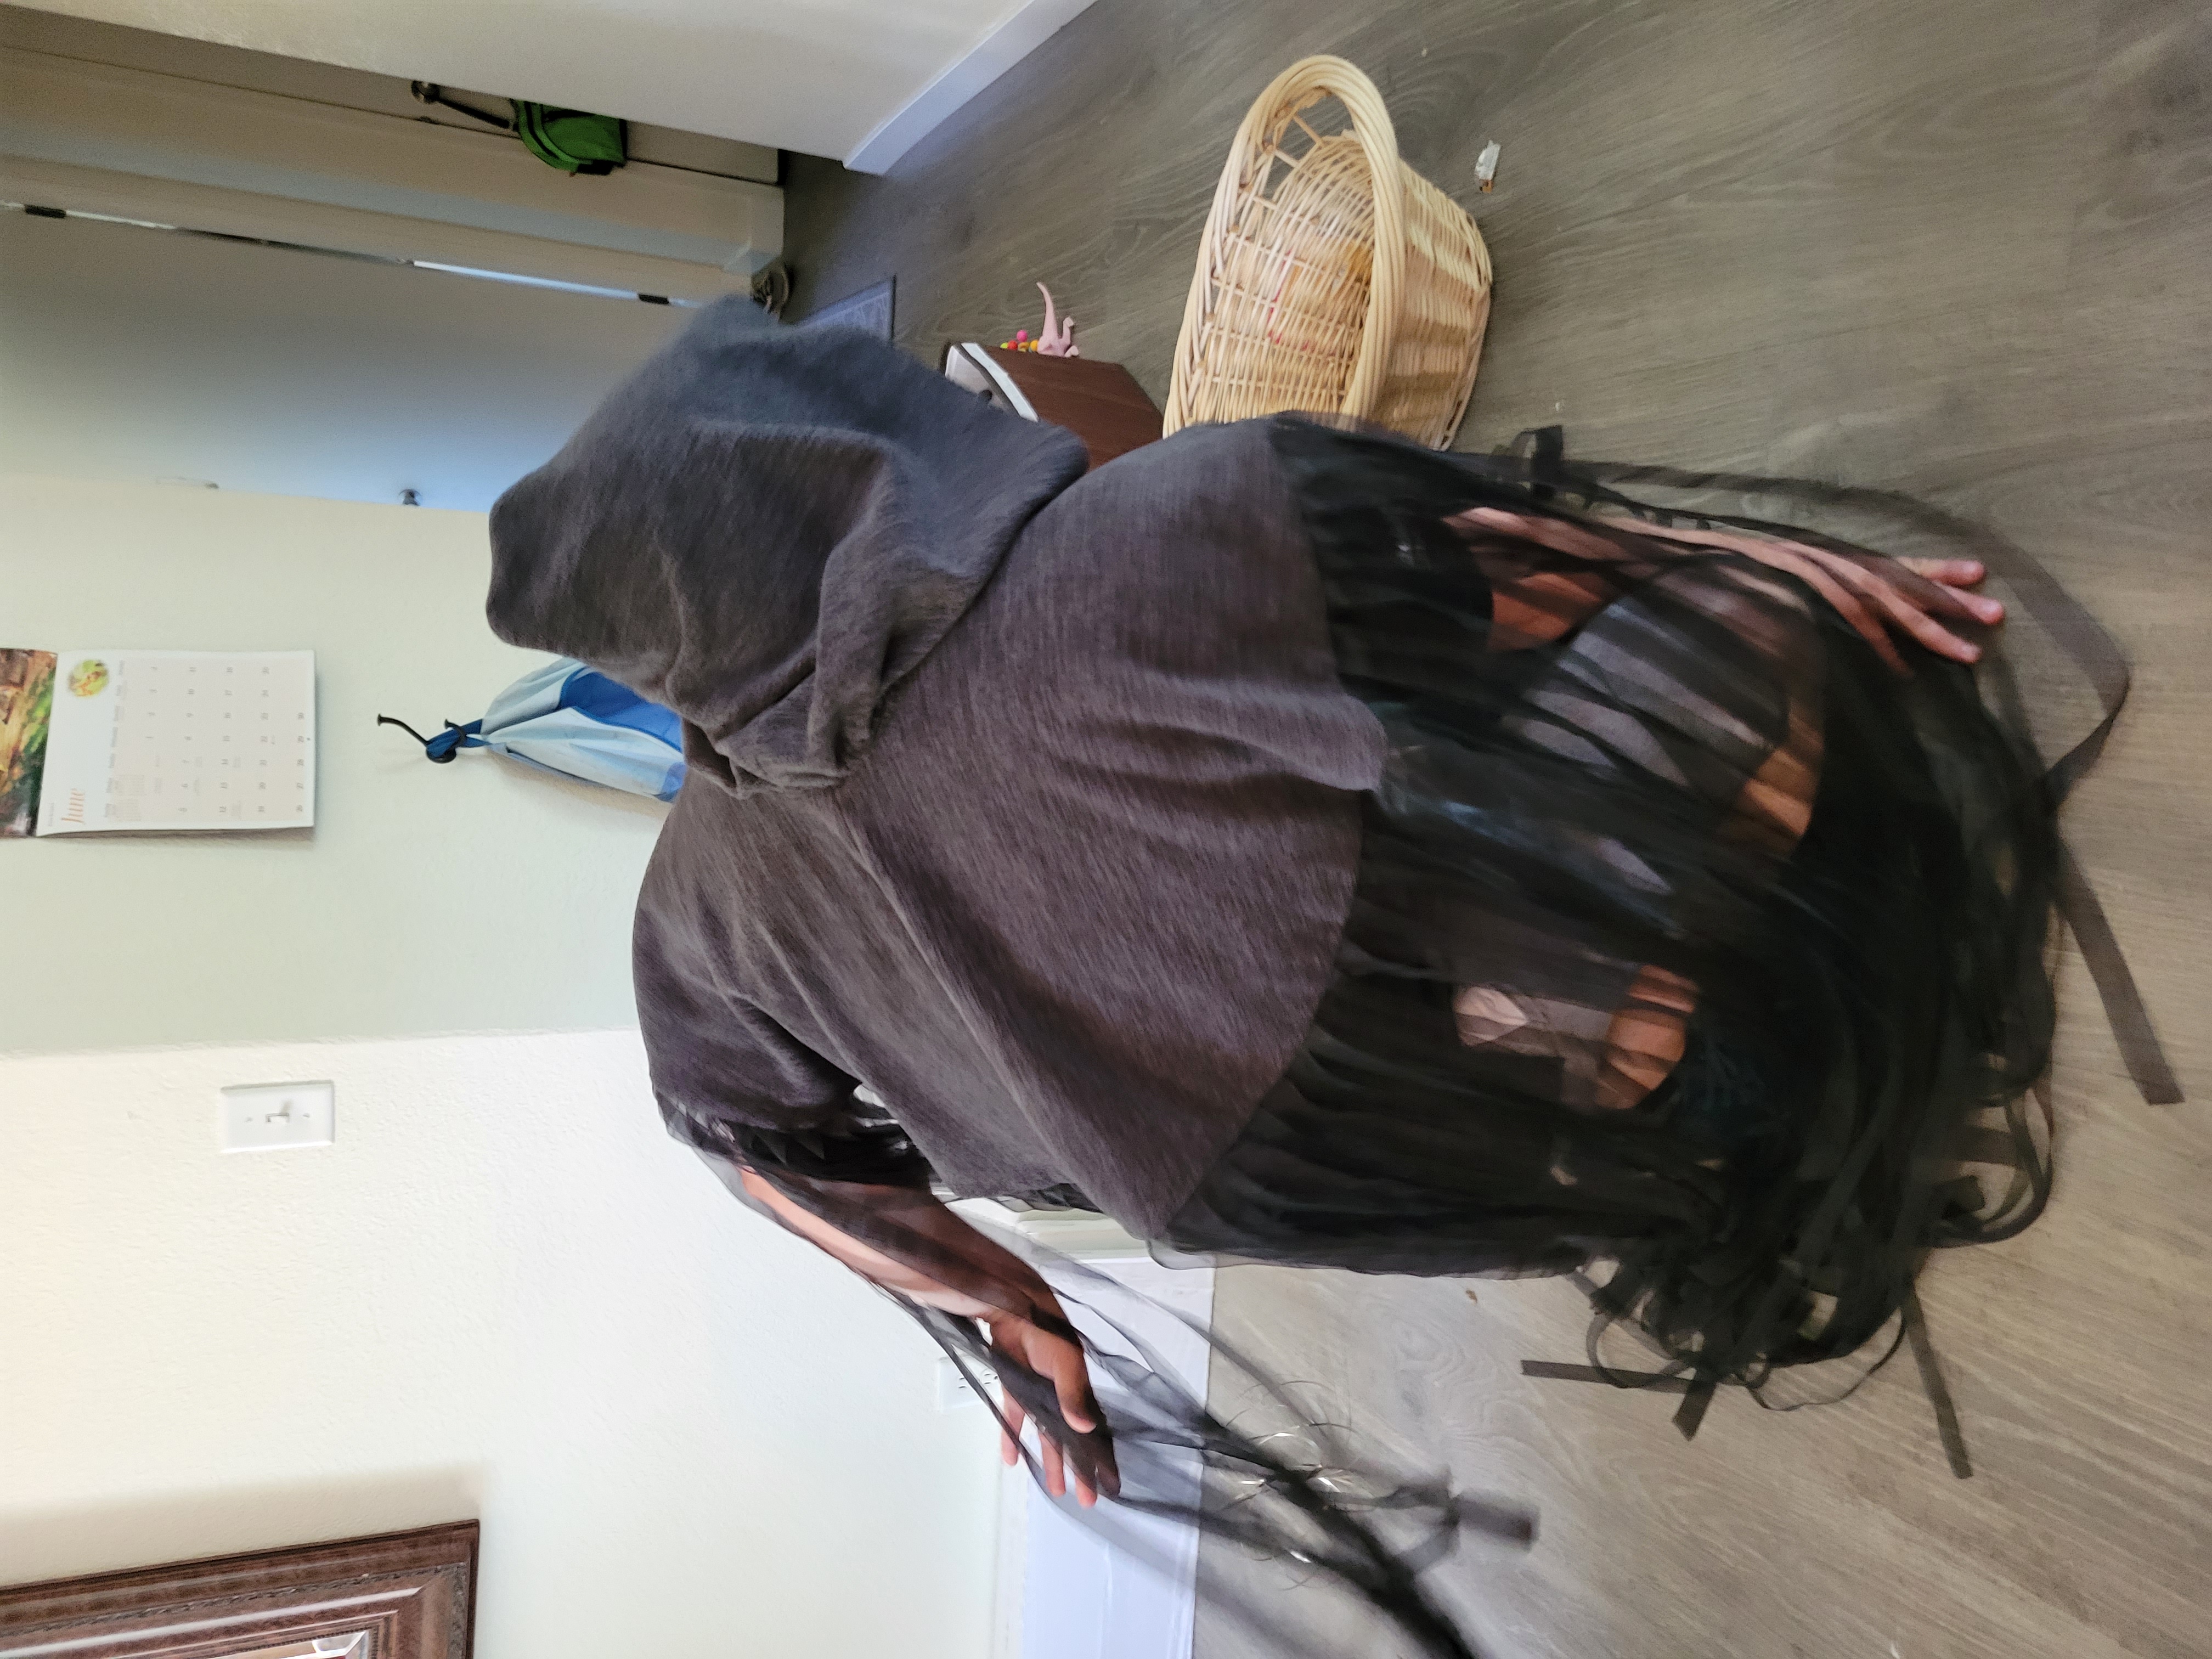
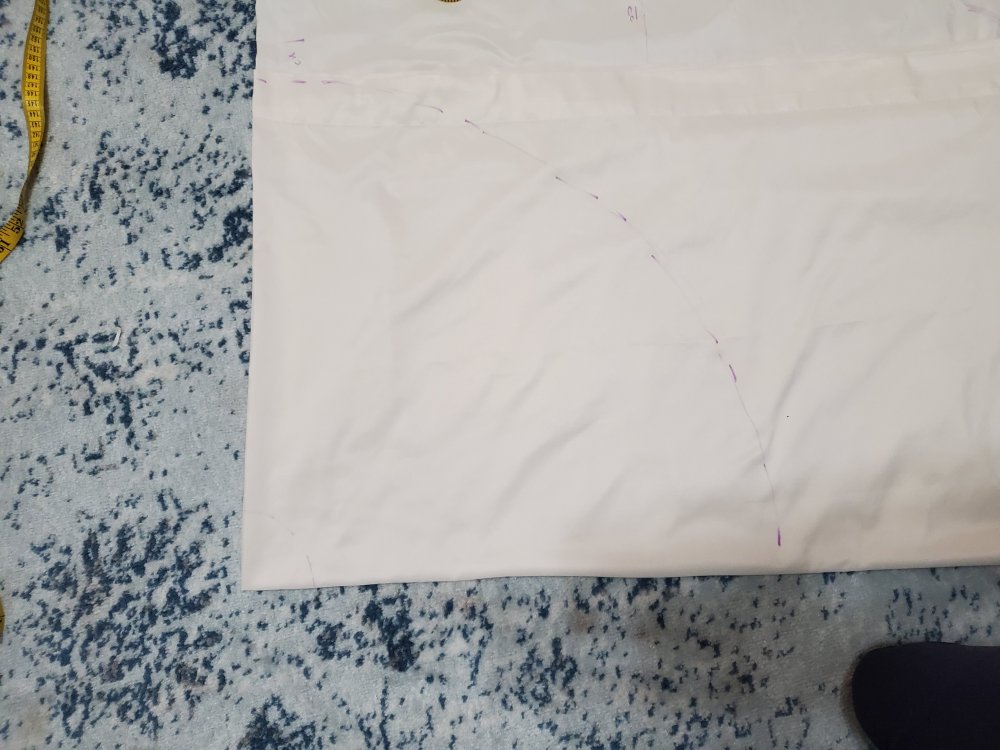
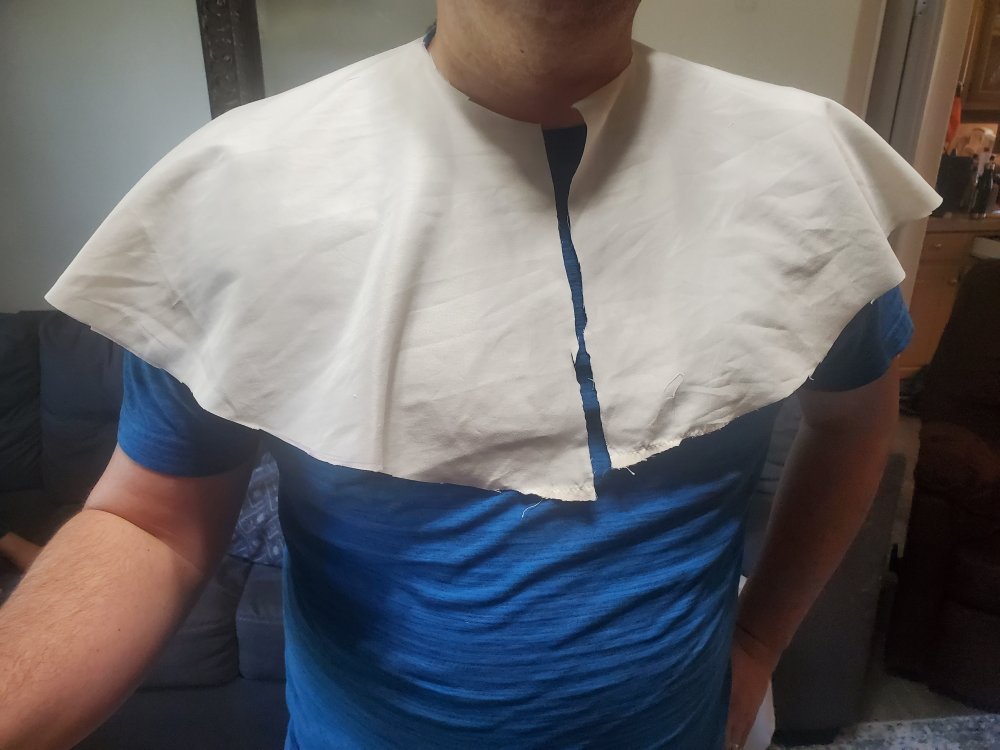
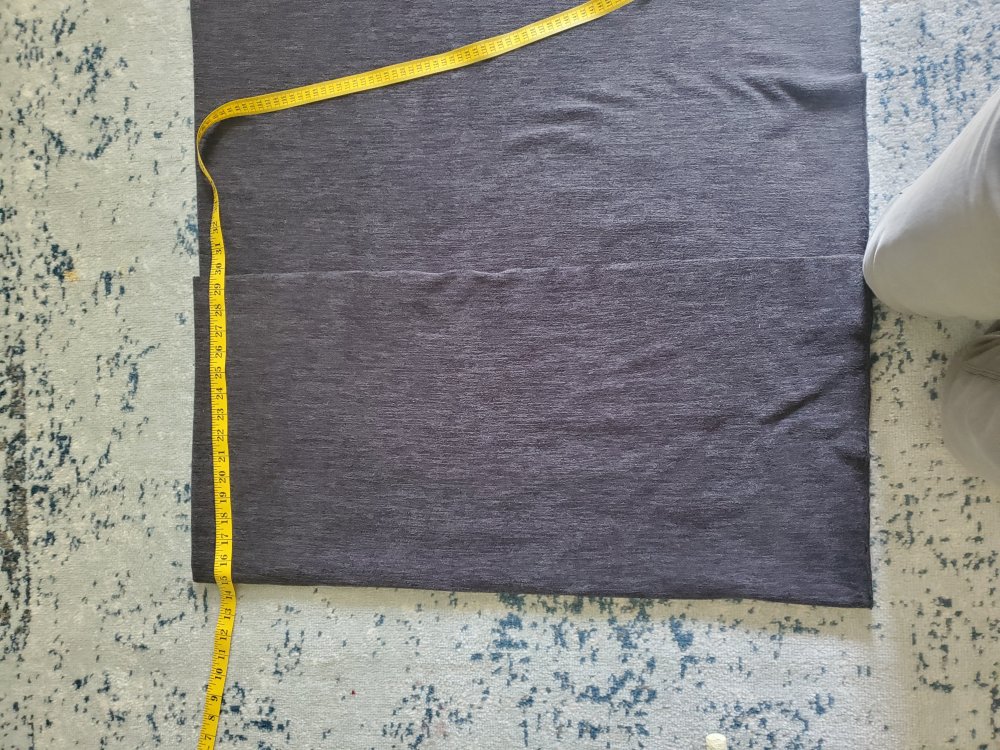
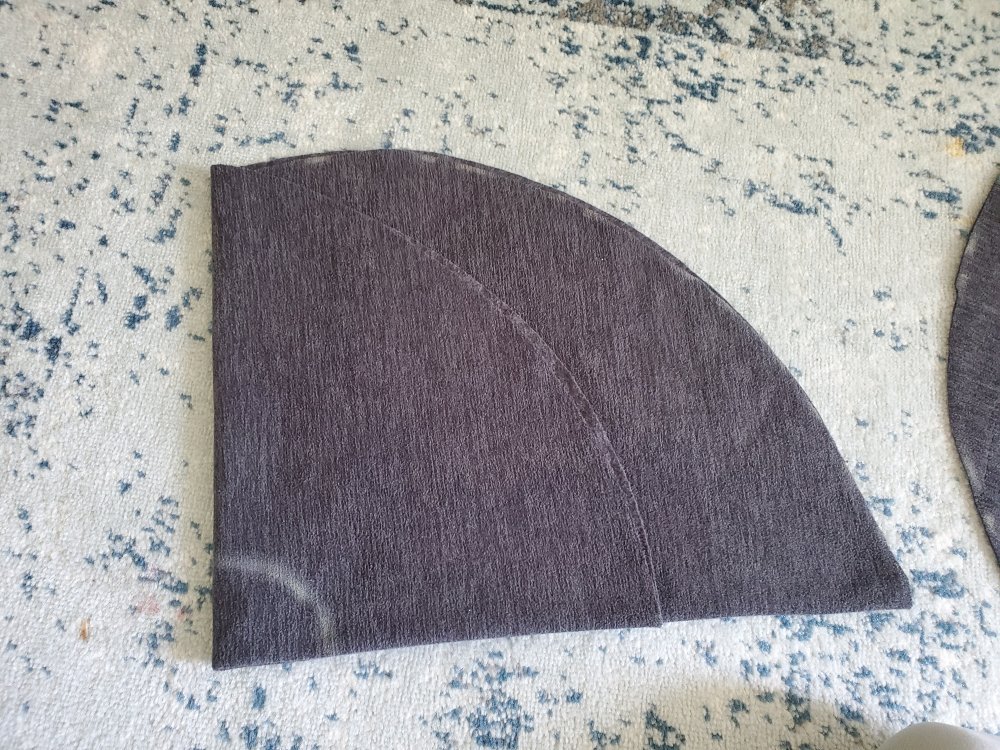
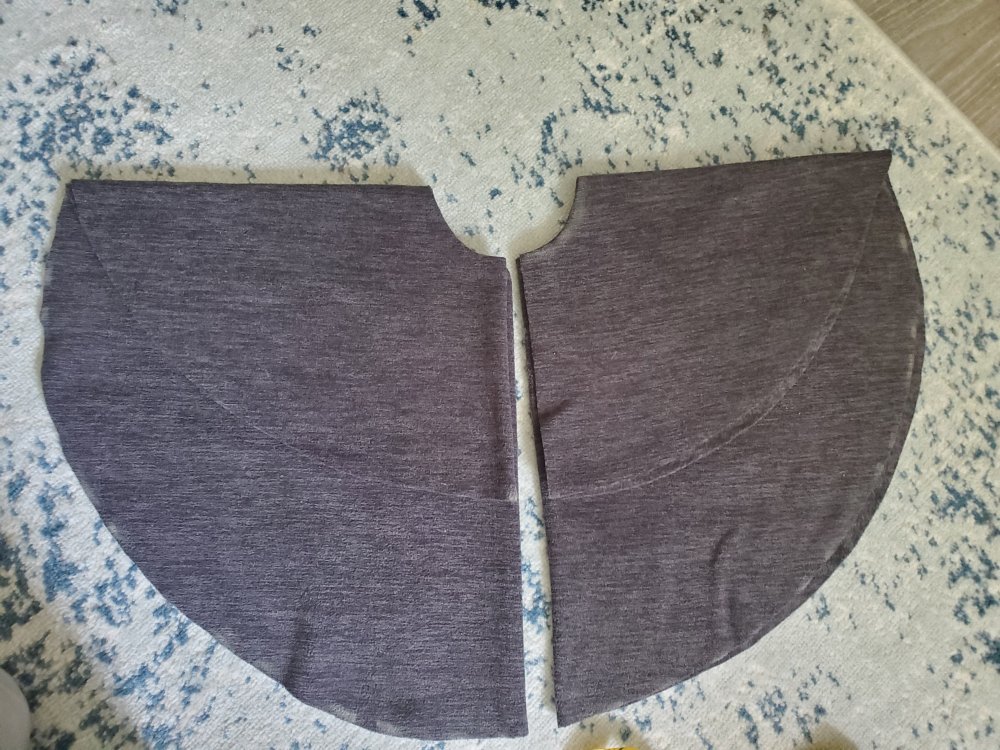
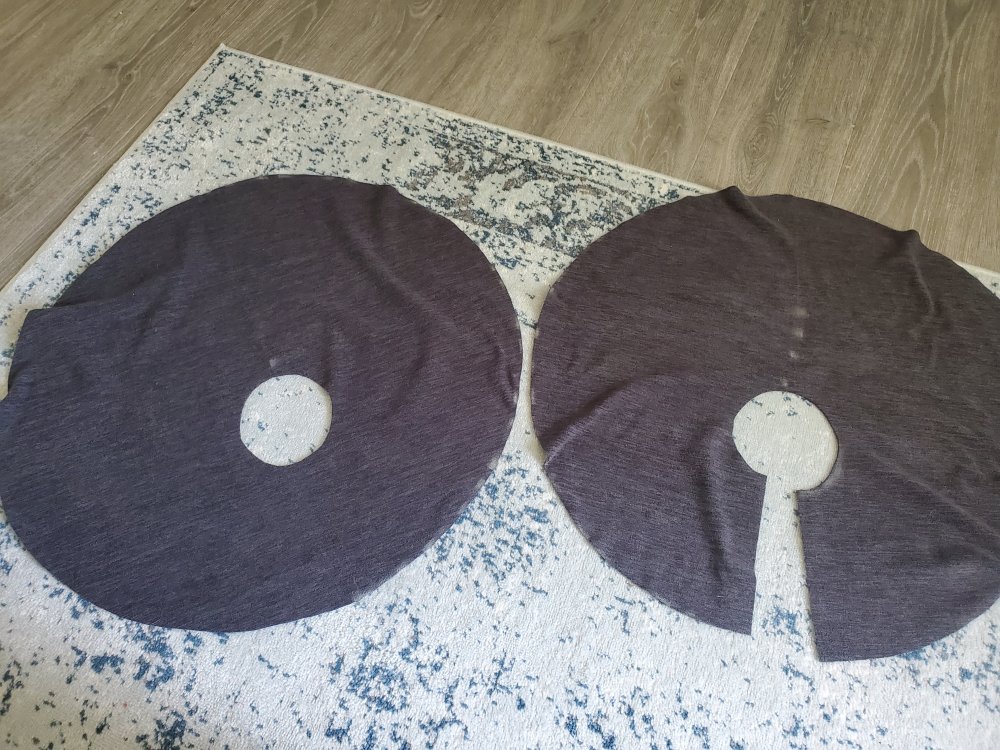
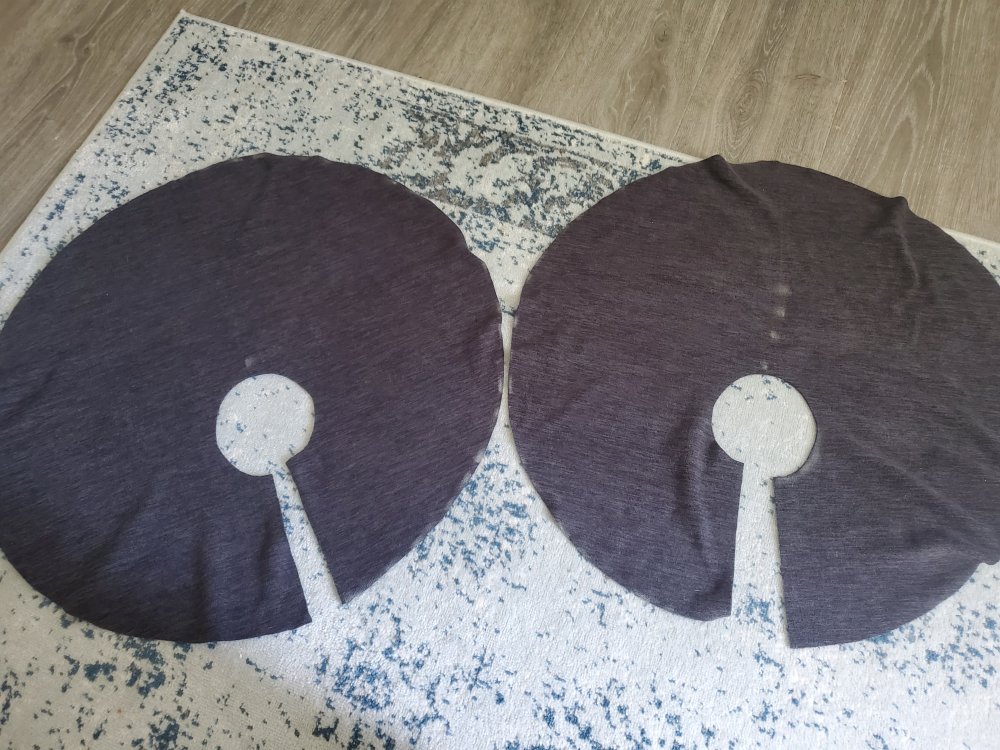
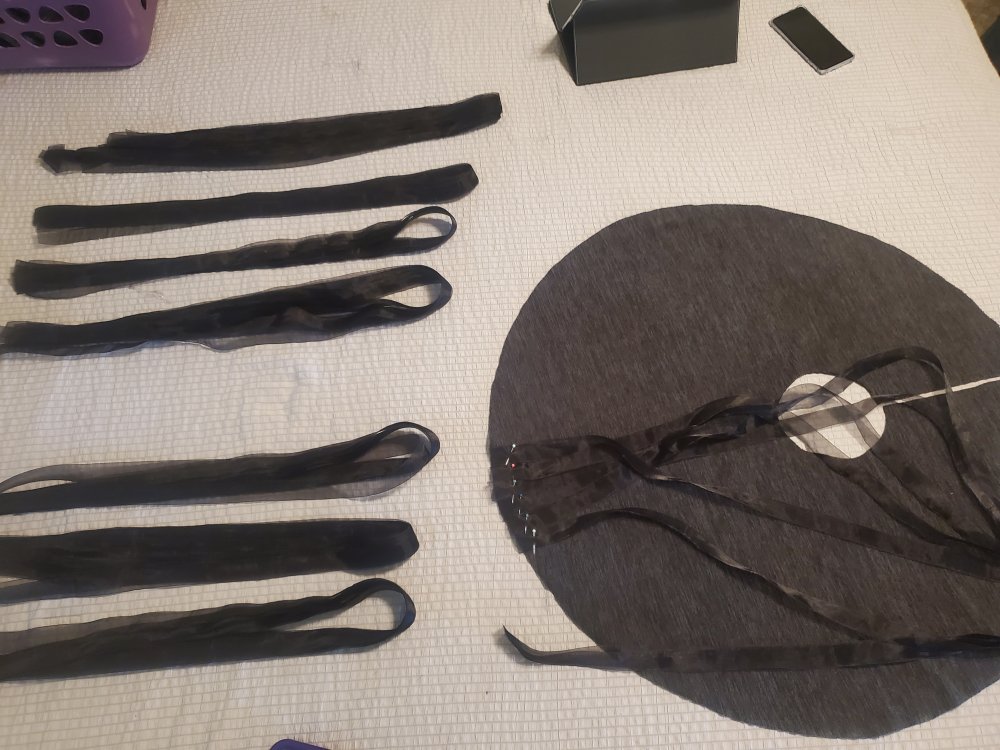
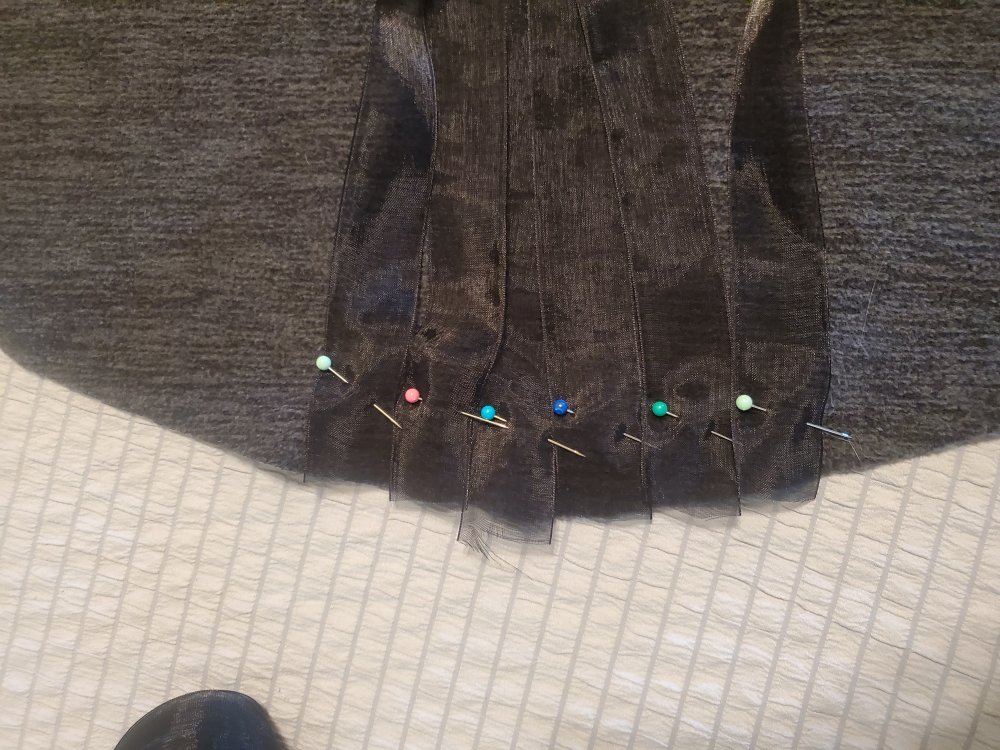
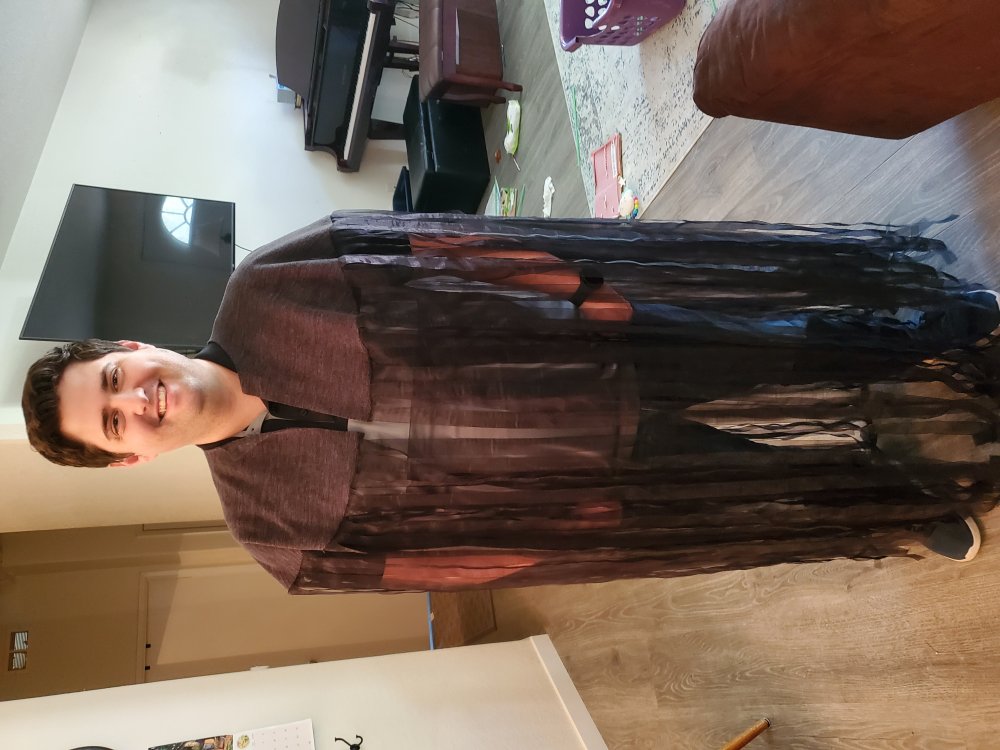
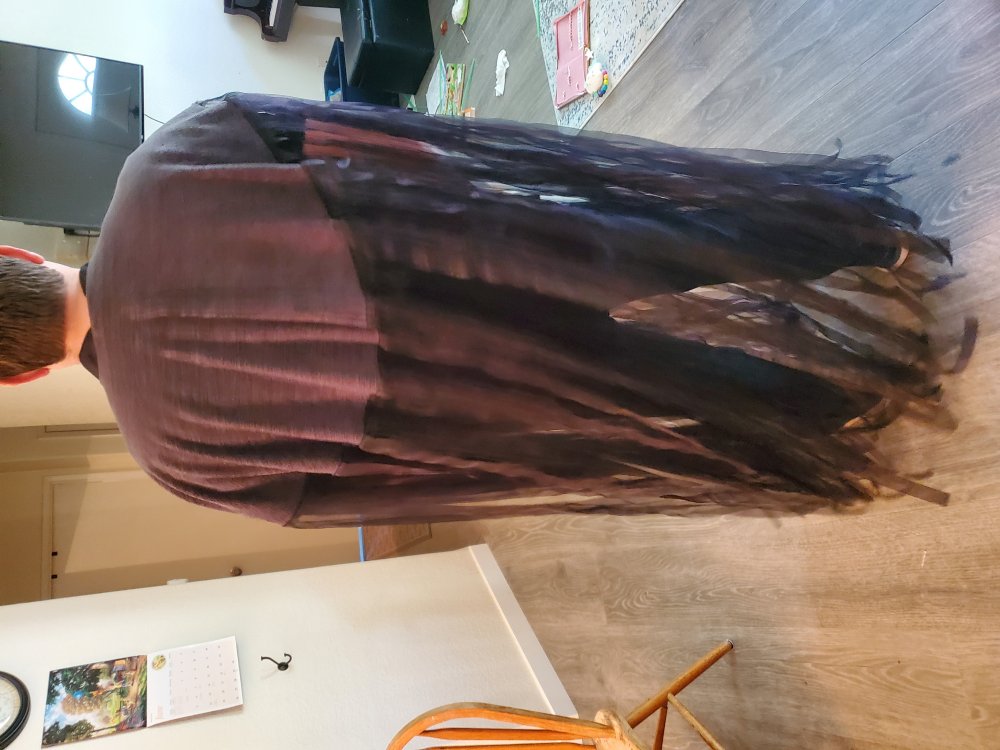
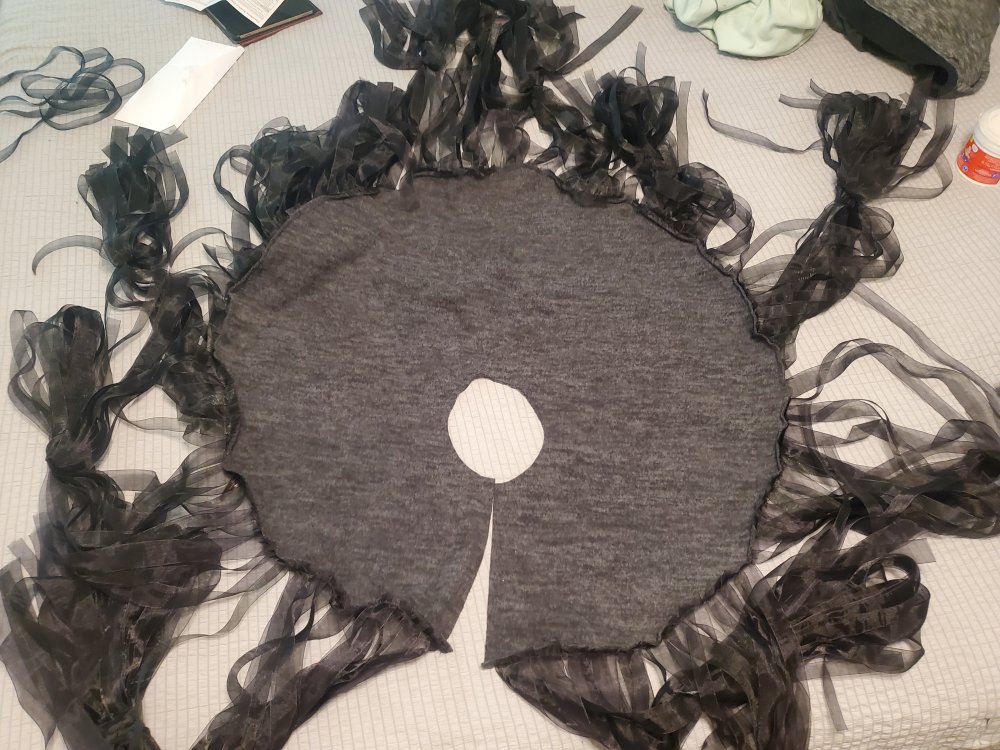
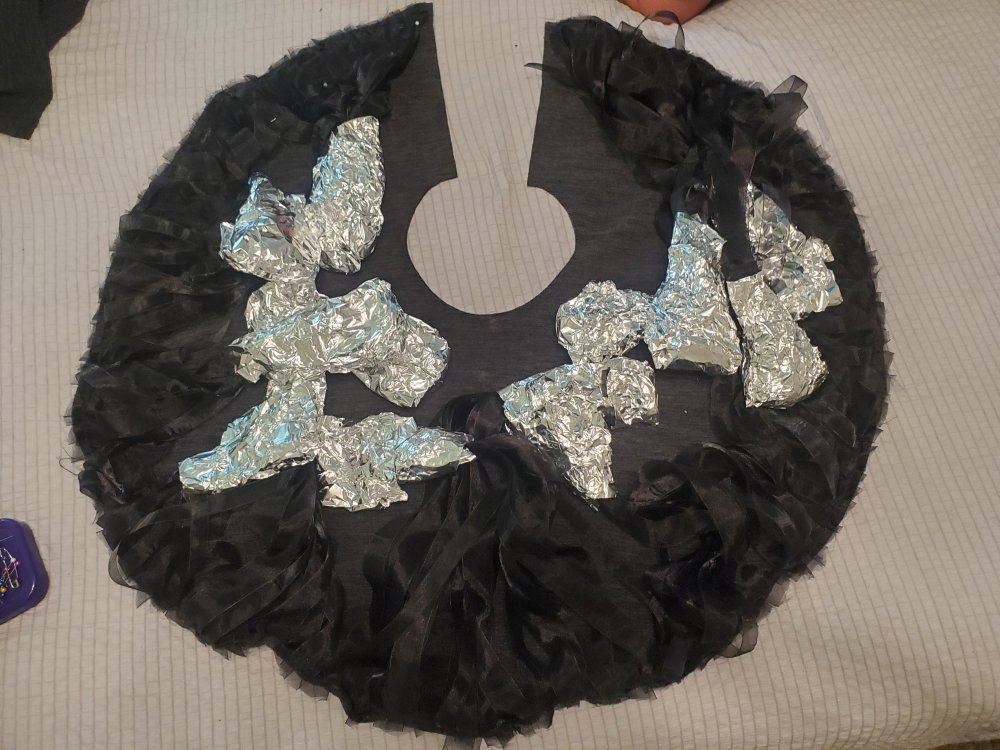
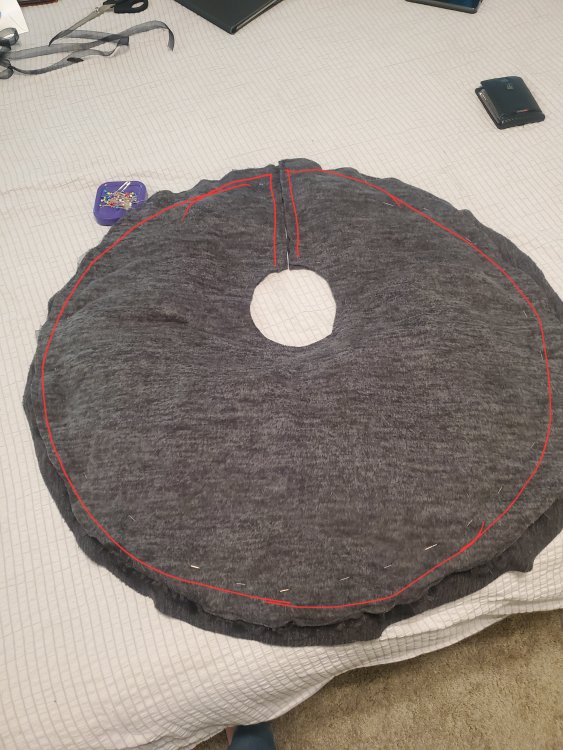
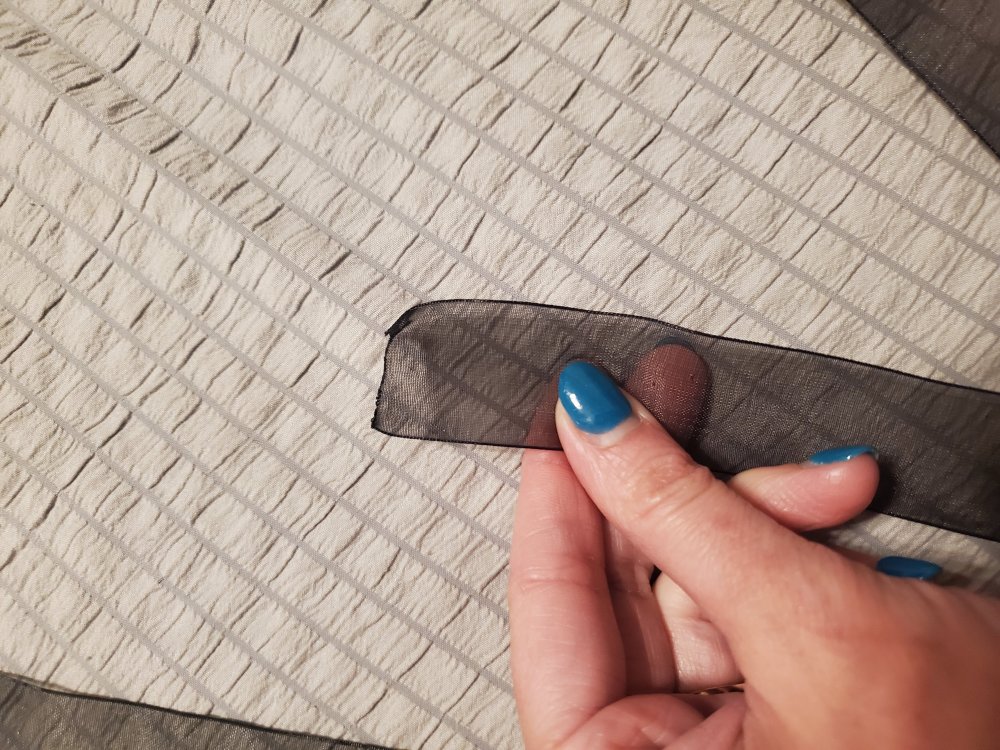
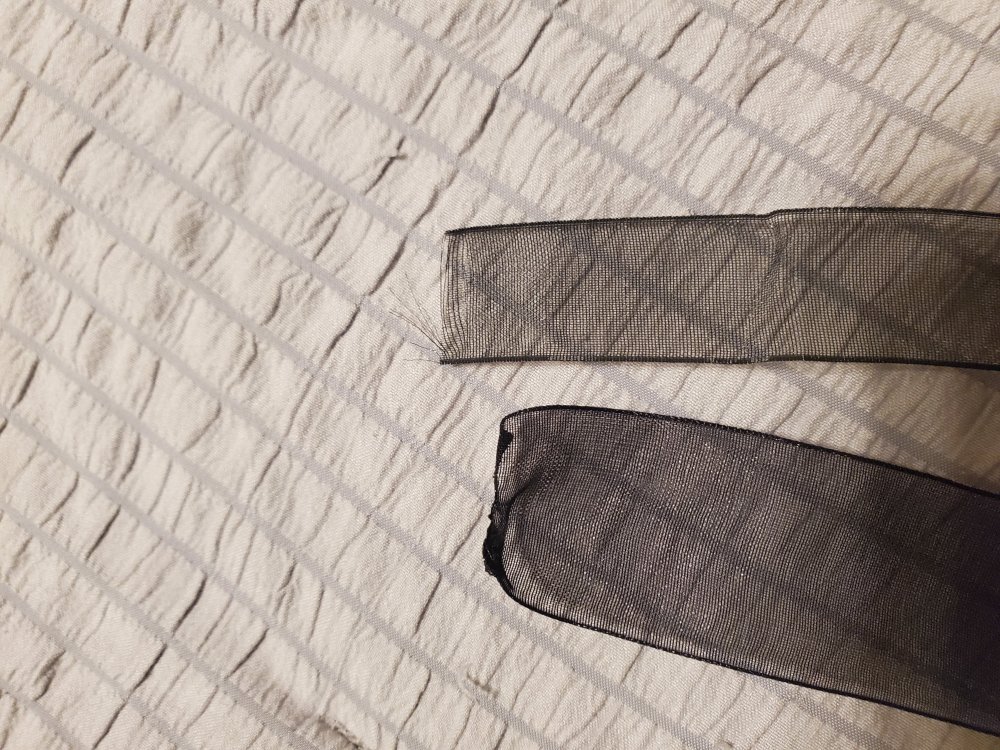
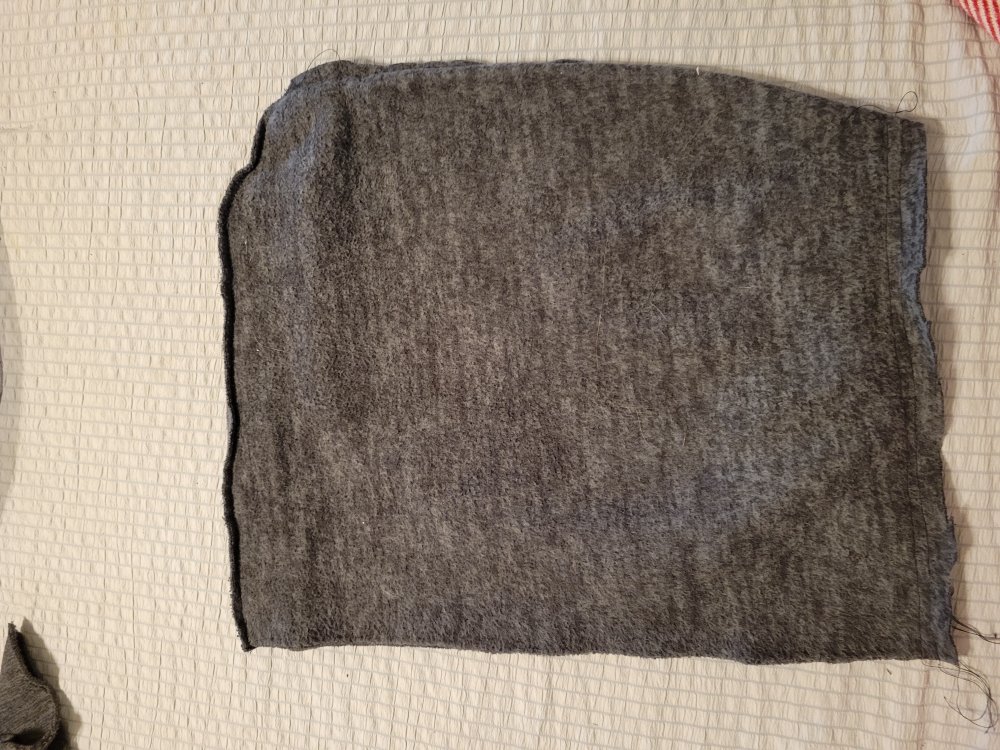
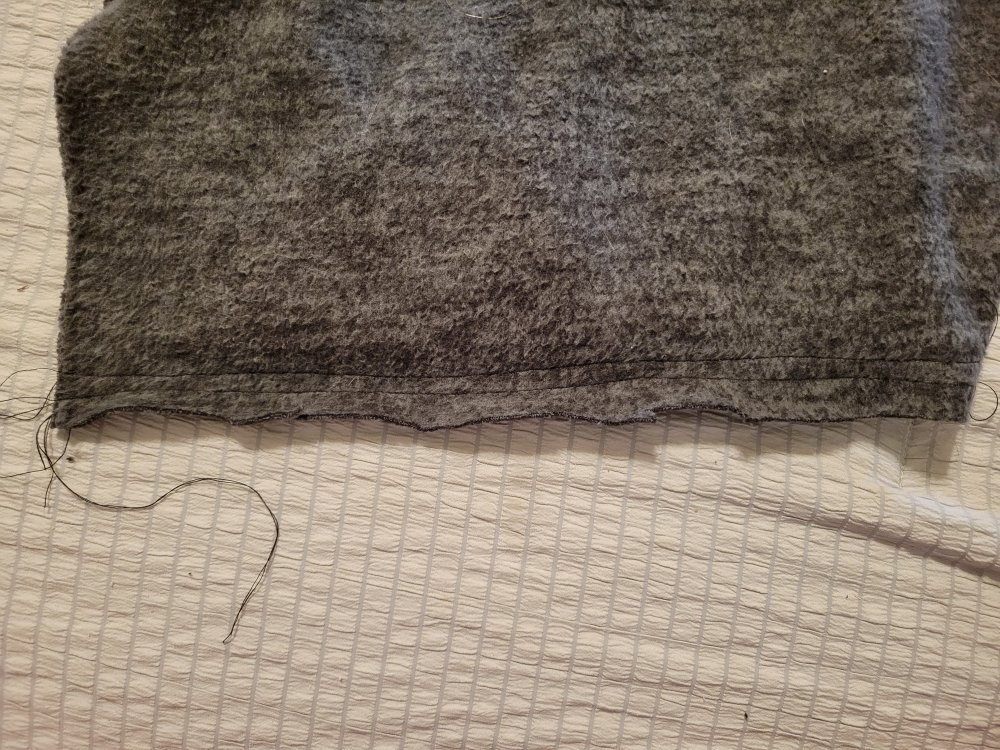
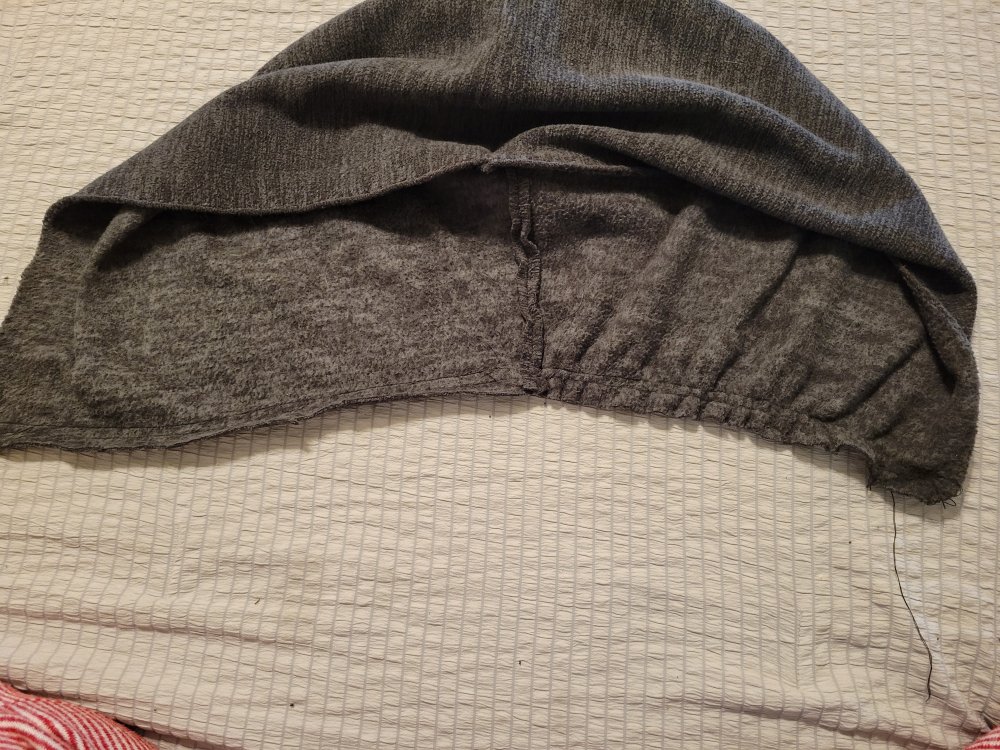
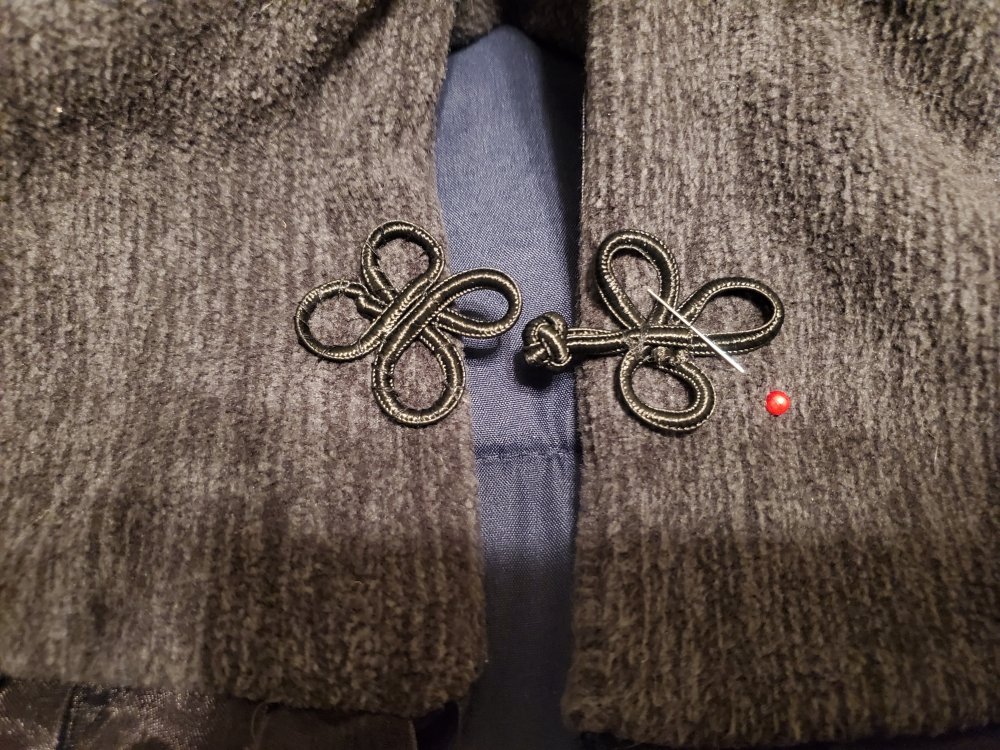
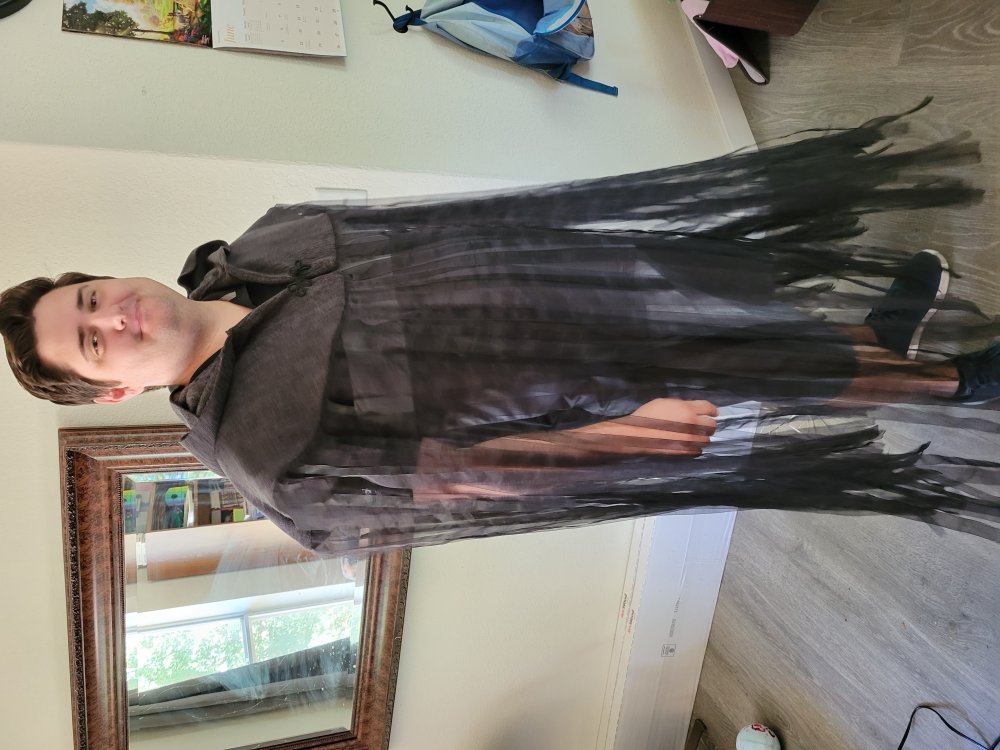
I kept looking for a good mistcloak tutorial, and I couldn't find a really good one. I found a few that helped me flesh out the idea and construction but wanted to make my own, putting everything I did together, with LOTS of pictures. Most of the tutorials I see are one layer of fleece that is cut into tassels, but I didn't want to do that. I wanted to make a caplet, and attach ribbon as the tassels. That way I didn't have to worry about anything fraying, or the tassels being different widths. My materials: Sheet to practice Fabric scissors Marking pen Pins or clips Fleece Fabric Organza ribbon (for the tassels) Frog closures I kept playing with ideas in my head for how to construct the caplet (a mini cape-like thing that just goes to the elbows or above) I knew I wanted 2 layers for the caplet and one for the hood, so I would need enough fabric for that. I wasn't sure how I wanted to cut out the fabric , so to help me decide, I took a sheet we had to mark it (to figure out the amount of fabric I'd need) and cut it in different ways to see how it would lay over my husbands shoulders. I cut out a circle with the neck hole in the middle, and it looked pretty good, but I thought about making it shorter in the front, so also cut out a high low circle pattern. Same circle, but with the neck hole cut out about 2/3 down instead of the middle. That looked better in my opinion, so we decided to go with that. I knew I wanted the caplet to be about 15 inches long in the back and 10 inches in the front, so including the neck hole (2.75 inch), that meant I needed about 30 inches in diameter. (So I could have extra fabric and seam allowance) I first folded the sheet in half, and then in half the other way, to make a quarter circle shape. I drew a line at 18 inches from the corner to make a circle and cut it out. (For the regular circle pattern, you also cut out a neck hole at the corner, 2.75 inches from the corner) For the high-low, after you cut the outer circle, you unfold and refold the circle with one half higher than the other. Fold it in half, and mark the neck hole, and cut it out. I drew out a few things on my sheet and did other practice cuts to figure out the amount of fabric I would need and ended up buying 2 and 1/3 a yard for charcoal Heather fleece. The sheet is wider than the fleece, so make sure you account for that when calculating the fabric needed. I started cutting my fabric. I washed it first to make sure it wouldn't shrink, laid it onthe floor and folded it in half longways. Since this fabric is thick, I cut out my pieces into semi circles, not quarters. I measured 30 inches along the fold, marked it, and then marked the halfway point at 15 inches. I then used my flexible measuring tape and some chalk to mark a semi circle 15 inches from the midpoint. I marked two semi circles. I then cut it out along that marking, and now I had 2 circles 30 inches in diameter. I folded them back in half, and then folded it again about 1/3 of the way down, and marked my neck hole. I measured 2.75 inches from that corner and cut it out. I did the same for the other circle, and now I had 2 circles with an off center neck hole. I then cut a slit on the shorter half to be the open side of the capelet. My ribbon I bought is 1 inch wide. So looking up the math, the circumference of a 30 inch circle is 94.24 inches. Because I will be layering my ribbon in-between the layers of fleece, I wanted to keep a few centimeters free along the short slit I made before. I think I would need 94 1 inch strips to make a full layer of ribbon. I had bought 100 yards of 1 inch ribbon, and 50 yards of 5/8 Before I started cutting them though, I measured my husband to figure out about how long the ribbon would need to be on different points of him. For example, along the front it needed to be 52 inches long, but the back only needed a out 46 inches. I also measured by where the shoulders were, and then went from there. After I cut them, I sorted them in groups. So I had some 54 inches, 53 inches, and basically down to 46 inches, and then I pinned them on in sections so I wouldn't misplace any by size. I ran out of ribbon and pins, so just get more ribbon than you think. I had to buy more of both, so that I could also have enough pins to attach the skinnier ribbon at the same time. That way I'd only need to sew down the ribbons in one go. They will get sewn again when I sew the second layer of fleece on. After I got all the ribbons pinned down, it was a huge mess of ribbons: I sewed along that edge, to attach them. Make sure the pins are far enough up that the sewing foot doesn't go over them. Most of mine were okay, but some were pushed out by the sewing foot hitting them. Once the ribbons were sewn on, I had my husband try it, and it looked amazing! They flowed perfectly and really did look like the mists. This next part was a bit trickier. I took the ribbons in small groups and knotted them together to stay out of the way. I then covered the smaller bunches with tin foil to wrap them more securely, since I needed to sew the other circle fleece right sides together. (Side note, my kids threw away my original piece, so to make another, I needed to cut out 2 halves of a circle, and then sew them together up the back. And then cut out another neck hole. I made this circle a little bit wider, since it was going to lay on top of the fleece and ribbon.) So I laid the circle piece plus ribbons as flat as I could. I pinned the front opening right side down together. Then I laid the second layer on top of the first, and pinned along the outer edge, sandwiching the ribbon bunches inside, and I pinned the neck hole together to make sure it was all in the right place. It ended up being like a big pocket of sorts. I sewed all the pinned sides, but NOT the neck hole. (so where the red line is. That was hole the ribbons would come through when I turned it all right side out. Then I had my husband try it on again, and had him stand on a chair to trim the ribbon to be right around his feet. Some of the ribbons ended up being too short for what I was going for, but I'm not too upset about it. The way to fix that is to make the ribbon all the longest length and cut them all at the end. I was just trying to not waste too much ribbon. So I trimmed them to be about foot length on my husband. And then we took a lighter and burned down each ribbon edge, to keep them from fraying. So now I have am almost completed cloak. I need a hood next. I copied the shape of a sweatshirt my husband had, and cut it out. I had the top part be on fold, so that I only needed to do the seam up the back. Since my hood was basically a squarish shape, I needed to gather the bottom to fit the cloak. I made 2 straight stitches next to each other along the bottom. Then holding just the top stitches, I tugged the hood toward the middle seam. I made both sides be 10 inches. I then pinned the hood seam, along the middle seam of ONE layer of cloak. Then I pinned the edge to the edge, and then sewed them together. But now I needed to sew the second layer down. I didn't want to fold it over, because then I would have too many layers of fleece to be sewn, so I just laid the cloak layer on top of the hood Seam, and tip stitched down pretty close to the edge. Since it's on the inside, it isn't too noticeable, and since its fleece, it won't fray. The last thing I need to do, is hand sew a closure to the cloak so it doesn't fall off when moving around. I picked a medium sized frog closure and hand stitched it on about 3 inches up of the front opening. And this is the finished Mistcloak! It took longer than I thought, and that was because of the ribbons. It took a lot of time to cut them out, and then to pin them on. I was hunched over so it was hurting my back, but I'm so proud of how it turned out!


-
I just wanted to ask if this is the place I could post a tutorial for a mistcloak. I made one and wrote down everything with plans to put it online. It would be a pretty long post!
-
Journey Before Destination - Panorama Art (WoR spoil!)
Wendy McGee replied to Sasha's topic in Sanderson Fan Works
This looks absolutely amazing!! -

-
For me, I've read enough fantasy and other books, that when someone "dies" too quick, without a lot of buildup, I think that it's a trick. The same kind of thing happened in Mistborn.
-
I just wanted to toot my own horn and say that during the scene when Shallan and Jasnah were on the boat, and Shallan sees Jasnah get stabbed, I had a feeling that Jasnah was not actually dead. My husband read the books before me, and tried to tell me that she really was dead, but I just didn't believe it. Wanted more people to know that I was right! When she came back in later on, I cheered for being right.
-
It's a fun book to theorize about!
-
My husband first got into the books by reading the novella in between stormlight 3 or 4 (or is it 2 and 3?) Anyway he was soo confused, but thought since it was short, it wouldn't be such a big commitment. He has since read them about 3 times each and got me reading them as well. I haven't gotten them all, but I loved all the ones I have read!
-
I've never been part of an online forum community, but I've been wanting to create a Tutorial for a mistcloak. I figured this would be the best place to put something like that since I also don't have a blog or anything!
-
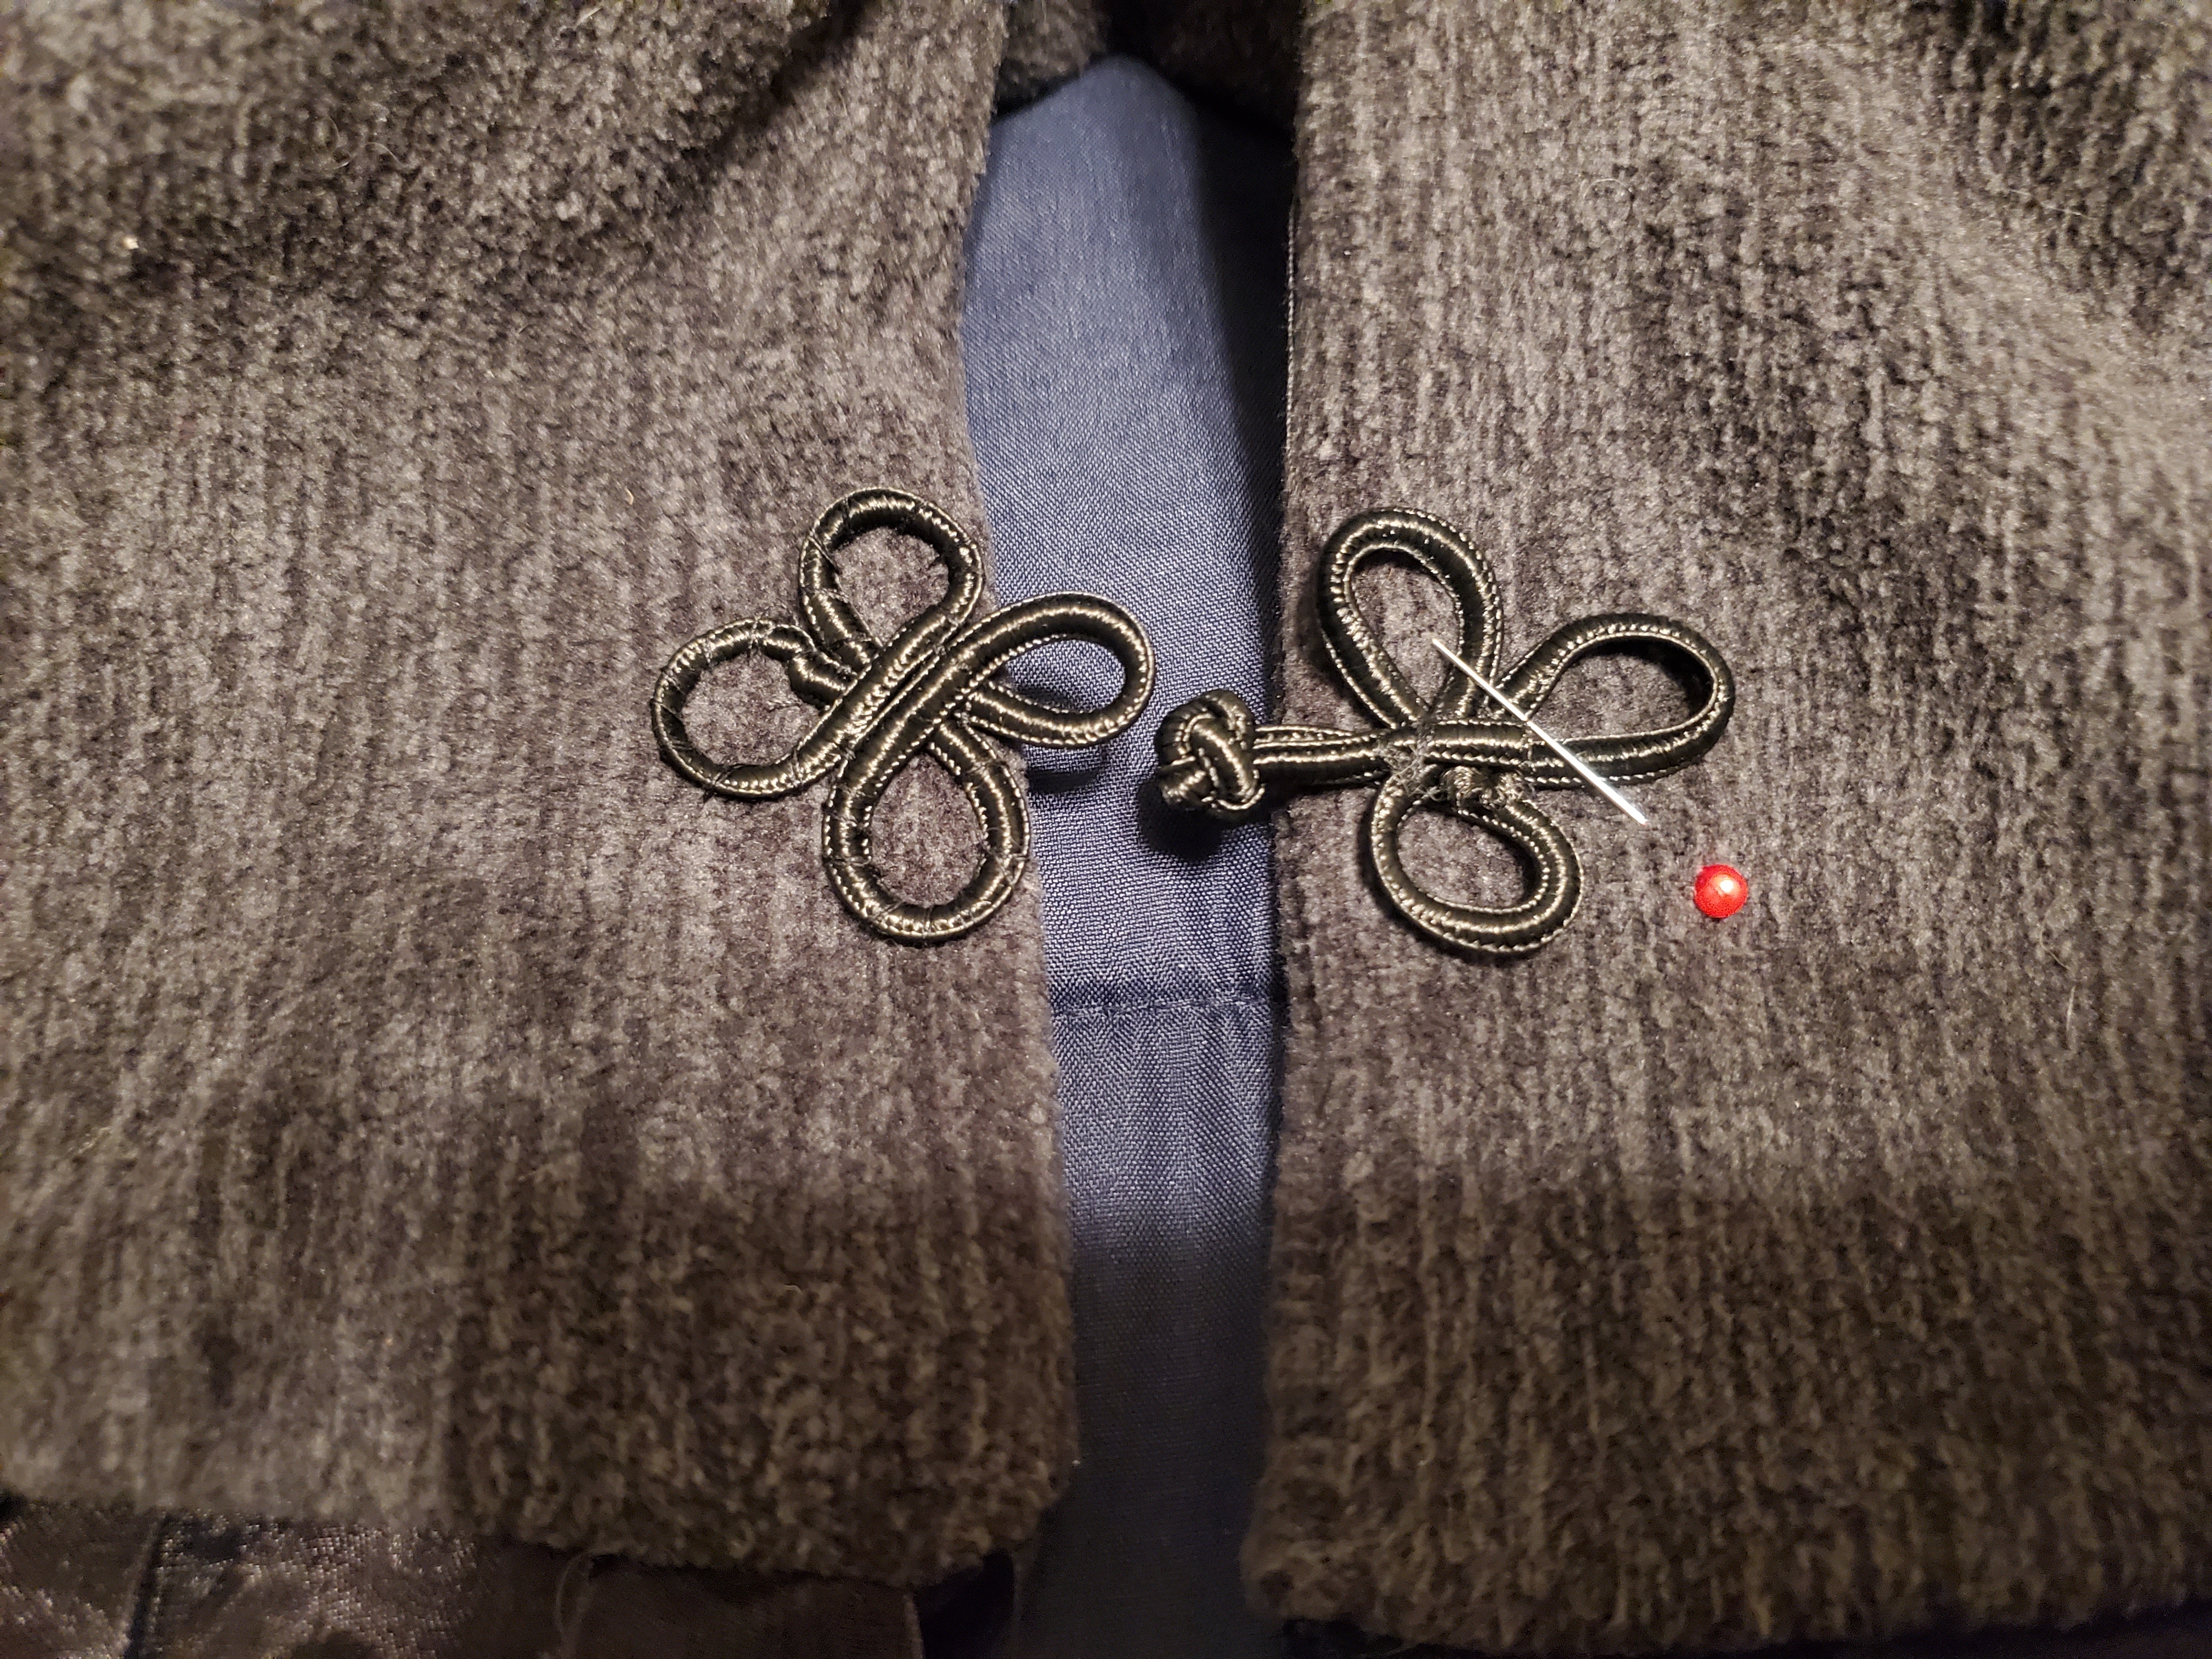
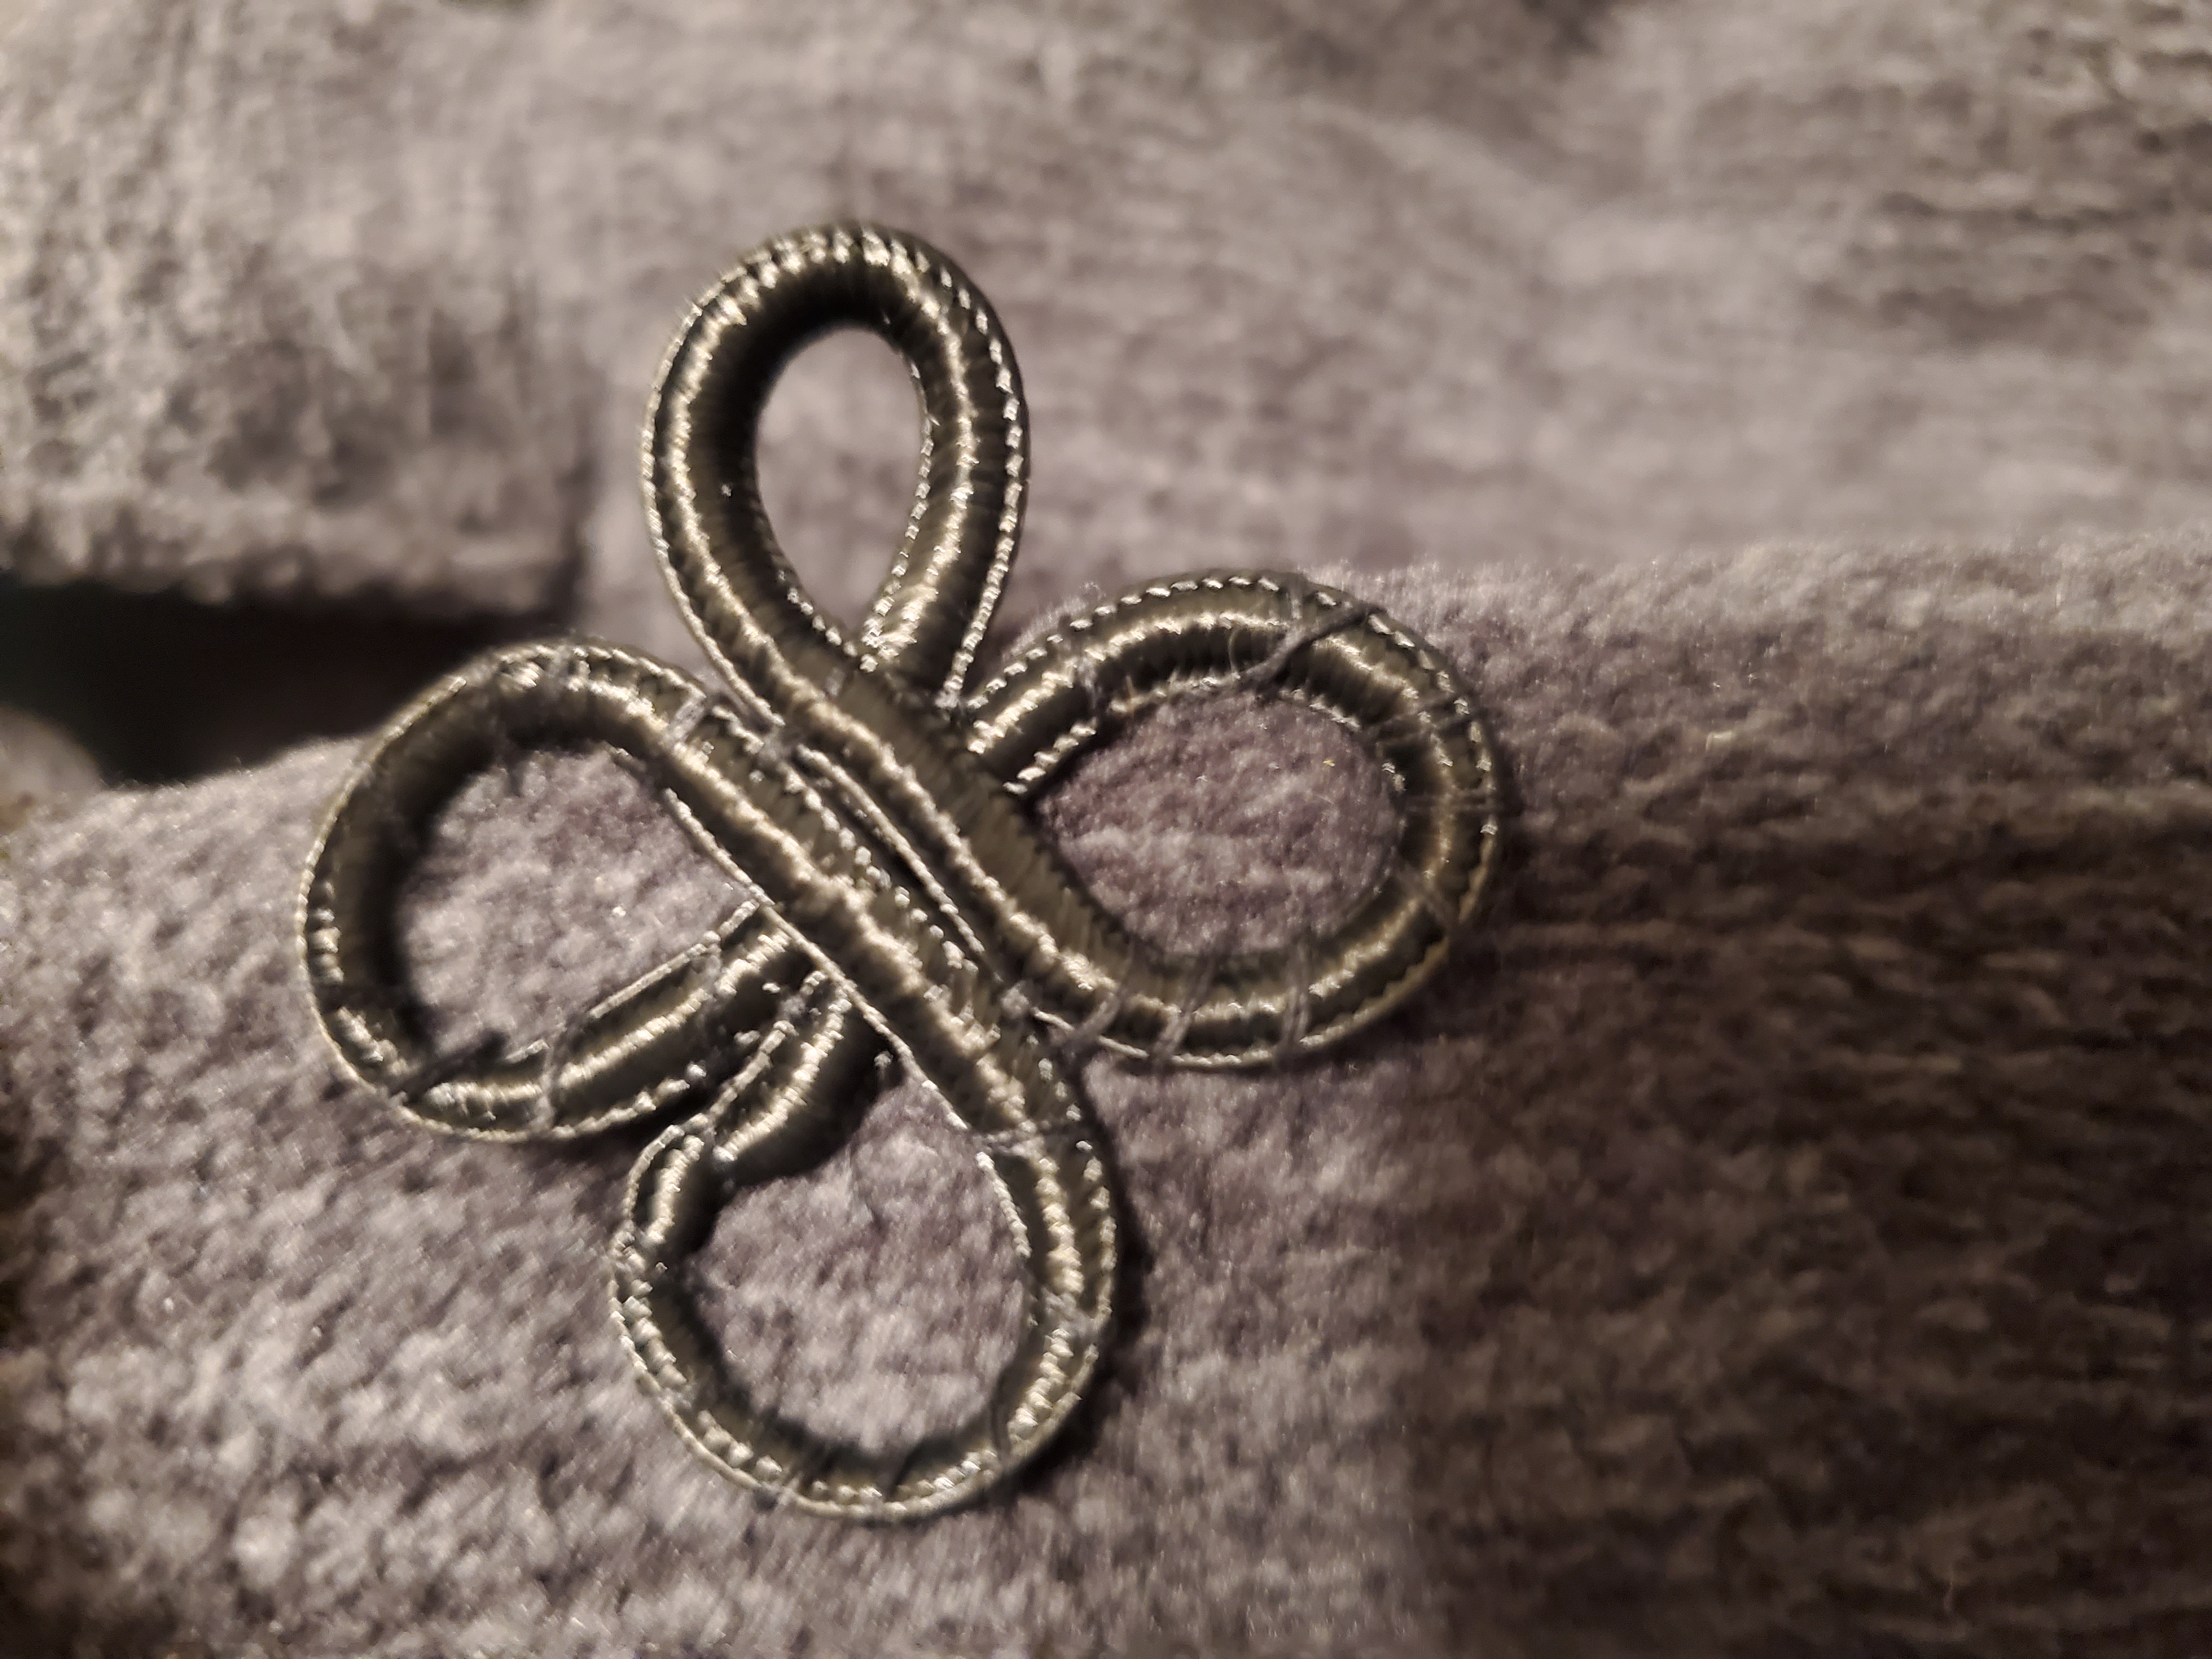
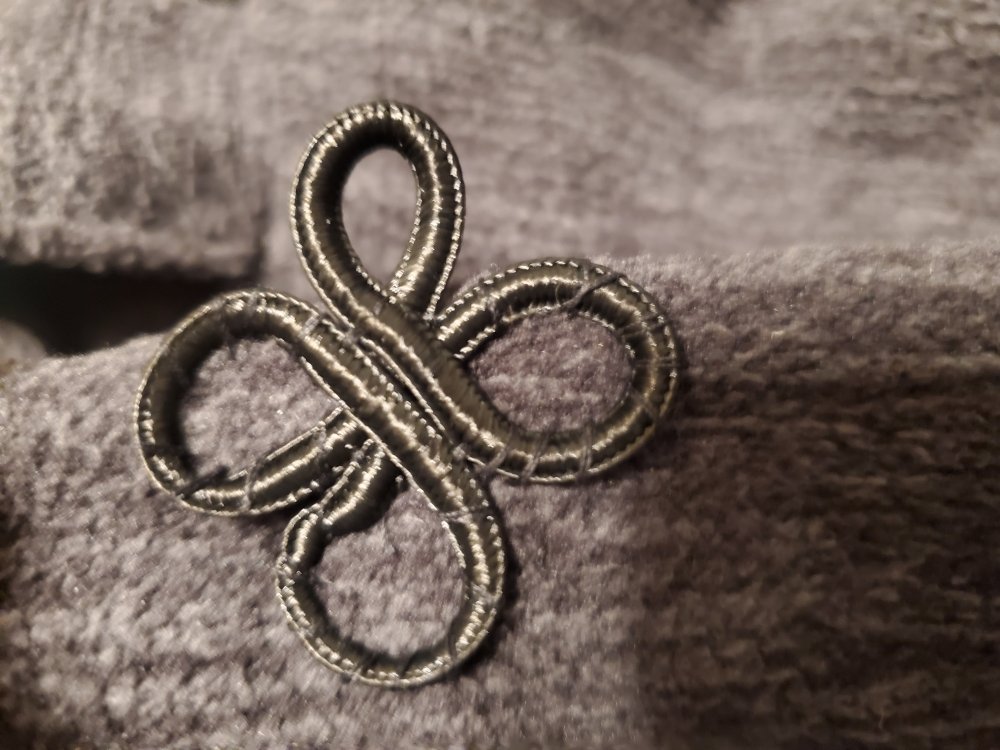
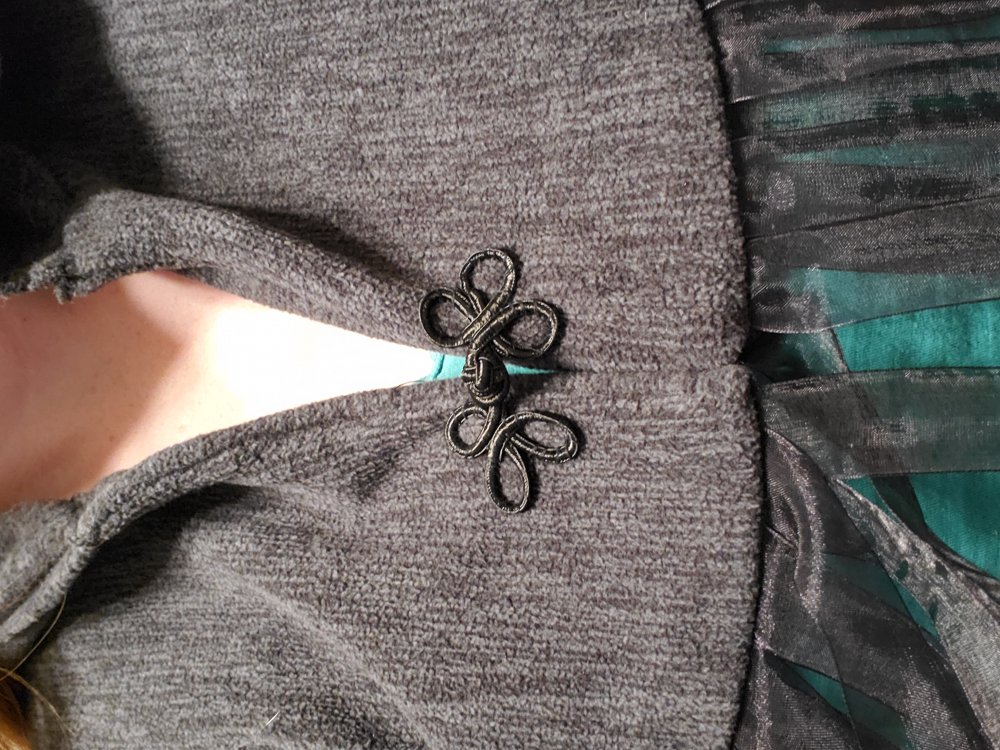
I'm making a mistcloak and my husband asked if I could get the allomantic symbols embroidered onto it. I'm looking for an already digitized set for an embroidery machine. Does anyone know where could find something like that?